In today’s tech trendy market, integrating QR code menus and ordering systems has become an essential part of the modern dining experience.
As businesses seek to provide seamless and contactless services, Odoo 17 provides a great solution for integrating a QR code-based menu and ordering system into its Point of Sale (PoS) module.
This blog delves into the complex process of implementing this system, providing details of its configuration and practical implementation.
The QR code menu system in Odoo 17 is intended to improve the customer experience by allowing them to access digital menus from their smartphones.
This strategy not only reduces the need for tangible menus, but also improves ordering efficiency, especially in a post-pandemic society when limiting contact is critical. The method begins by ensuring that the POS module is properly installed and configured in the Odoo 17 module.
The module is simple to install and can be accessed via the Apps module on the Odoo dashboard. Before starting with the QR code menu settings, ensure that you have a fully functional POS setup.
Advantages of Using Odoo POS with a QR Code Menu
1. Enhanced Customer Experience:
Convenience: Customers can browse, order, and pay using smart phones, providing a smooth and personalized experience.
Autonomy: Customers can order at their own convenience, which is particularly useful for large groups or individuals with dietary requirements.
2. Increased Operational Efficiency:
Reduced Wait Times: Faster ordering and payment processes result in faster table turnover, allowing restaurants to serve more customers efficiently.
Improved Table Turnover: Restaurants can accommodate more customers by reducing the amount of time they spend waiting for service, which increases overall income.
3. Cost Reduction:
Lower Labor Costs: Customers can order and pay for themselves, reducing the need for large servers.
Elimination of Physical Menus: Reduces printing costs and allows for simple menu revisions without incurring additional fees.
4. Higher Customer Satisfaction:
Personalization: Customers love the ability to modify items without feeling pressured, which leads to increased satisfaction.
Modern Dining Experience: The adoption of digital menus meets the expectations of today’s tech-savvy customers, improving their overall experience.
5. Sustainability and Flexibility:
Environmentally Friendly: The decrease of physical menus helps to make the business more sustainable.
Easy Menu Updates: Digital menus can be updated instantly ensuring that options remain current without the need for reprinting.
How to Configure Odoo POS QR Code Menu
Configuring the QR Code Mode in Odoo’s Point of Sale (POS) system simplifies the ordering process by allowing clients to pace purchases straight from their mobile devices.
Follow these precise instructions to set up the QR Code Menu option in your POS system, which will improve your client’s overall dining experience.
Step 1: Access POS Configuration
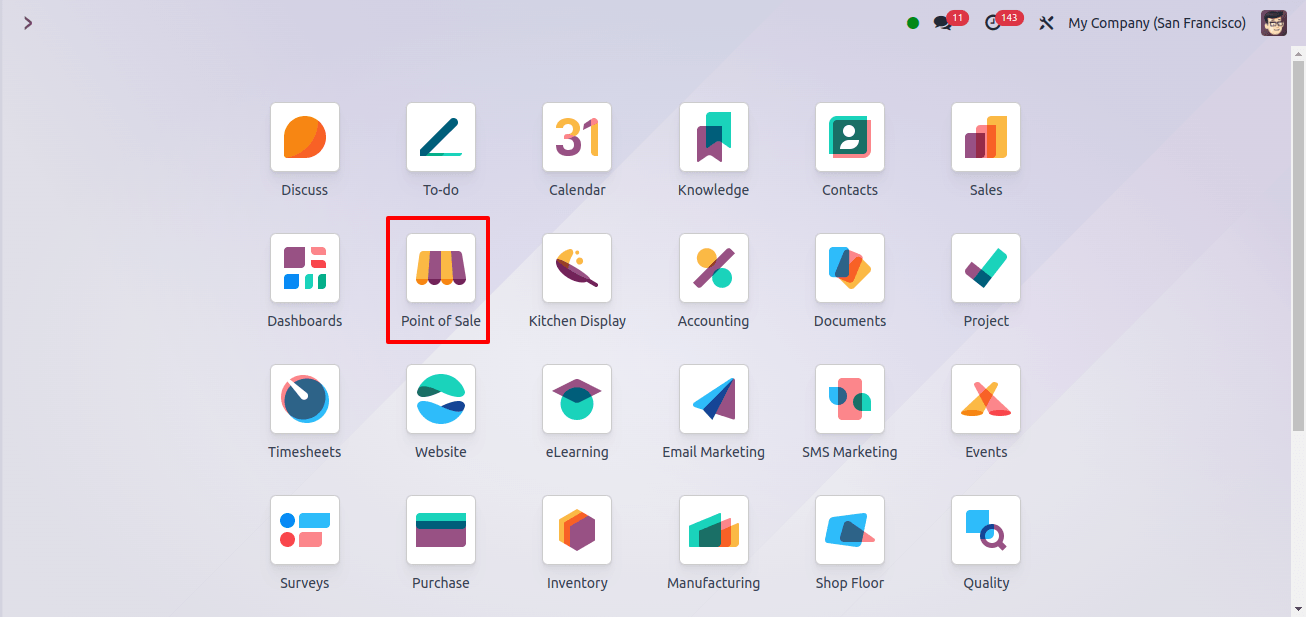
To begin, connect into your Odoo account and go to the Point Of Sale module on your dashboard. This module is where all POS configurations are managed.

Step 2: Enable QR Code Menu
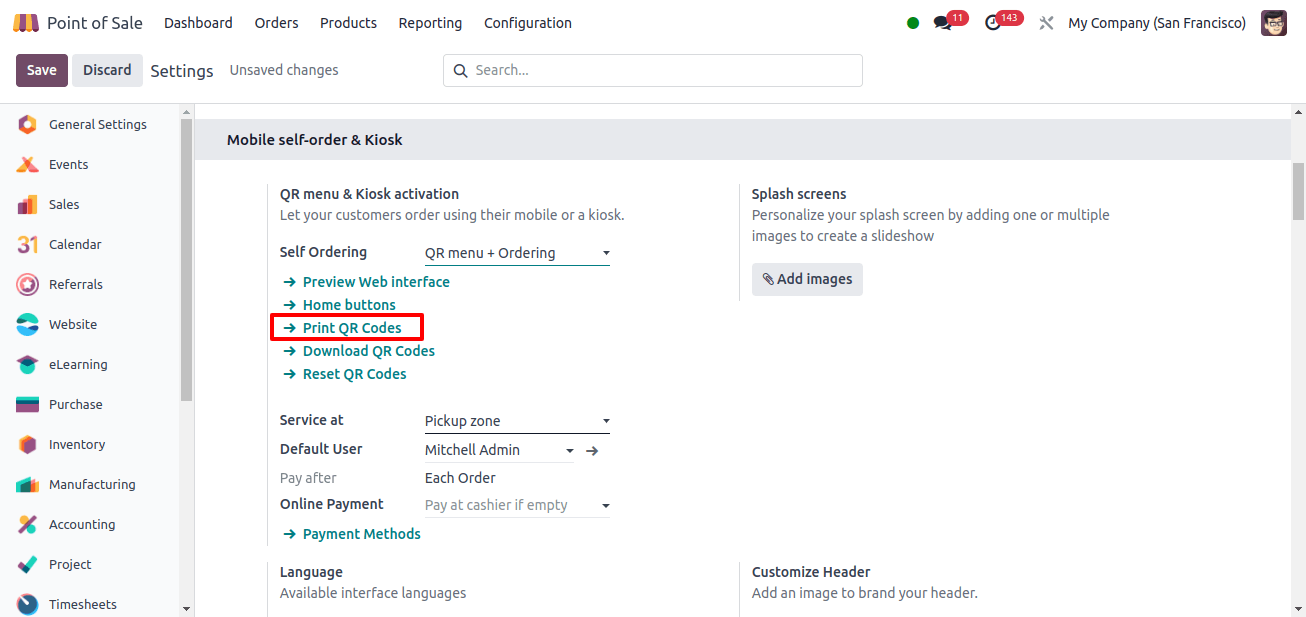
With your POS system selected, go to the settings field of the POS configuration. You will find multiple options that influence how your POS runs. Scroll down to find the Mobile Self Order & Kiosk Section.
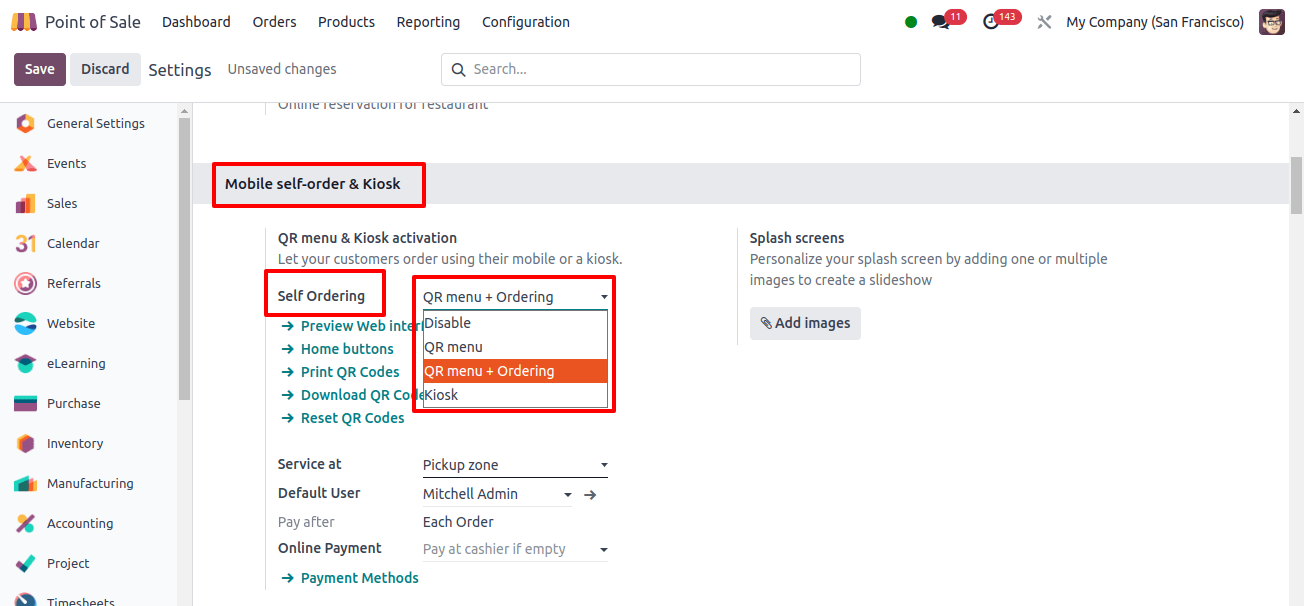
To use the Self Ordering system, simply pick the QR Menu + Ordering option. Enabling this option lays the groundwork for allowing clients to access your menu via a QR code, making it an important step in the configuration process.
In the supplied part, you can describe the Online Payment option, which allows the customers to pay using accessible payment ways wherever it is convenient.
In addition, you can specify the interface language in the Language field. In the Eat In/Take Out area, you can change the tax rate depending on whether the consumer dines in or orders takeout.
To personalize the menu’s splash screen, select the add images option in the splash screen box and build a slideshow. The Customize heading box allows you to change the heading of the QR menu. This box allows you to upload a picture to brand your header.
Step 3: Print the QR Code
Once the QR Code Menu function is activated, a new option labeled ‘Print QR Code’ will appear on the screen. Click this button to create QR codes for your digital menu.
These QR codes can then be printed and strategically placed throughout your restaurant, including on each table.
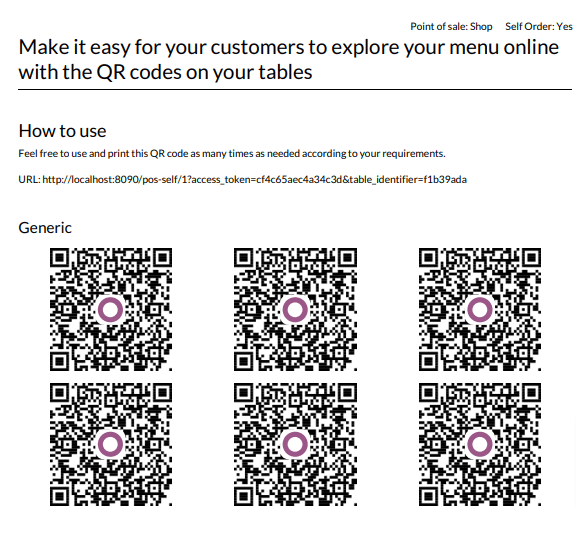
When clients arrive at their table, they can scan the QR code with their mobile devices. This will instantly send them a digital version of your restaurant’s menu.
The interface allows them to browse available options, create their meals based on their preferences, and place orders directly from their smartphones. This not only speeds up the ordering process, but also reduces employees workload, allowing them to focus on other aspects of service.
Step 4: Allow Customers to Pay After Ordering
To provide consumers more flexibility in how they pay for their orders, make sure the Pay After Ordering option is activated in the POS Configuration settings. Customers can select whether to pay instantly via mobile payment or later at the cashier’s counter.
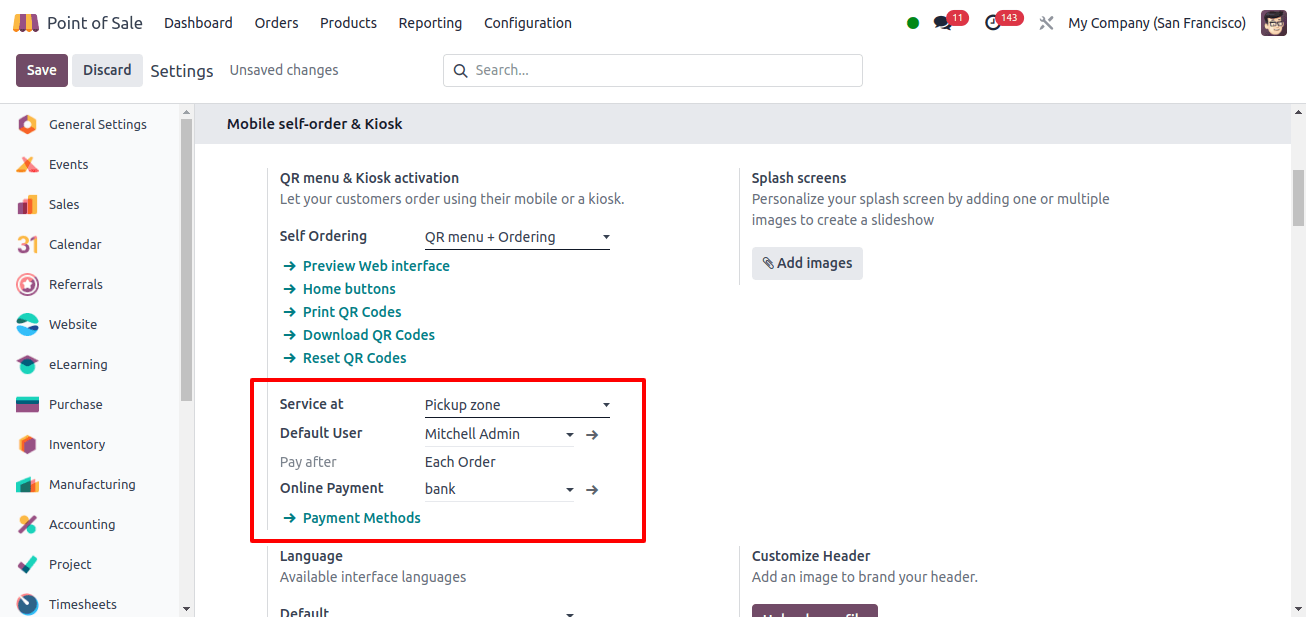
Offering several payment options appeals to a wide range of consumer preferences and can boost the overall dining experience. Configuring this feature is optional, but it can easily improve customer convenience, particularly in today’s digital market, when contactless payments are becoming increasingly popular.
Step 5: The visibility of the self-ordering feature on the POS dashboard
After you enable the self-ordering feature, it will display on your POS dashboard, allowing you to track and control orders in real time. This access allows you and your staff to efficiently track incoming orders, ensuring that operations run smoothly even during peak hours.

The feature’s interaction with the POS dashboard means that it is fully integrated into your existing workflow, requiring only minor changes to your current process.
Step 6: Customize the Mobile View (Optional)
The mobile view that visitors see after scanning the QR code can be adjusted to match your restaurant’s brand. You can alter the background image within the POS module to ensure that the digital interface is consistent with your restaurant’s aesthetic.
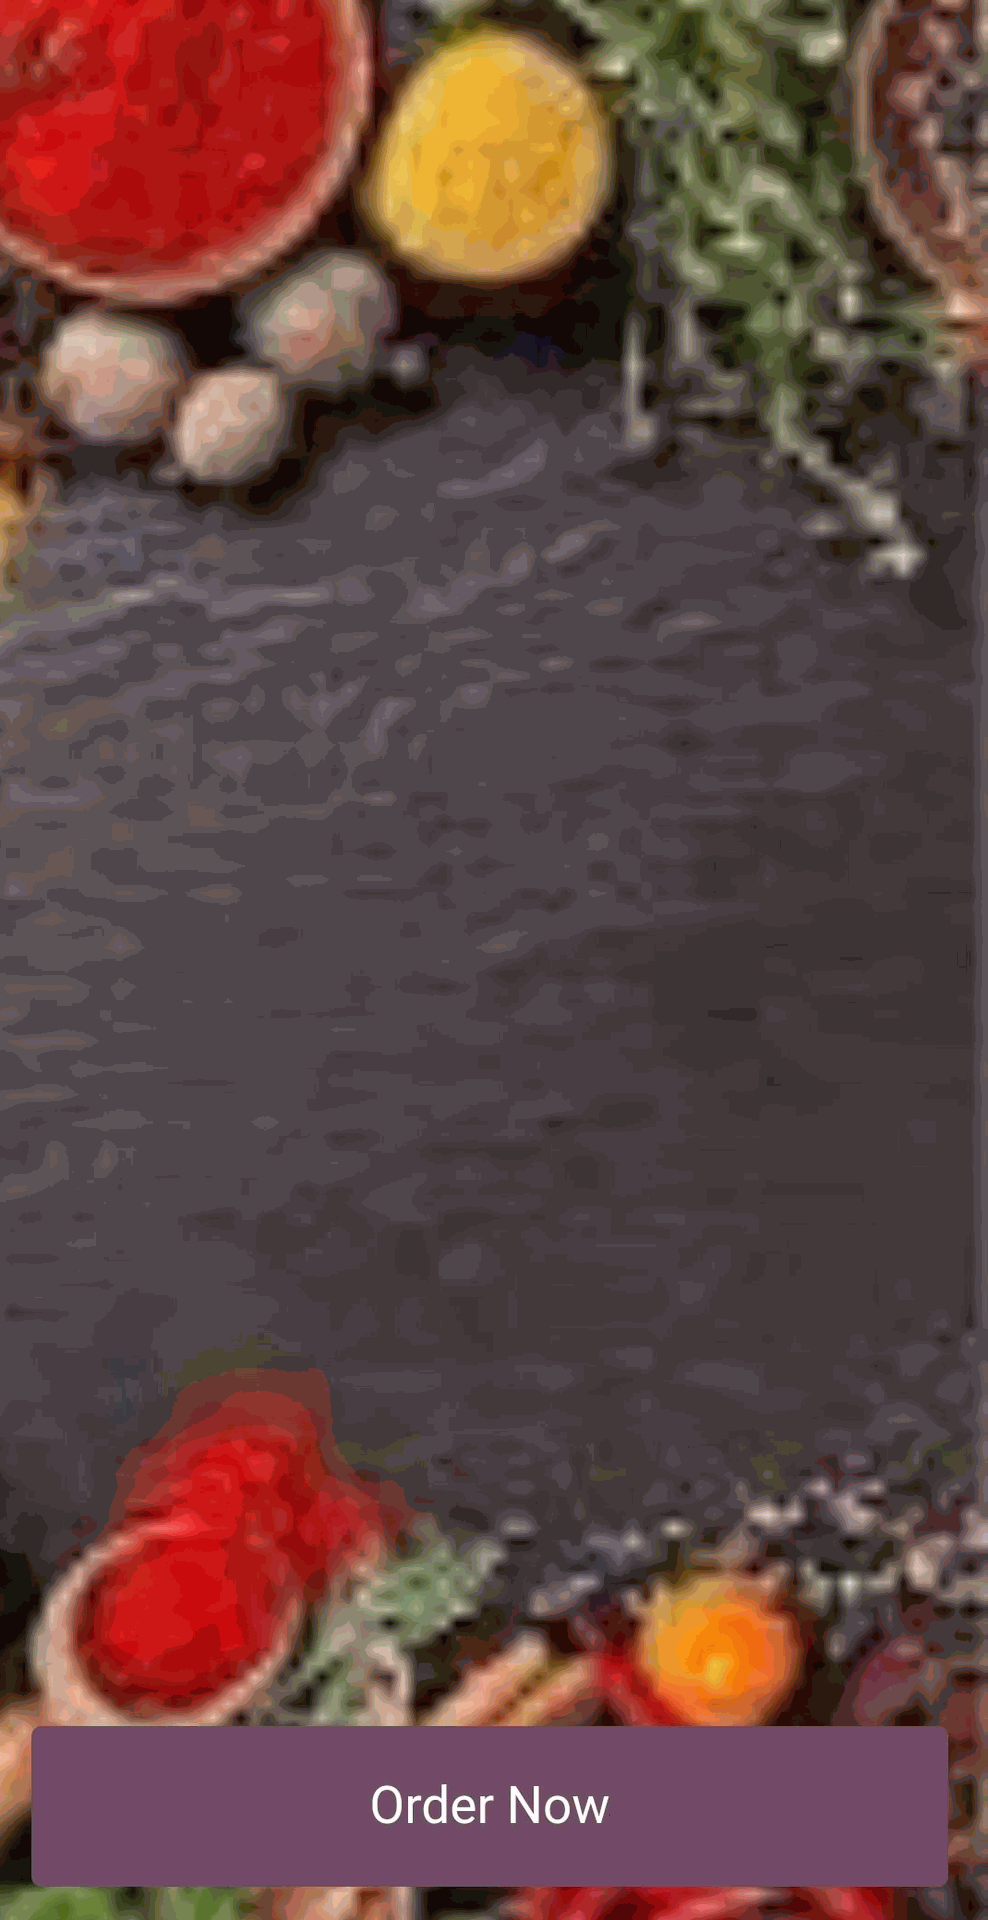
Customers will notice a ‘Order Now’ button on the mobile webpage, which they may tap to see what dishes are available. This customization option enables you to provide a more consistent and branded customer experience.
Step 7: Placing Orders via Mobile
Customers can analyze the items on the menu using their mobile devices, which are generally sorted by category for ease of browsing. They can add things to their basket, adjust quantities, and even leave special instructions or comments for the chef.
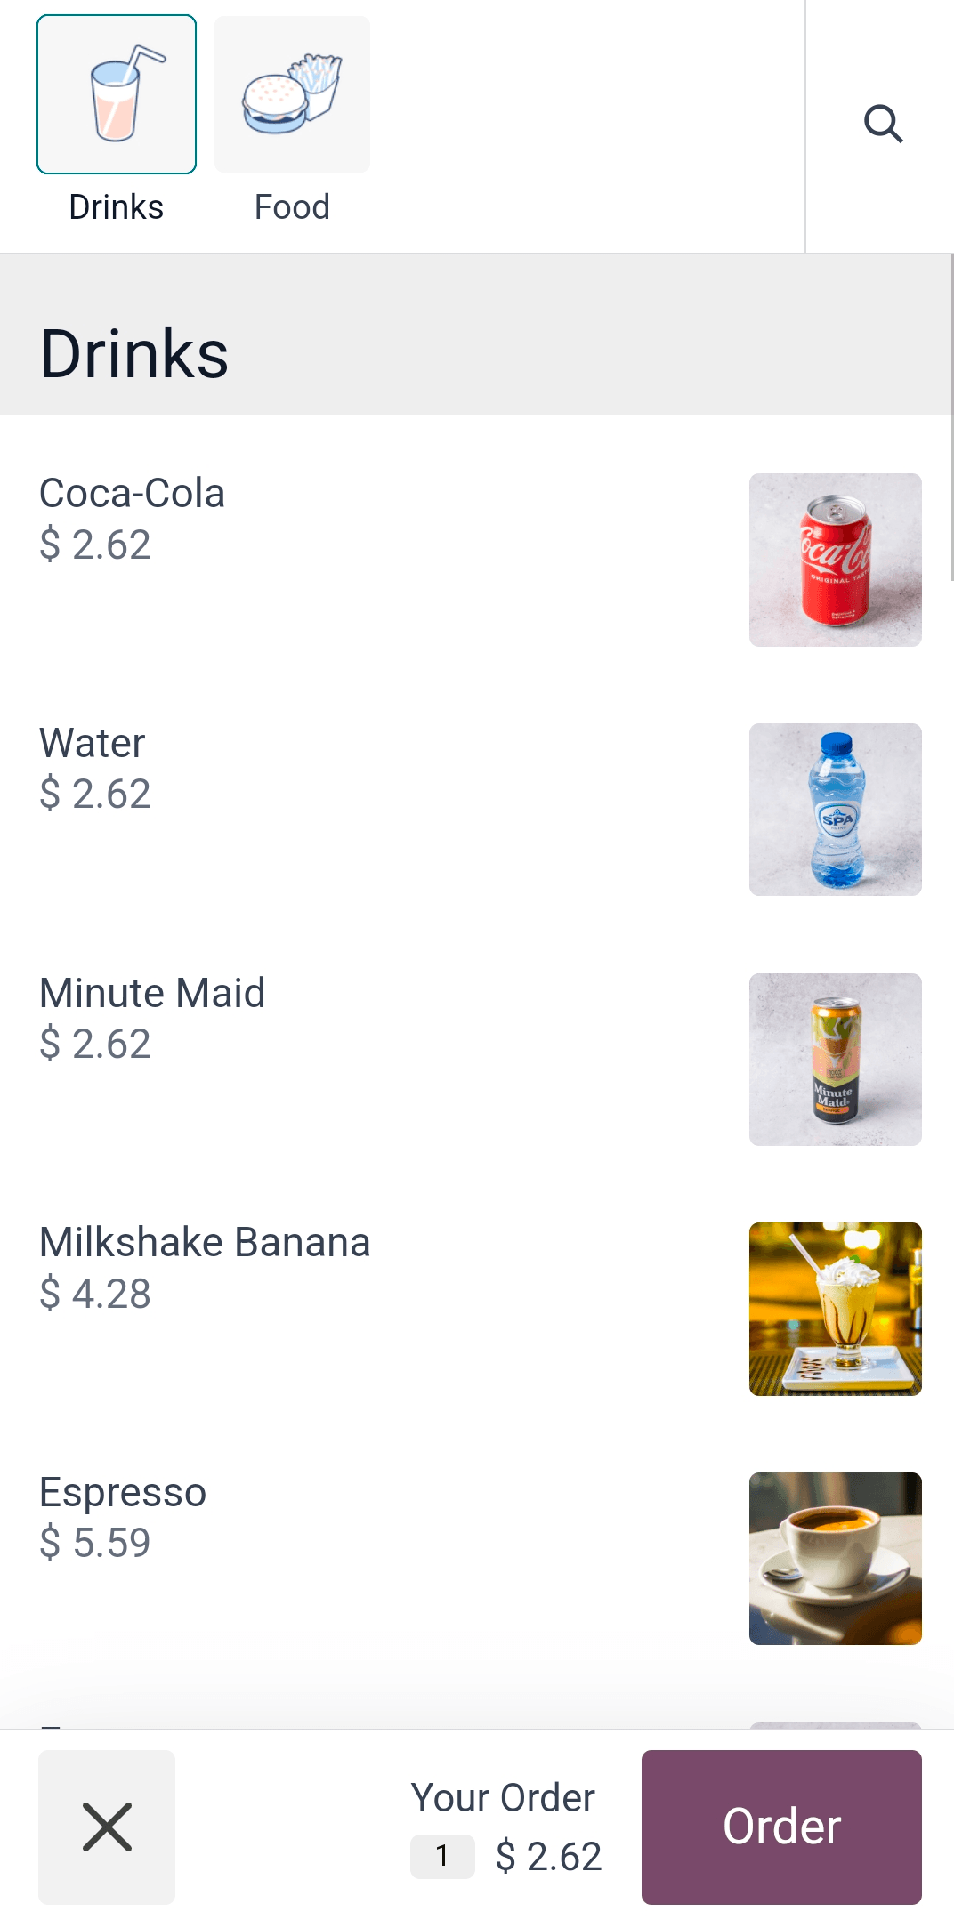
Customers can verify carts before confirming their order to ensure that everything is correct. This detailed engagement with the menu allows clients more control over their order, resulting in a more personalized dining experience.
Step 8: Finalizing the Order
As clients complete their order, they will be prompted to confirm their floor and table number, ensuring that the item is delivered to the exact location within the restaurant.
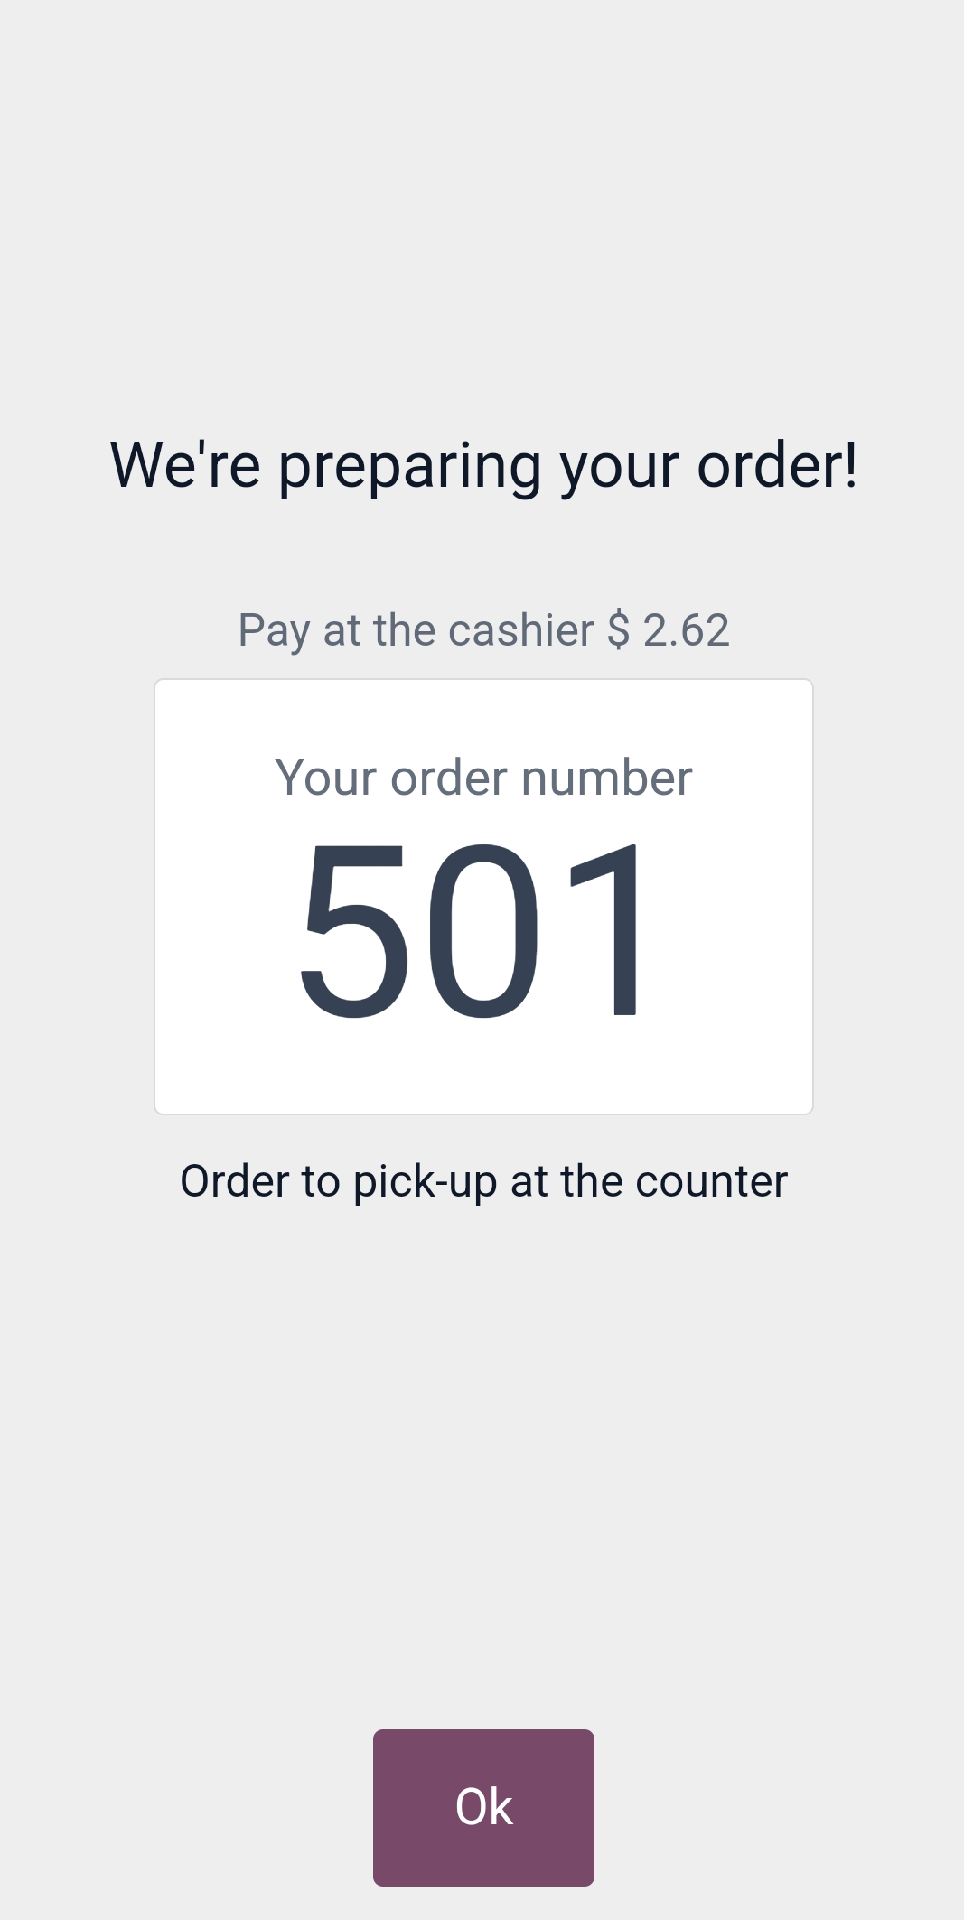
This step is important for ensuring proper order delivery. Once the order is placed, clients can follow it in the mobile interface under ‘My Orders’, giving them peace of mind that it is being processed.
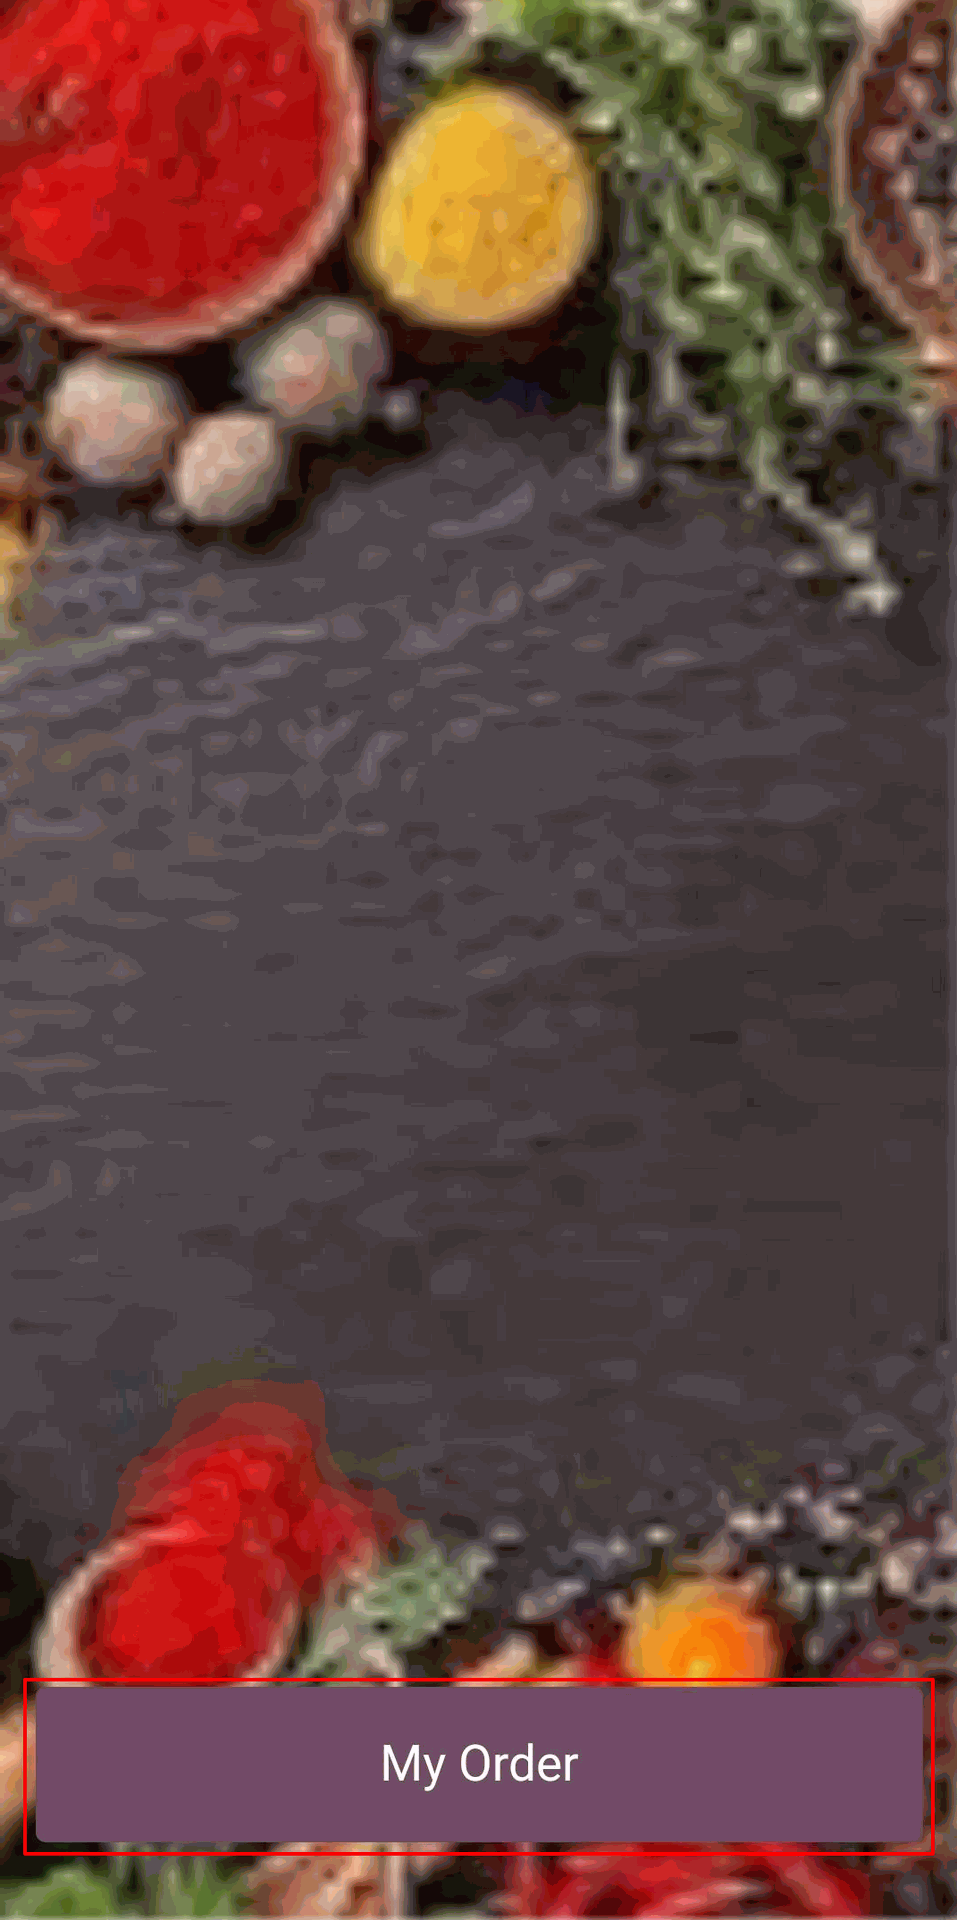
This transparency in the process improves the client experience by keeping them informed throughout their dining experiences.
Step 9: Payment
Finally, if the mobile payment option is enabled, users can pay immediately from their smart devices.
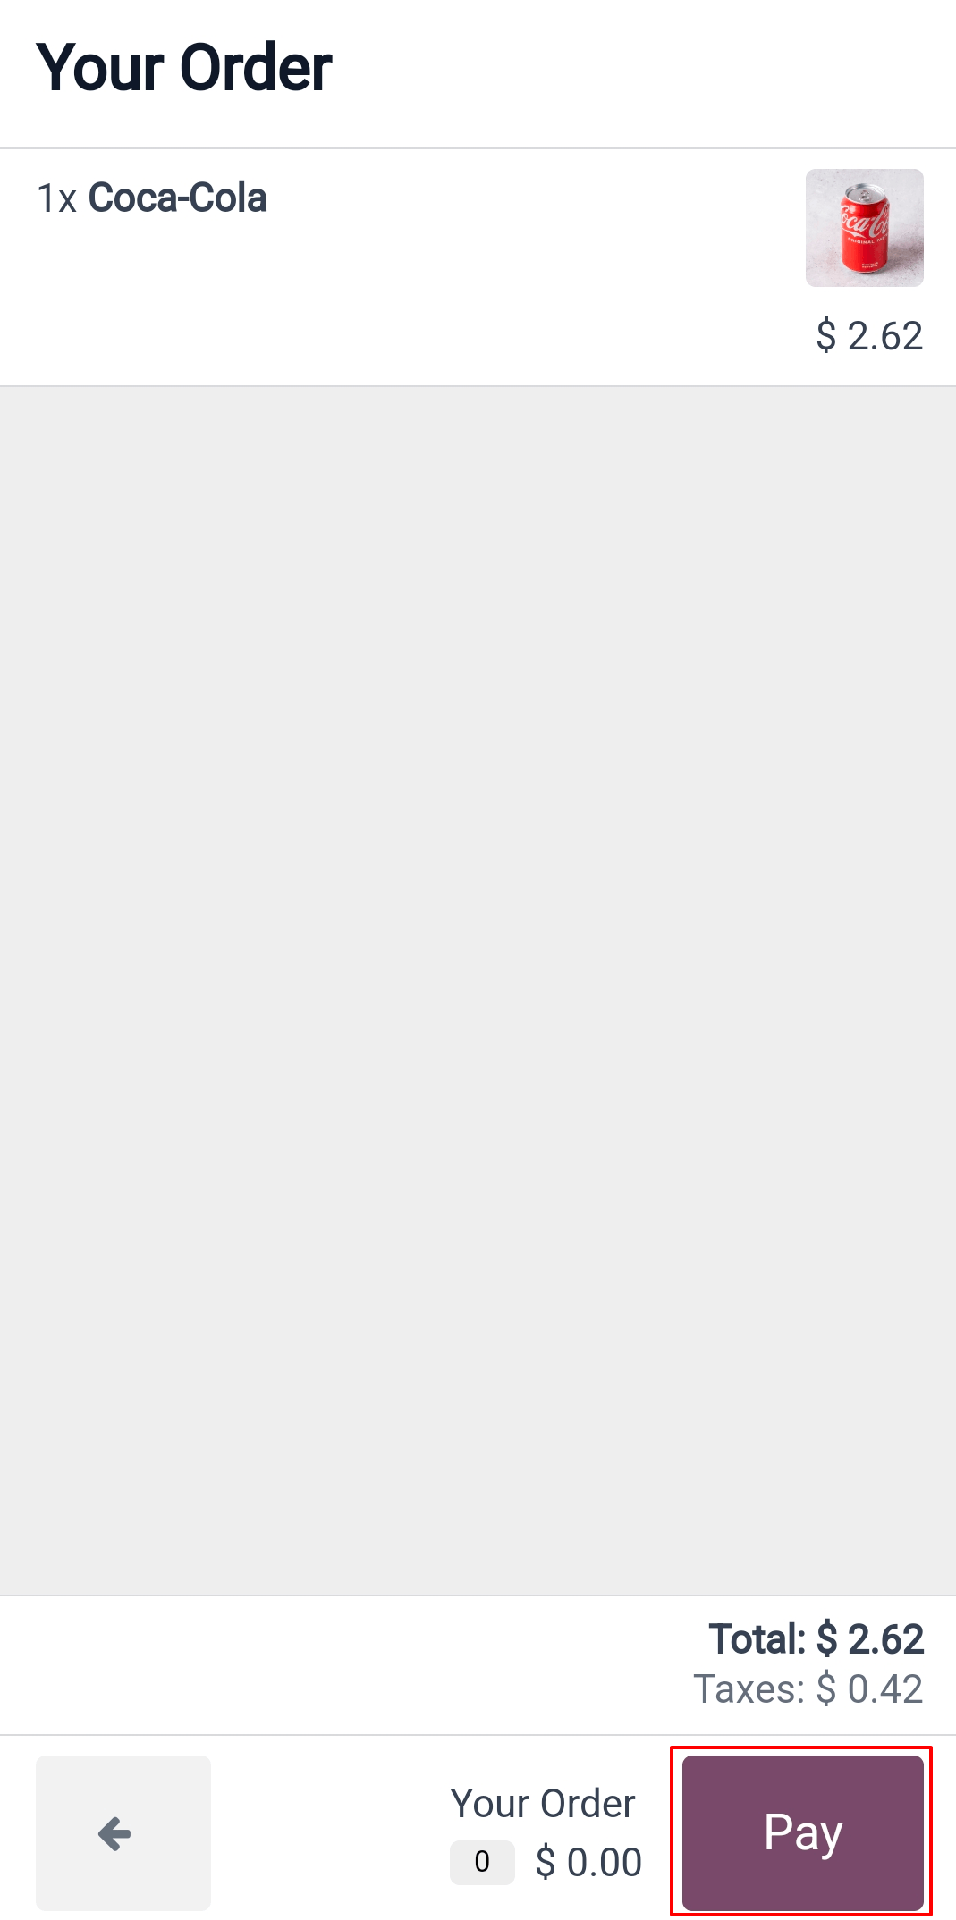
Alternatively, customers can pay at the cashier’s counter once their meal is over. Providing several payment options allows clients to select the method that best meets their needs, hence increasing convenience and satisfaction.
By following these precise instructions, you can successfully install the QR Code Menu in Odoo POS, providing your clients with a modern, efficient, and effortless dining experience.
Configuring a QR code menu and ordering system in Odoo 17 POS is a game changer for businesses wishing to update their operations and boost customer satisfaction.
Following the detailed setup process explained above, companies may effectively accomplish Odoo 17’s features to create a smooth, efficient, and customer-friendly ordering system that matches today’s market demands.
