Odoo is an effective tool for managing POS transactions in the retail and hospitality industries. Better tracking, organization, professionalism, customer happiness, and financial insights are all made possible by digital invoicing.
They allow for transparent transaction record-keeping: unified customer information management, and the development of trust. Analyzing invoicing data provides useful information about revenue streams, customer behavior, and business success.
The solution has a user-centric approach, allowing businesses to simply pick customers and build new profiles during transactions. With just a few clicks from the POS interface, users can create invoices and print them right away, making the invoicing process highly efficient.
In today’s retail environment, efficient invoicing is important to ensure smooth transactions and customer satisfaction.
Using Odoo POS, businesses can speed up their invoicing process while ensuring correctness and professionalism in each transaction. Let’s look at how to manage invoices using Odoo POS.
Steps to manage invoices using Odoo 17 PoS
Issuing Invoices
One of Odoo POS’s important capabilities is the ability to generate and print invoices for registered clients after payment. These invoices serve as formal transaction records and are smoothly included in the related accounting journals, allowing for a comprehensive view of financial activity.
To configure the default journals used for orders and invoices, go to the Odoo POS settings window and select the Accounting tab. Next, we may select the POS journals from the Accounting tab’s default journals.
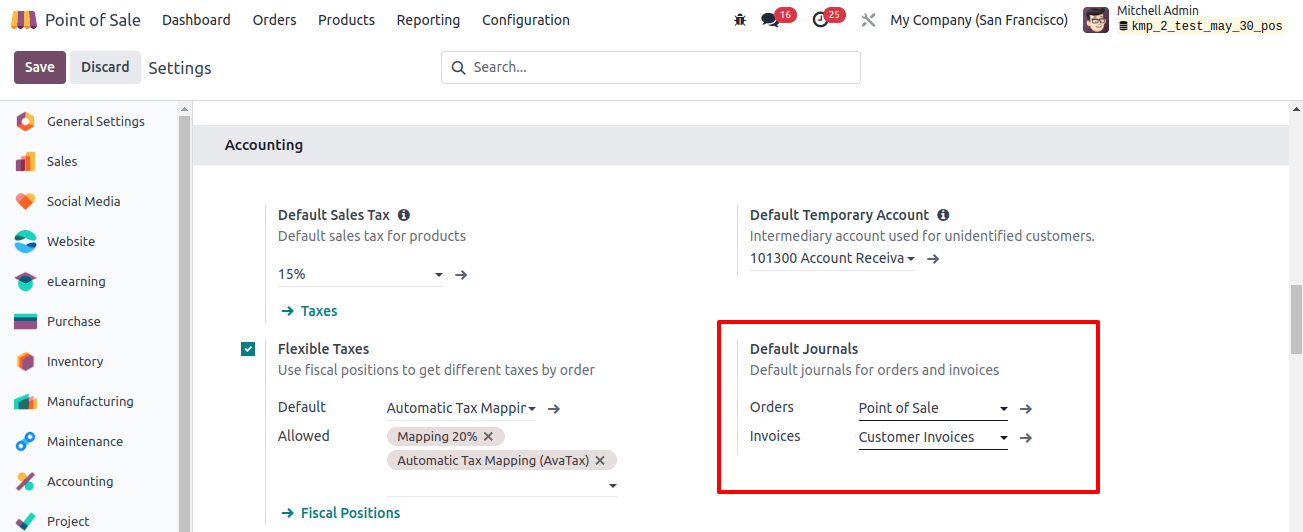
The above image shows the Orders as POS and the Invoices as customer Invoices.
Invoicing a Customer
After saving the settings, we can generate a simple order from an existing shop session and select the products. Then use the Payments button to complete the payment process.
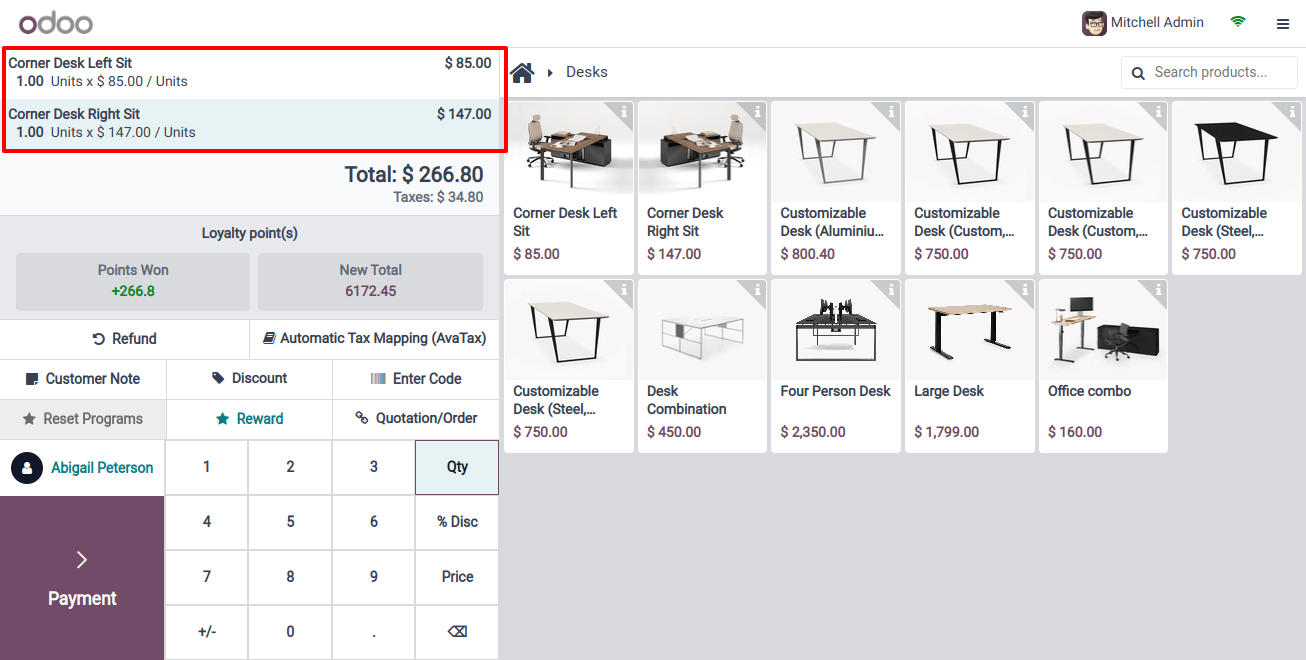
When making a payment, simply click the ‘Invoice’ button below the customer’s name to process an invoice for the order. Select your preferred payment method, validate the transaction, and voilà!
The invoice is automatically generated and available for download or printing. Importantly, invoices can only be sent after a customer has been selected.
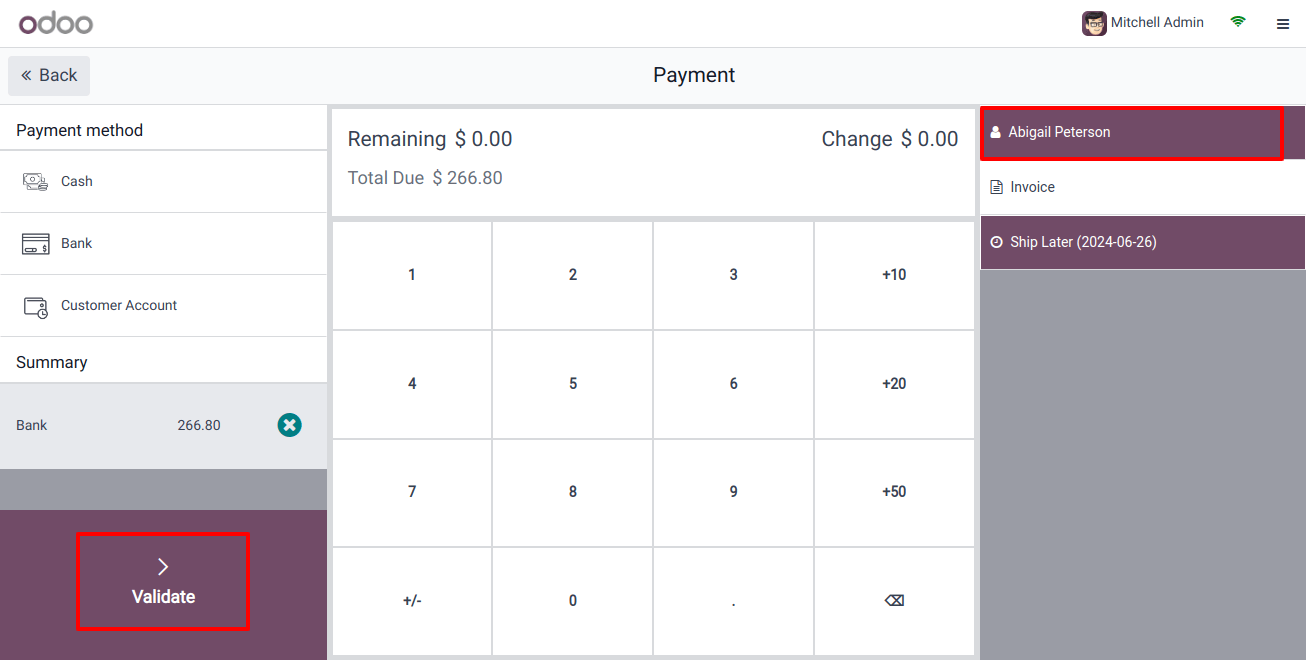
After validating the invoice, we may view it on the right side of the window, as shown below.
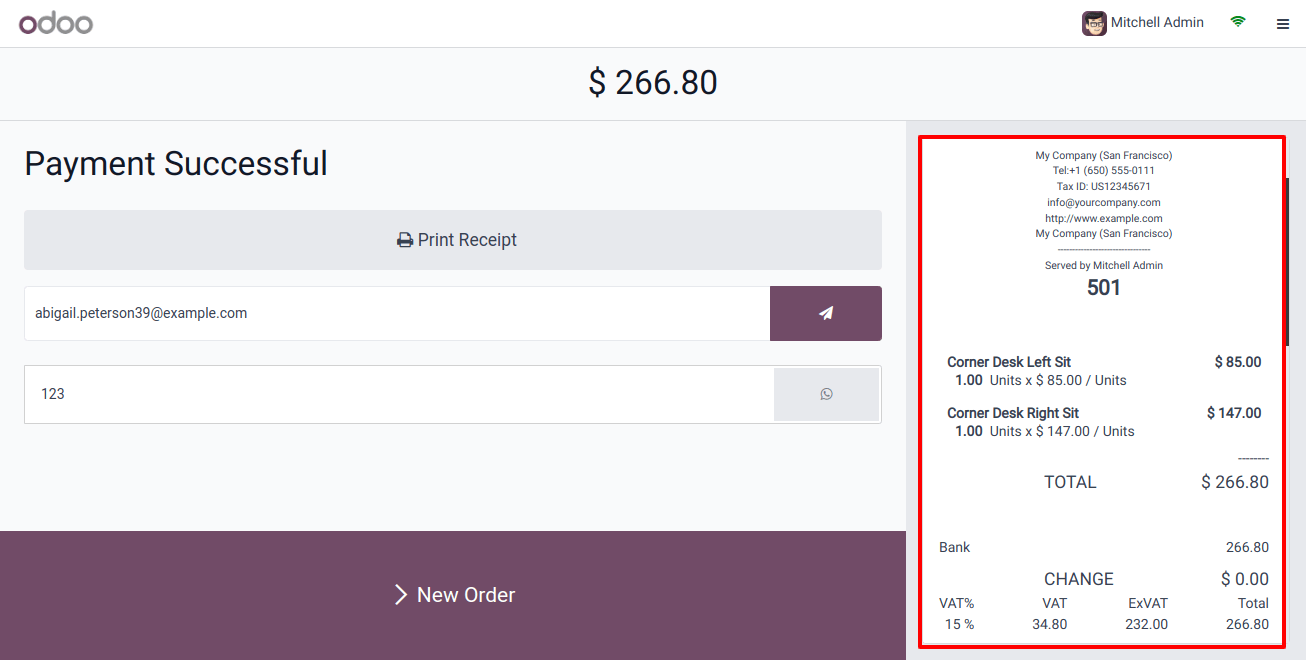
Retrieving Invoices
The POS dashboard provides easy access to all past invoiced orders. To review a detailed list of transactions, go to the POS Orders section under the Orders menu.

Invoiced orders are indicated by the ‘Invoiced’ status in the status column. To retrieve an invoice, simply choose the required order and then click ‘Invoice’ on the order form.
Configuring Invoice Specifics
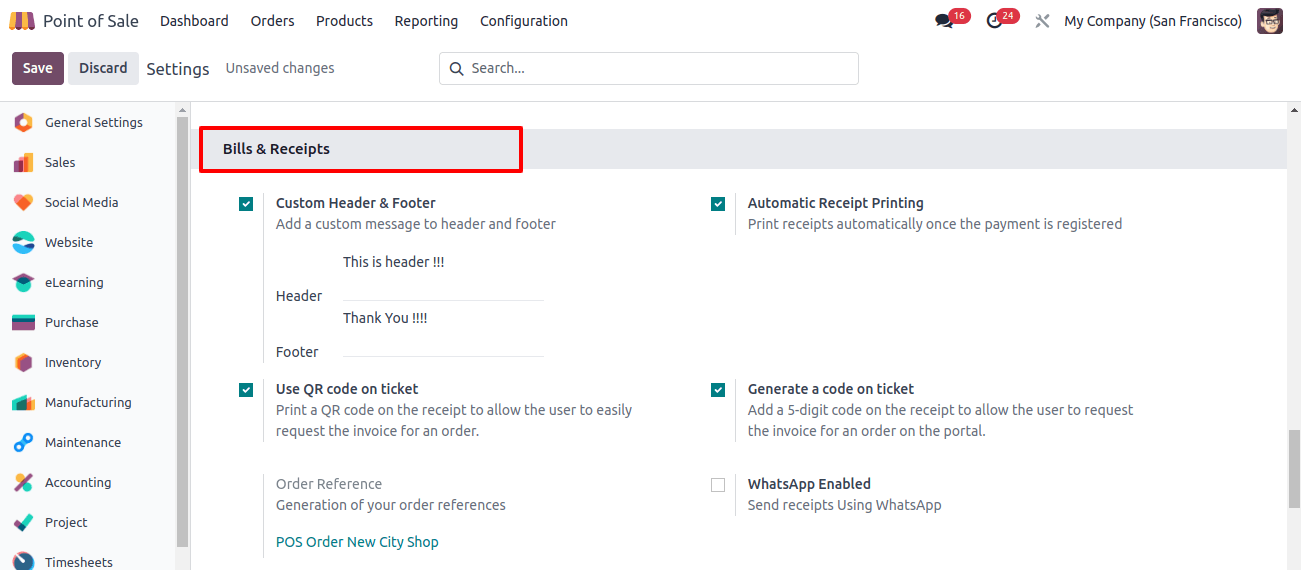
To customize various invoice features in Odoo’s POS module, first go to the POS part of the configuration settings window. Once there, select the POS where you want to enable invoicing. Look for the Bills and Receipts field in the POS’s setting choices.
Choose the relevant journal for invoice preparation from the "Automatic Receipt Printing" option and provide the invoicing choice. This simple approach guarantees that invoices are smoothly included in the POS transactions, resulting in a complete record of sales activities.
Invoice Headers and Footers
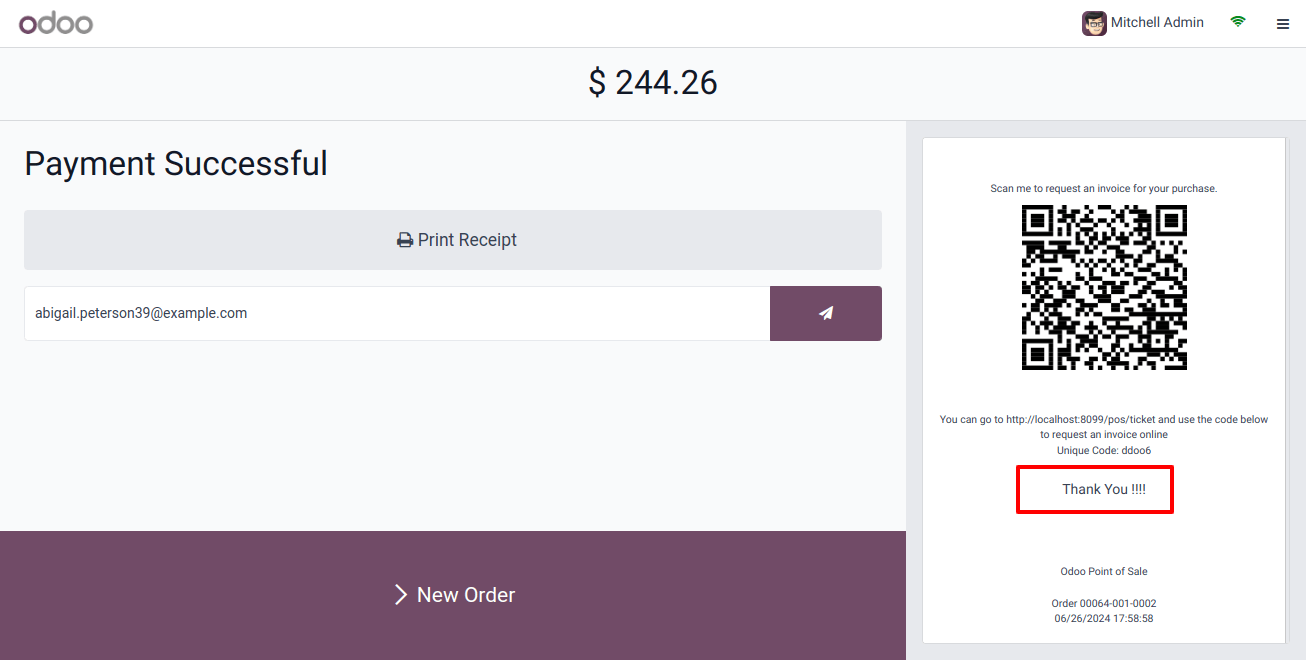
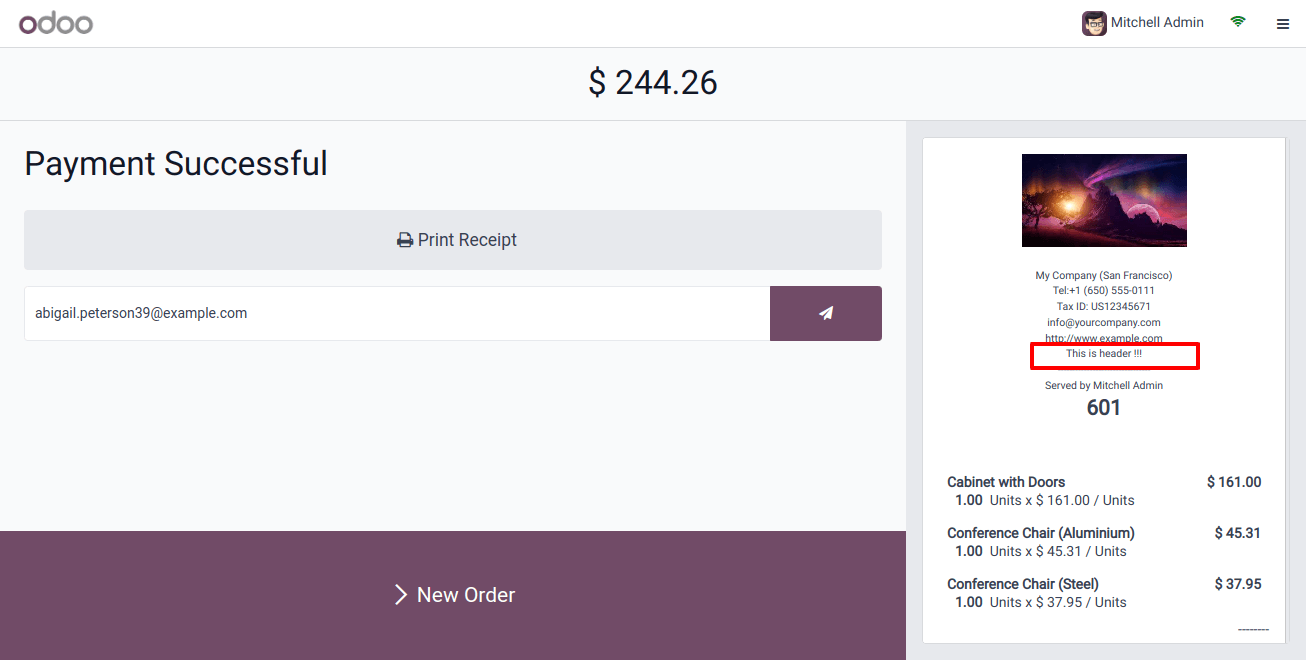
Turn on the Custom Header & Footer option to customize the header and footer of your company’s invoices. I’ve altered the invoice header to include the company name, and I’ve put a small thank-you note in the footer.
Checking the Invoice Header and Footer
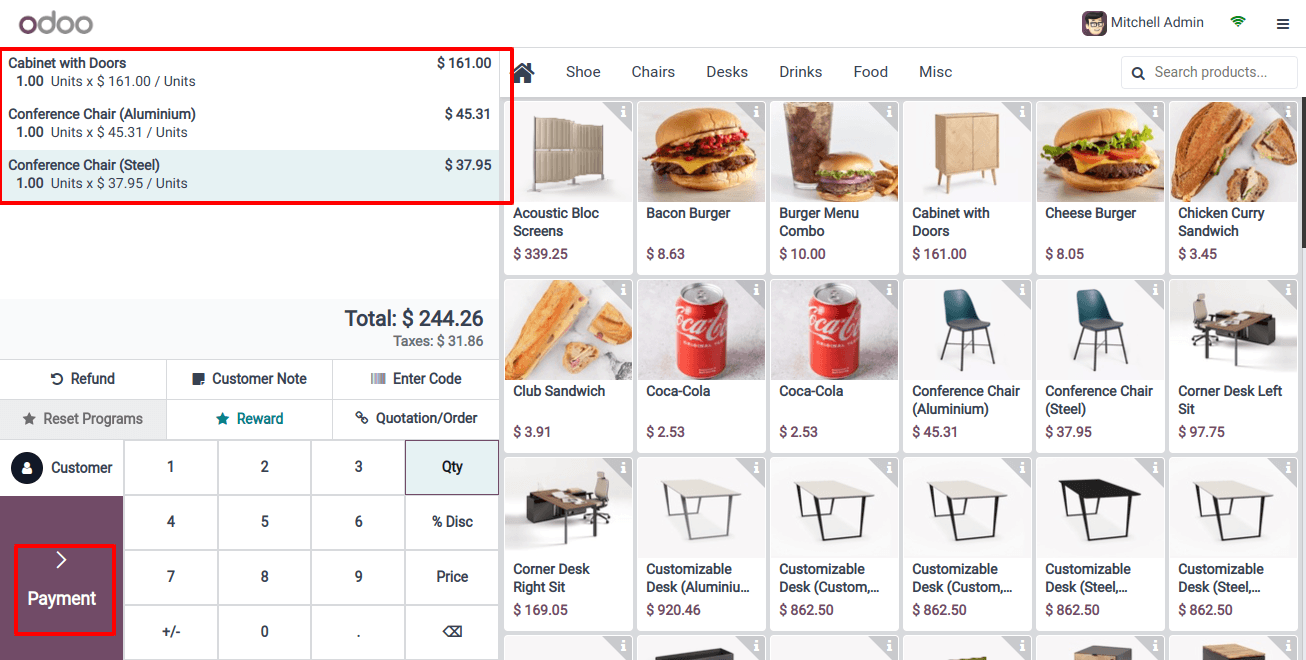
Starting a store session from the Dashboard window allows us to generate a randomly chosen sample POS order and confirm the presentation of Invoice Headers and Footer.
Related Post: Digital Receipts Made Easy: Odoo 17 POS
When you’ve finished placing your order, click the payment button to start the payment process. This action will take you to the Payments window, where you may choose payment options, leave tips, and enter client information, as shown in the image below.
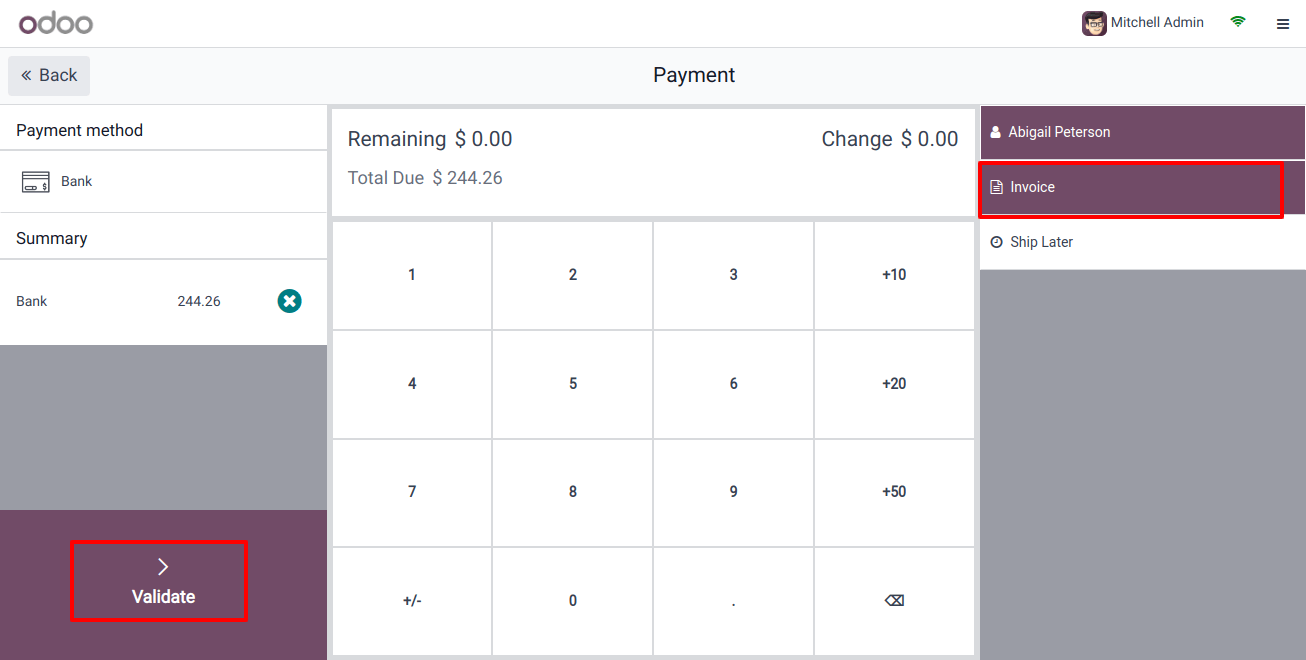
The next step is to validate the payment with the validate button. This action completes the payment and generates the invoice.
So, when we receive the invoice following a successful order and payment completion, we can see the Header and Footer inside the invoice, as seen in the photos below.
QR Codes on Tickets
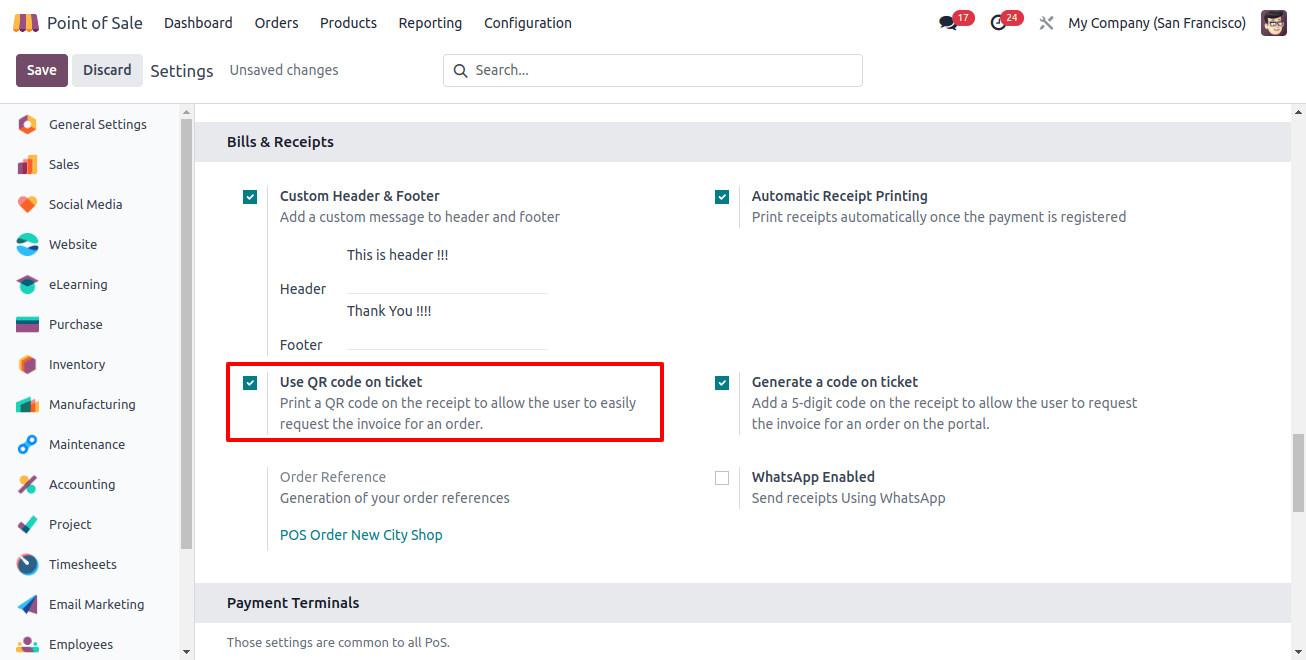
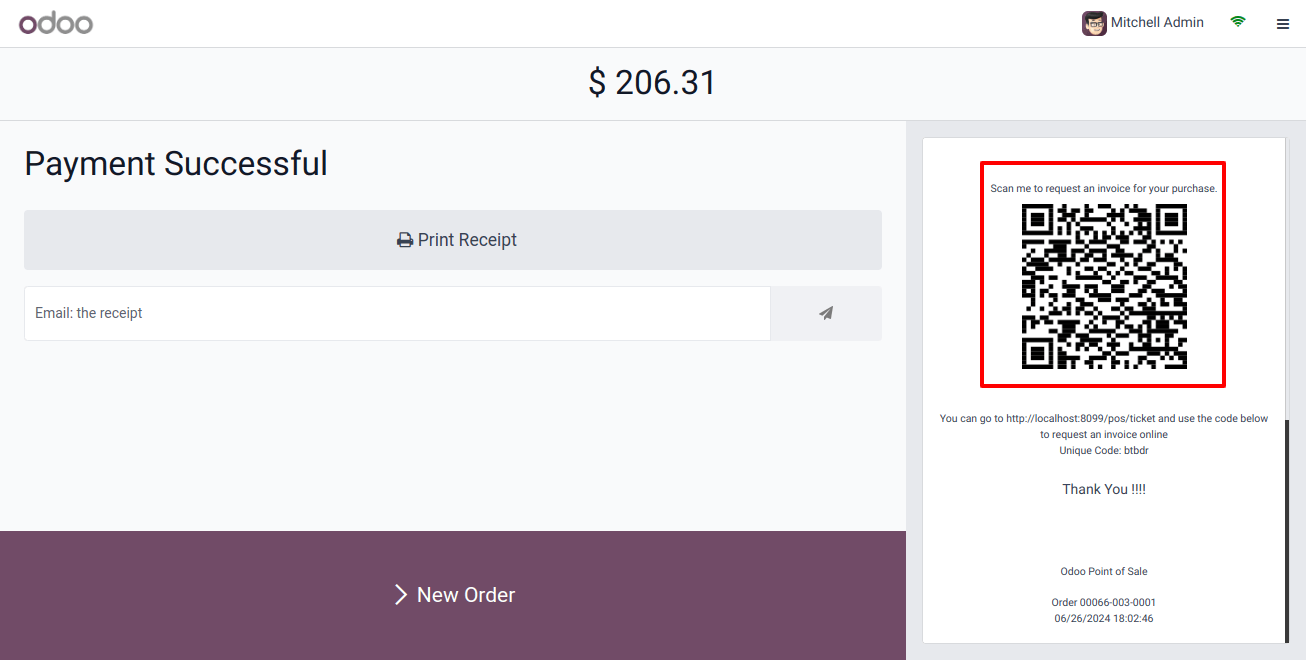
To boost convenience, customers can scan the QR code shown on their receipt to receive an invoice. After scanning, consumers are requested to provide their billing information, which generates a downloaded invoice. To allow QR codes on receipts, Open the configuration Settings box and select ‘use QR code on the ticket.’
Activate the function, save the settings, proceed to an ordering session, process payments, and review the invoice to see the QR codes included in the invoice bill, as seen in the image below.
To conclude, mastering invoicing with Odoo POS allows businesses to manage efficient transactions, provide professional documentation, and increase customer happiness.
The application saves time, maintains correctness and transparency, and is excellent for modern restaurants, stylish retail stores, and other smart businesses that use a POS system. Odoo’s invoicing capabilities allow for fast client service while preserving control over financial information.
Related Post:
- How to Use Odoo 17 POS Cash Control Flawlessly
- Odoo 17 POS Makes Multi-Warehouse Easy
- How to Set Up Accounts & Payments in Odoo 17 POS
- Understanding the Basics of POS for Your Retail Business
- Streamline Your Billing Process with Odoo Invoicing
- How Does Odoo 17 Enhance Accounting Localization for Slovakia
- How Does Odoo 17 Handle Accounting Localization for Denmark

