Odoo 17, a strong and feature-rich open-source ERP system, includes advanced accounting tools. Adding the opening balance is an important step in setting up your Odoo 17 Accounting.
The opening balance shows your business’s original financial position prior to using the Odoo 17 Accounting module. At the end of a fiscal year, it is important to convert the ending amount of that year into the starting balance for the following fiscal year.
Odoo, a business management software, uses journals and journal entries to manage and set up this initial amount for your financial activities in the new year. To achieve this, create an equity account to represent the existing starting amount.
In addition, you create a journal entry to ensure that the account balance is converted into the starting balance for the next fiscal year. When creating the new journal entry, it is important to provide the date as the start of the new accounting period. This method keeps your financing data clear and ready for the next year.
In this blog post, we will explore the process of adding opening balances to Odoo 17 Accounting.
How to Set up Opening Balance in Odoo 17
Looking at the starting balance in an account—for a bank, a customer, or a supplier—is made possible by comprehending the opening balance in Odoo. This starting amount is usually determined at the beginning of a fiscal or accounting period.
When creating an account for your business in Odoo, you must first specify an opening balance. The opening balance may be positive or negative, based on the credit or debit balance that occurred in the previous period.
Let us analyze the steps given in the Odoo 17 Accounting module to gain an understanding of how to effectively manage the opening balance.
To start the process, select the accounting module from Odoo 16’s main dashboard. Ensure that the fiscal module option is enabled in your database, which can be done easily via the accounting module’s settings menu.
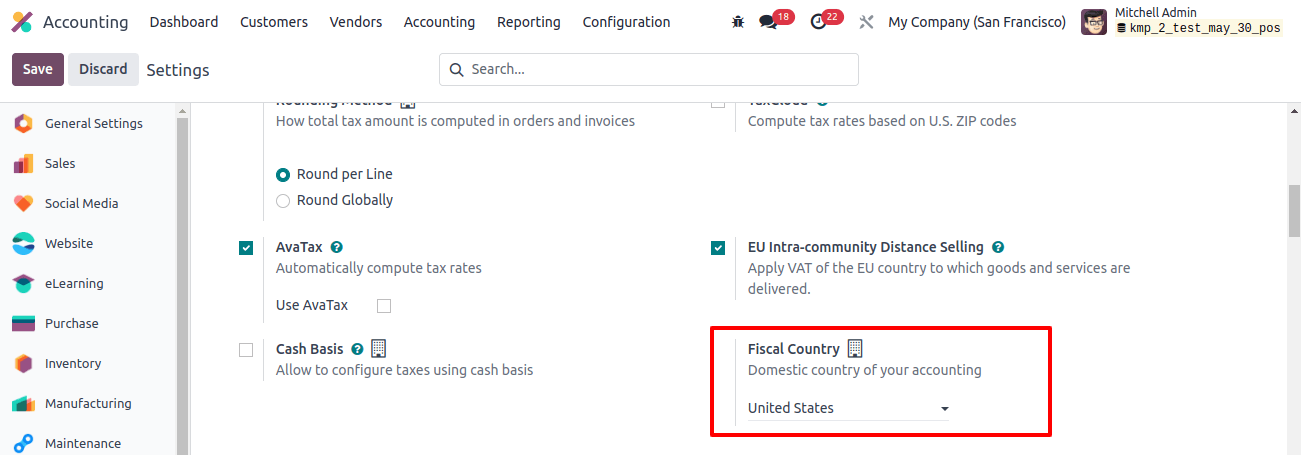
The selected fiscal country is visible in the settings menu, and it indicates the country linked with all subsequent accounting processes and charts of accounts. This option ensures that all charts of accounts are only related to the specified country.
If you want to set the opening balance directly from the settings menu, use the ‘Review Manually’ option under the account import tab.
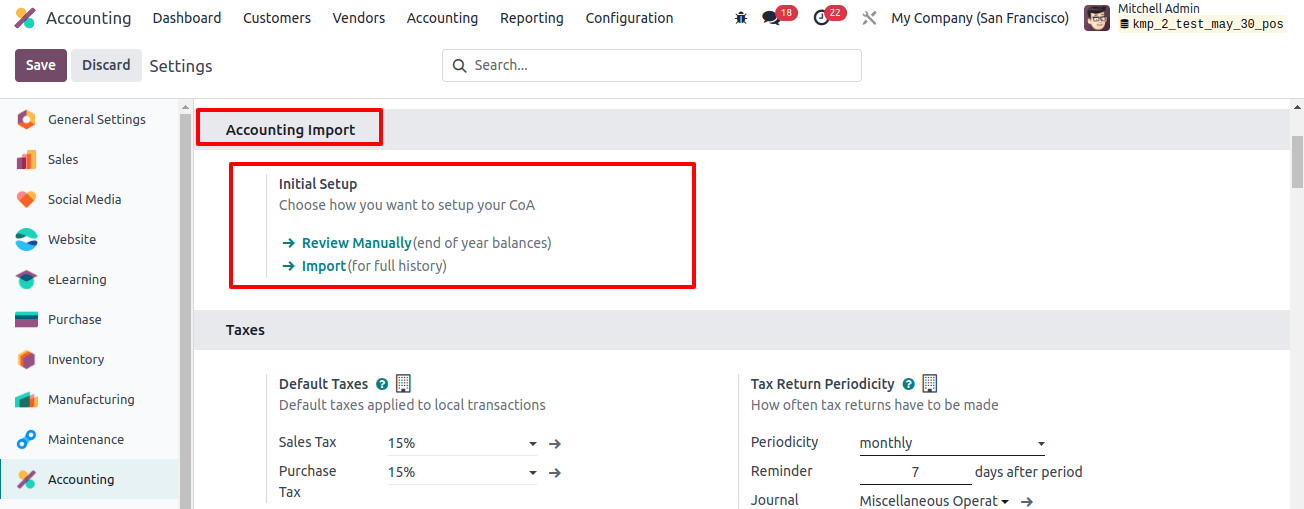
This strategic decision allows the precise development of year-end balances, which easily transfer into the opening balance for the next year.
The Accounting module’s interface displays an onboarding panel where you may set the initial balance for the upcoming year. To set up the starting debit and credit balance, go to the chart of accounts menu.
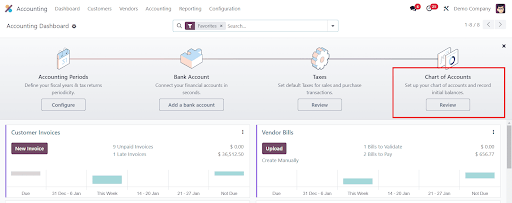
Clicking the ‘Review’ button in this field opens a new window with a detailed view of the chart of accounts configured in your database.
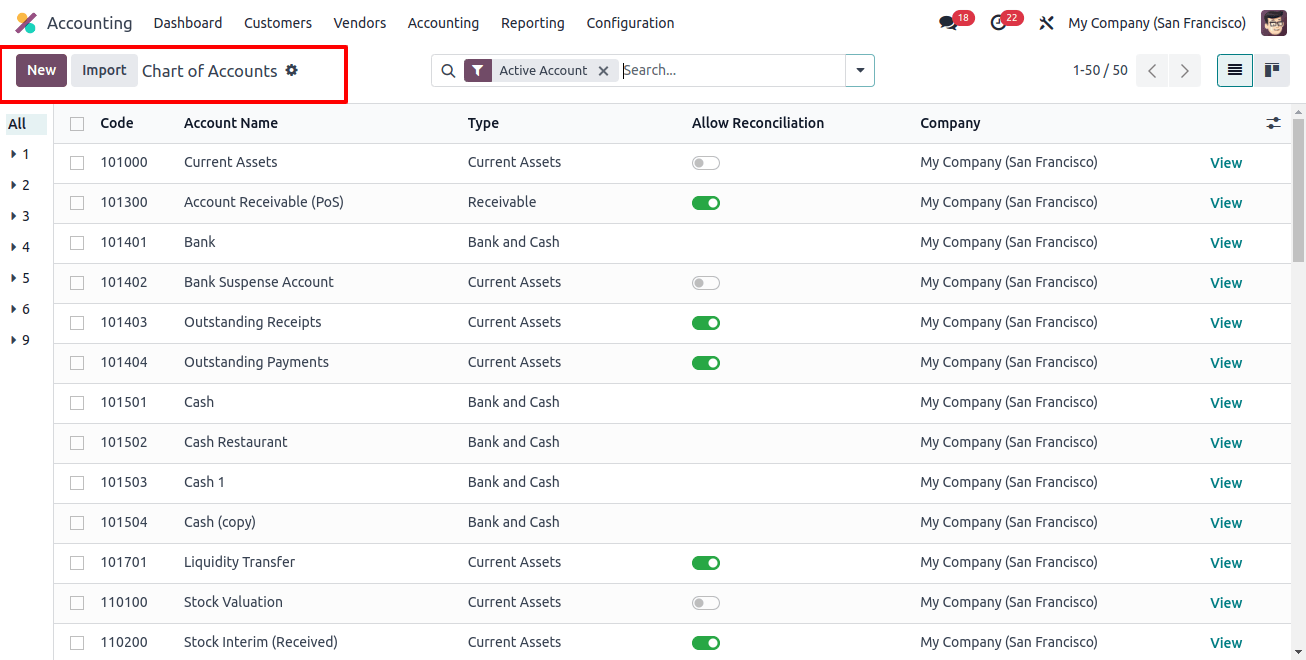
Clicking the ‘New’ button initiates the formation of a new account and introduces an opening balance. Also, adding an opening balance for an existing account requires specifying debit or credit balances in the respective account.

After clicking ‘New’, a new line opens, allowing you to enter details such as code, Accounting name, and type of account, allowing reconciliation, opening debit, and opening credit. Consider calling the account a ‘new project’ for the new accounting period and categorizing it as an expense type.
Activate the allow reconciliation button and specify an opening debit of $5000. When you click the view button, a new window displays the details of the newly set account.
After saving these details, enter the opening balance as credit or debit for other accounts in the chart of accounts. Once this configuration is complete, check the results under the journal entries option in the Accounting menu.
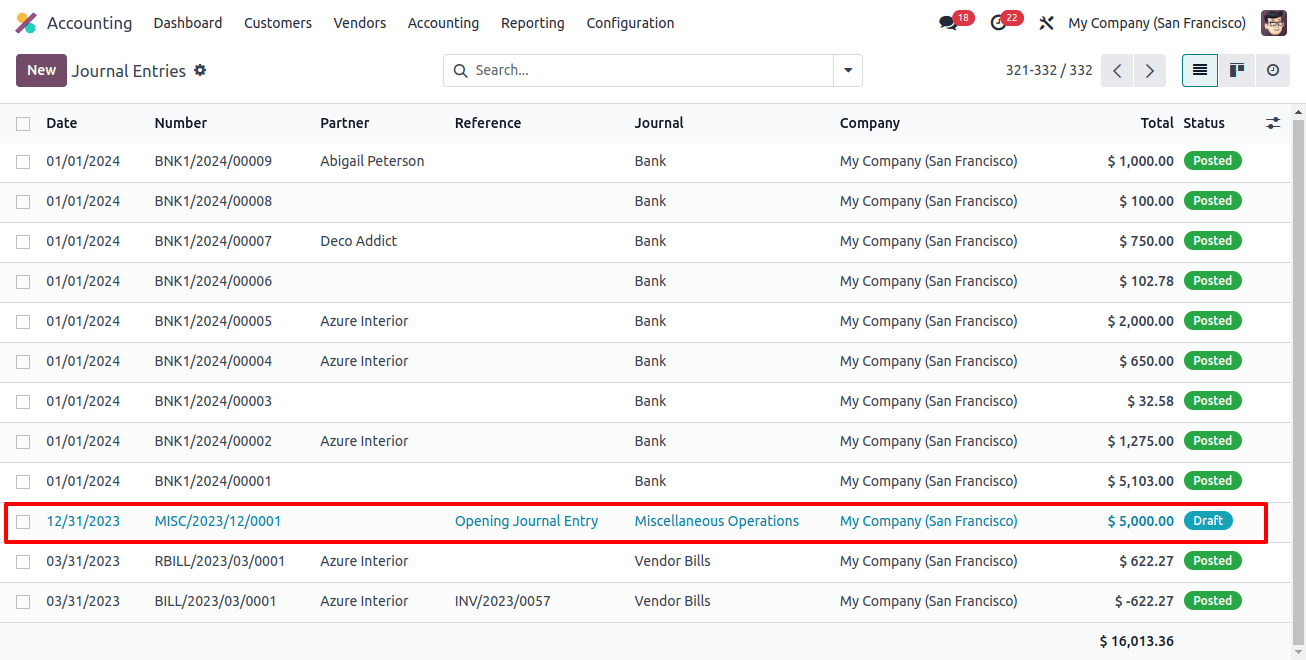
A detailed look at the newly generated journal entry, labeled ‘opening journal entry’ is provided. Analyze the journal entries listed beneath this item to ensure that the debit and credit entries are equivalent.
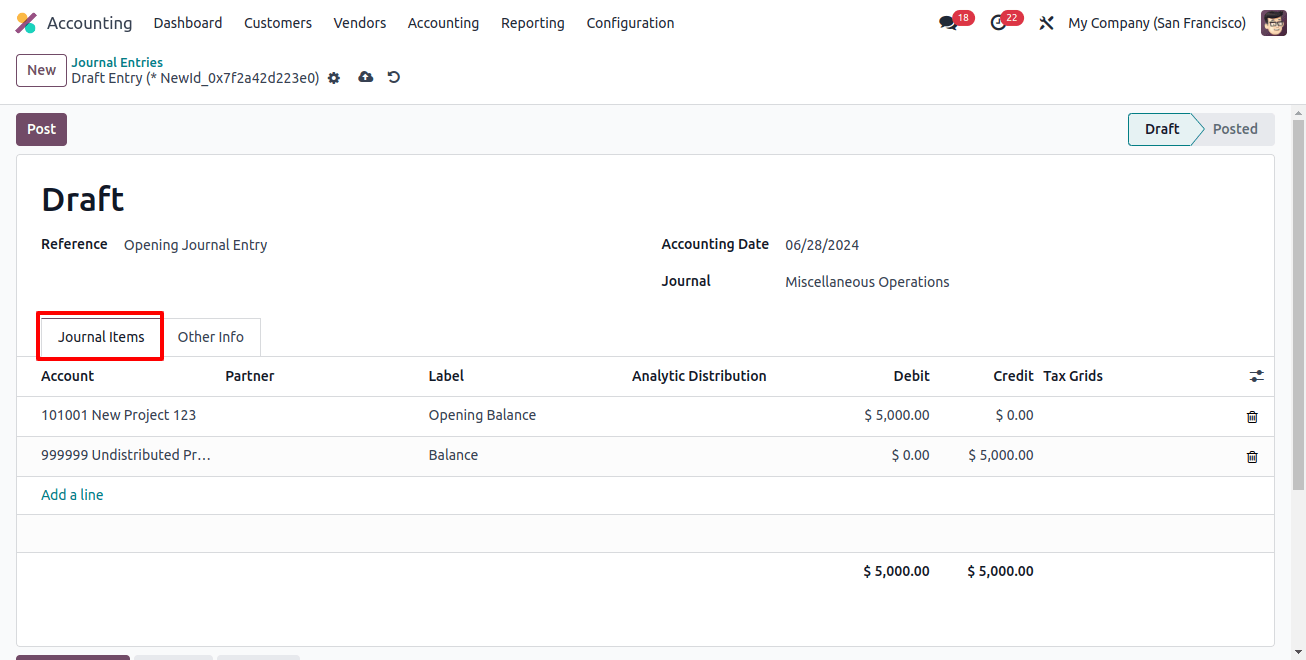
With the balance equal, click the post button to complete the posting of this journal entry, resulting in the successful generation of the starting balance.
Return to the configuration menu, and pick the chart of accounts option.
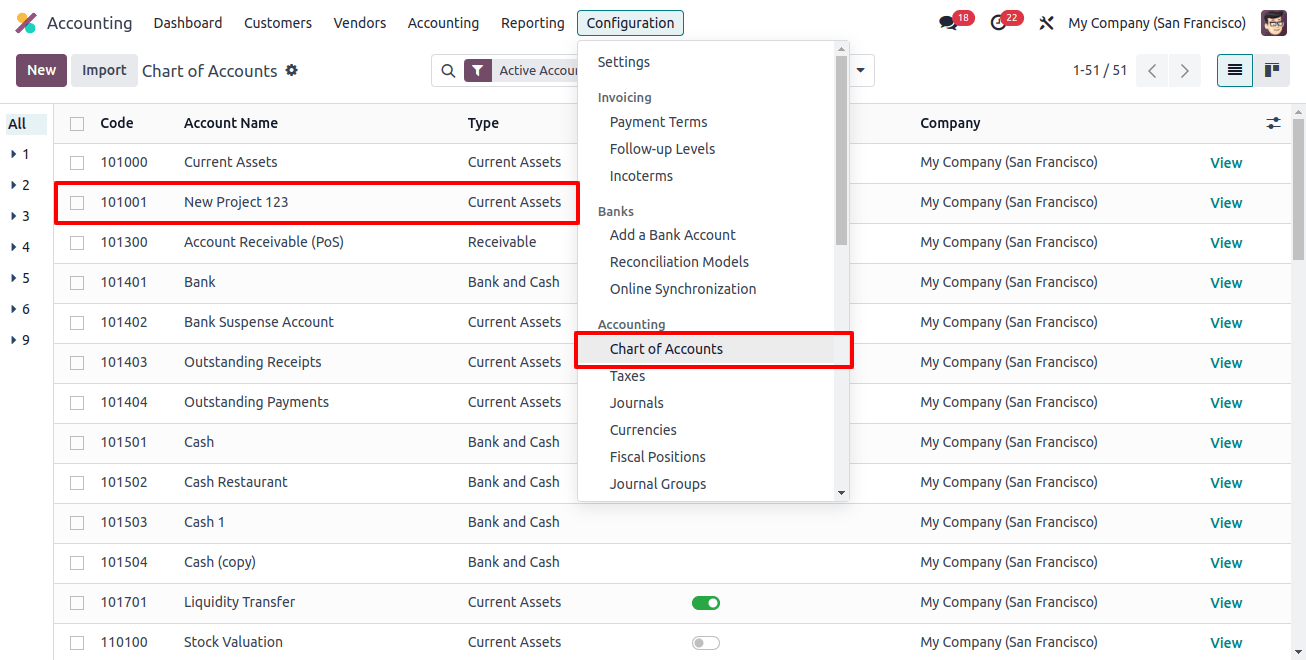
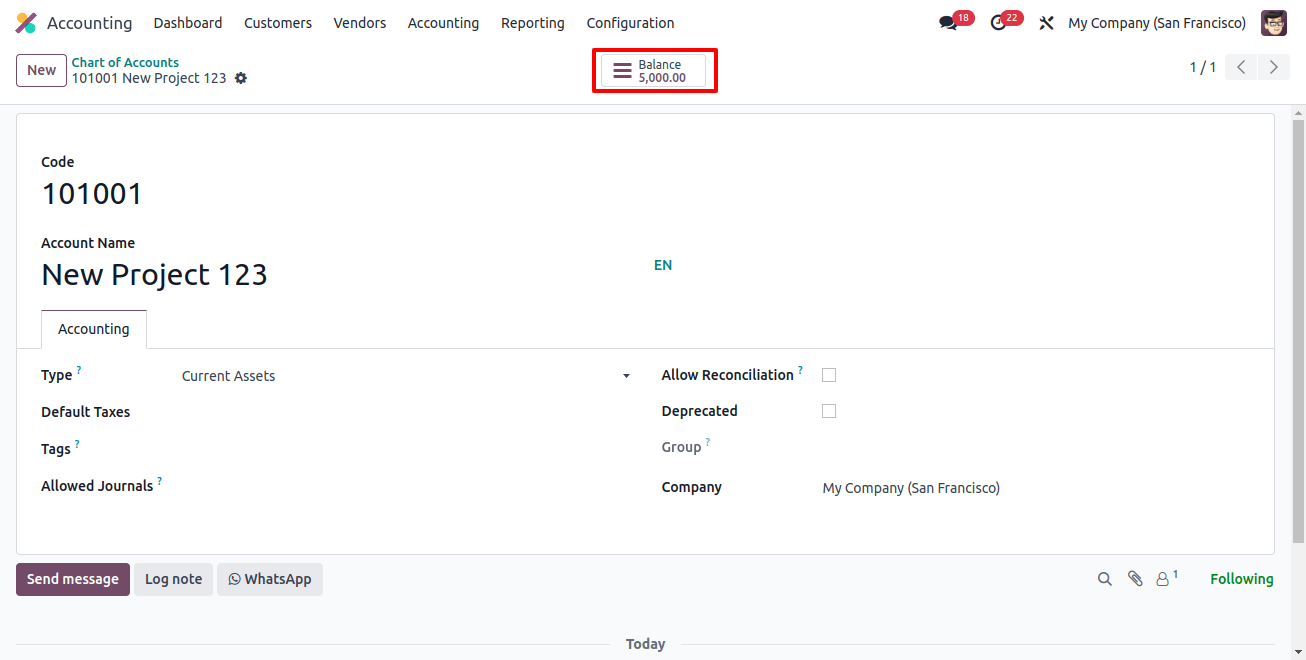
Choose a previously created account to see the materialized opening balance, now clearly displayed on the screen.
The Accounting module provides the opportunity to manually enter journal entries for opening balances. Go to the accounting menu and select journal entries.
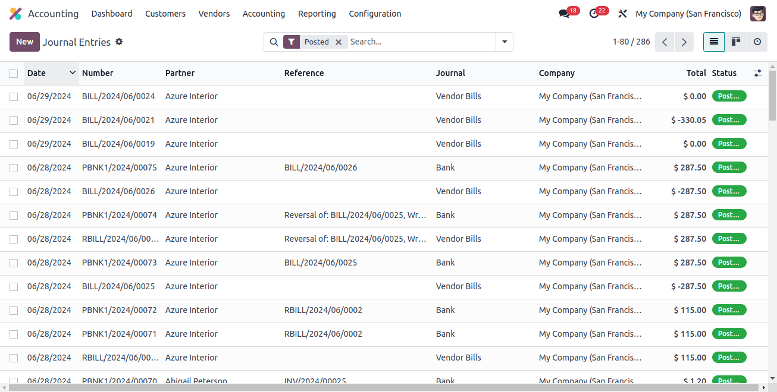
The ‘New’ button displays a new form view.
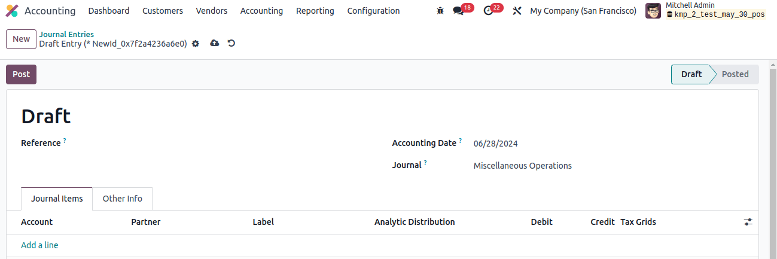
In this form, set the reference to ‘opening balance’ and provide the accounting date and journal information. Use the ‘Add a line’ button to add accounts and set up opening debits or credits. Make sure the debit and credit lines are always equal, then post the journal entry.
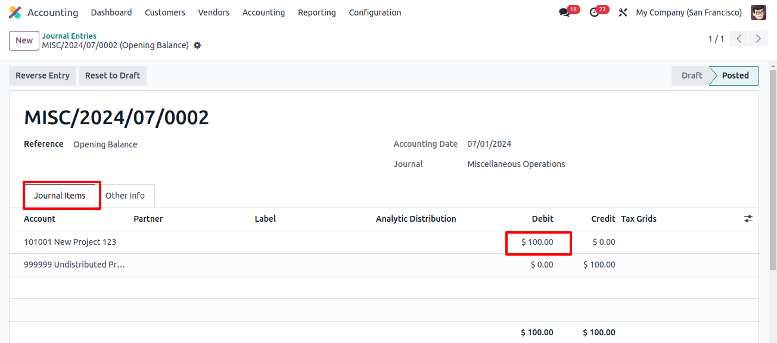
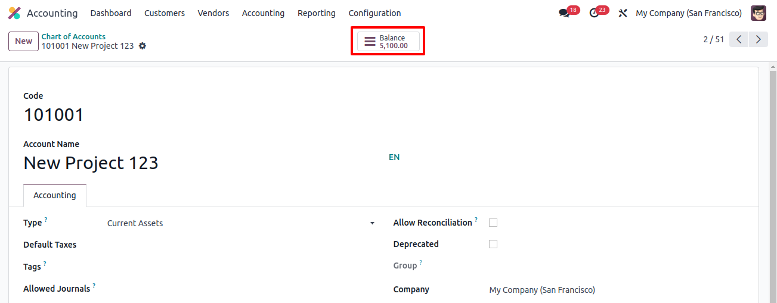
Consider starting a debit balance of $100 for the new project account. Post this entry and return to the chart of accounts to see the augmented balance by clicking the view button for the current assets account.

You can see that the initial balance in the account ‘New Project’ has increased from 5000 to 5100.
Adding opening balances in Odoo 17 Accounting is an important step towards efficiently setting up your financial records. Following the above steps will guarantee that your initial financial balance is accurately shown in Odoo, providing the groundwork for successful accounting and financial planning.
