This blog is related to how to trace products, while validating Receipt Of A Purchase Order in odoo 12. Here we have mentioned It’s procedure and their description along with their respective screen-shots.
First Go To Purchase > Purchase > Select Products
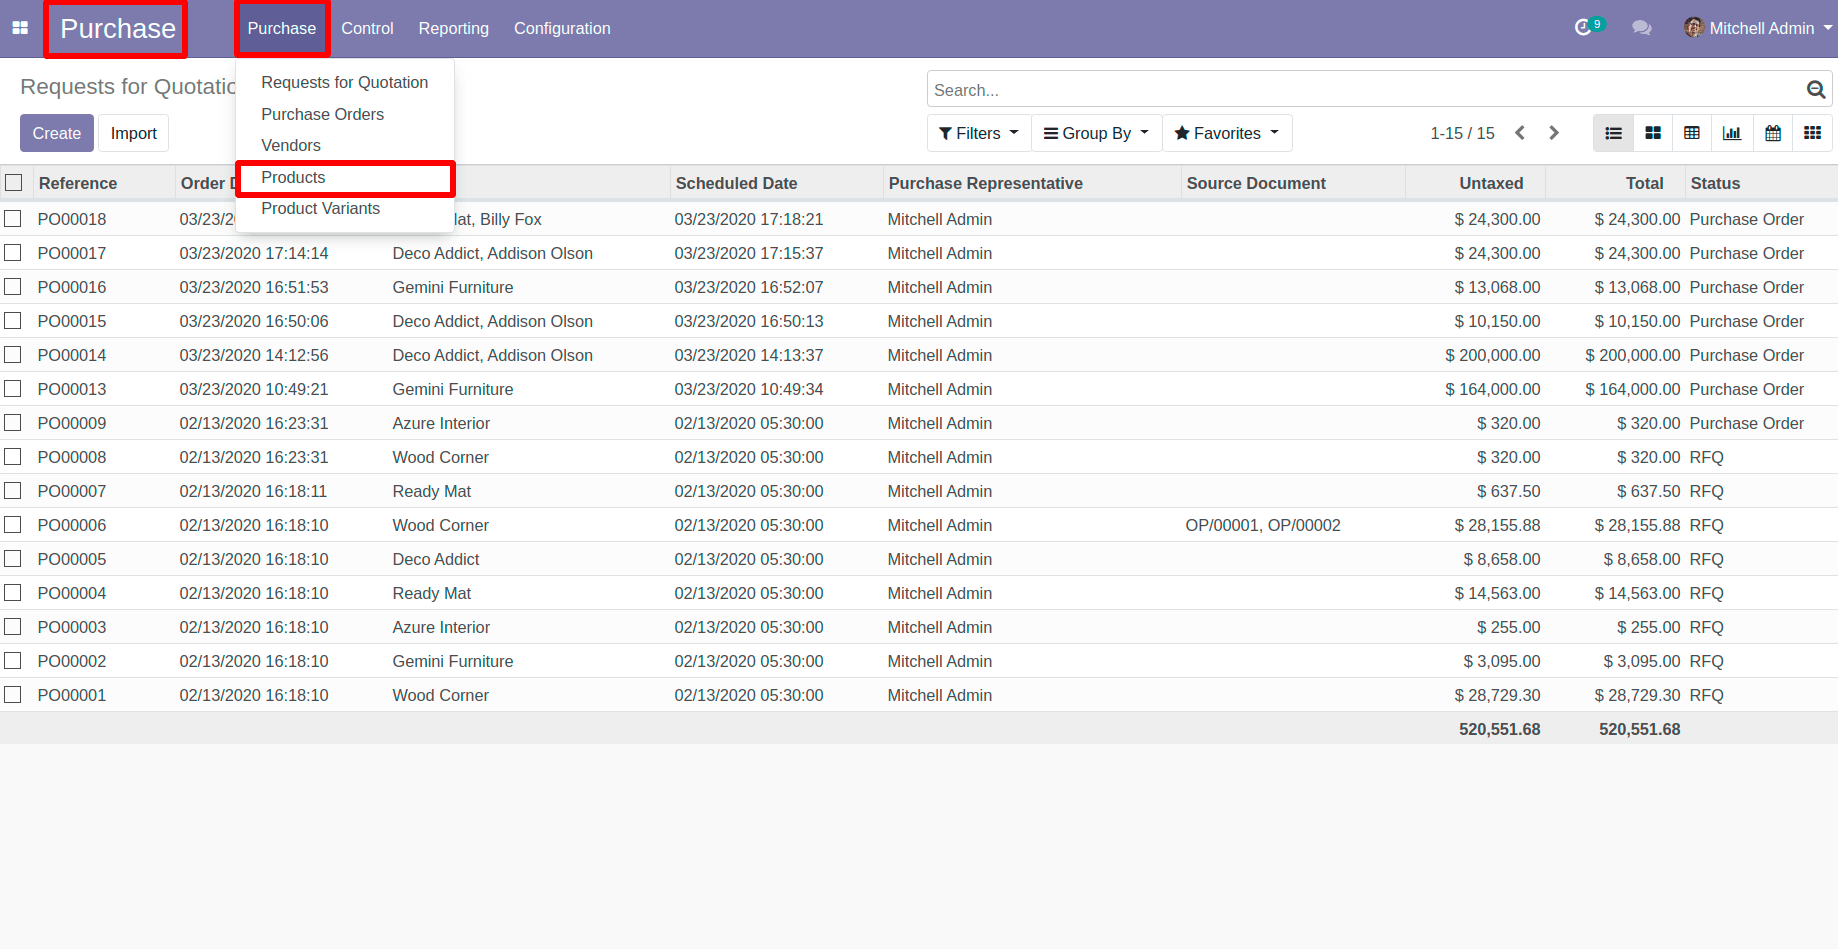
![Goto Purchase and Click on the Products Menu in Odoo Goto Purchase and Click on the Products Menu in Odoo](/cr_blogpost_image/static/src/img/553/content_images/1_content_image.png)
Now ,Select Your Products which you are going to use In Purchase Quotation
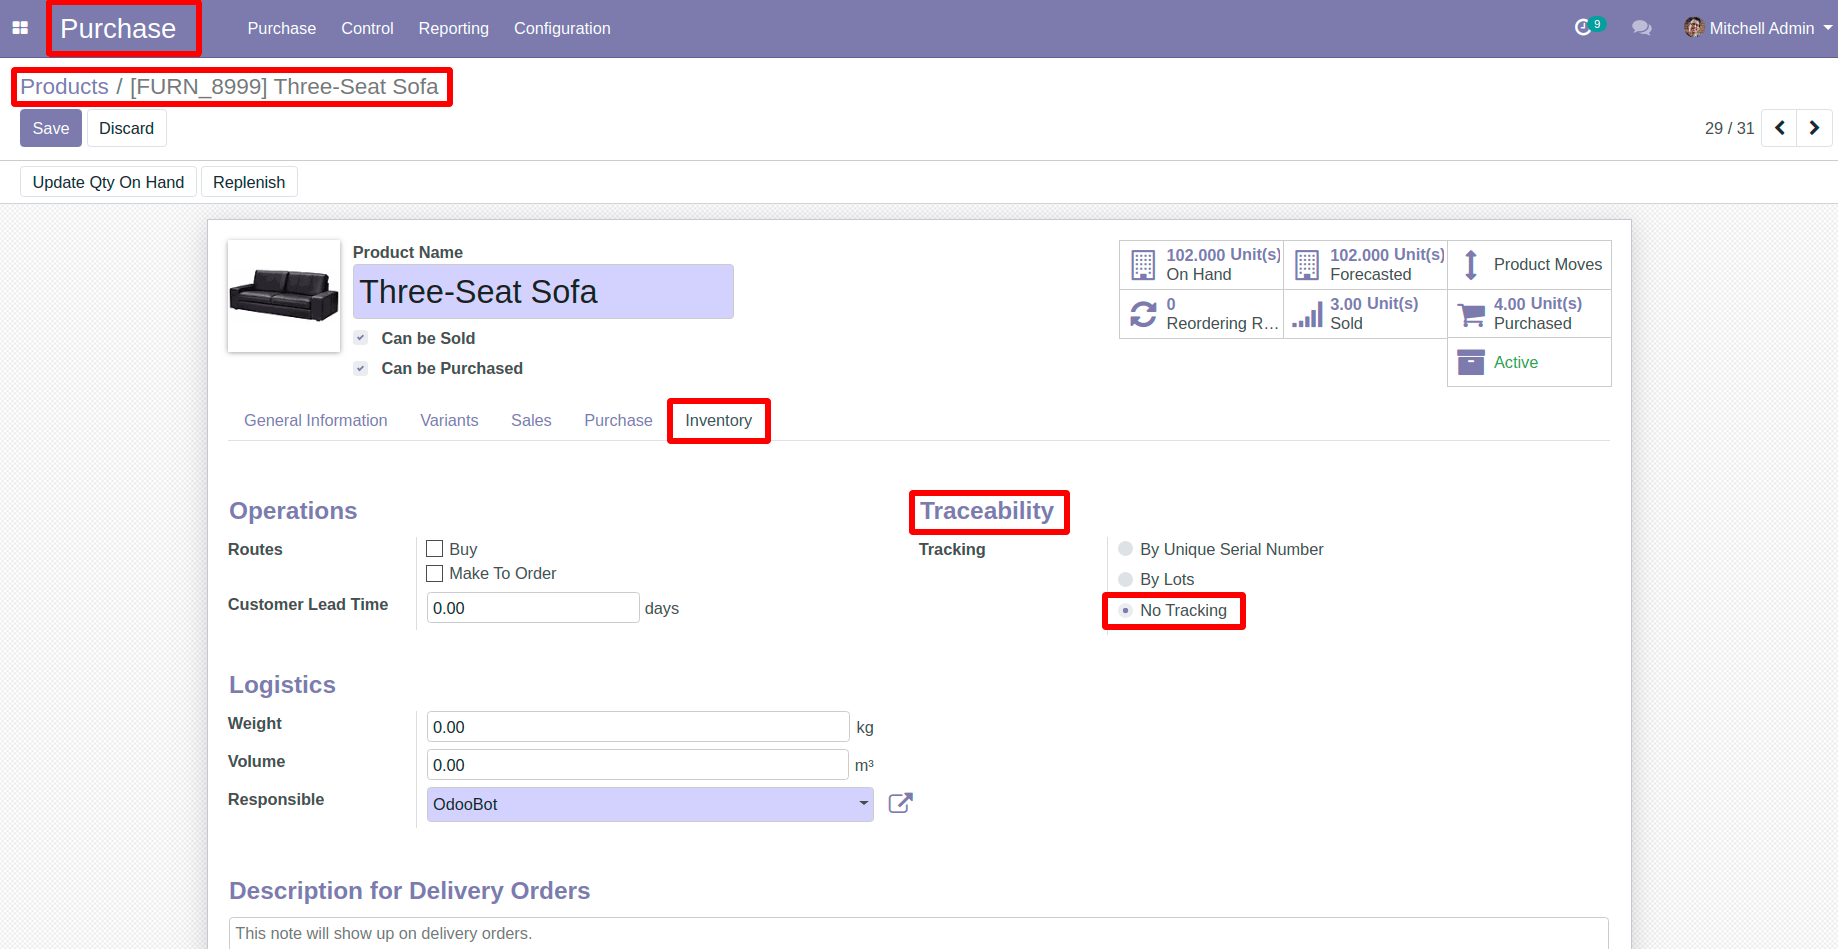
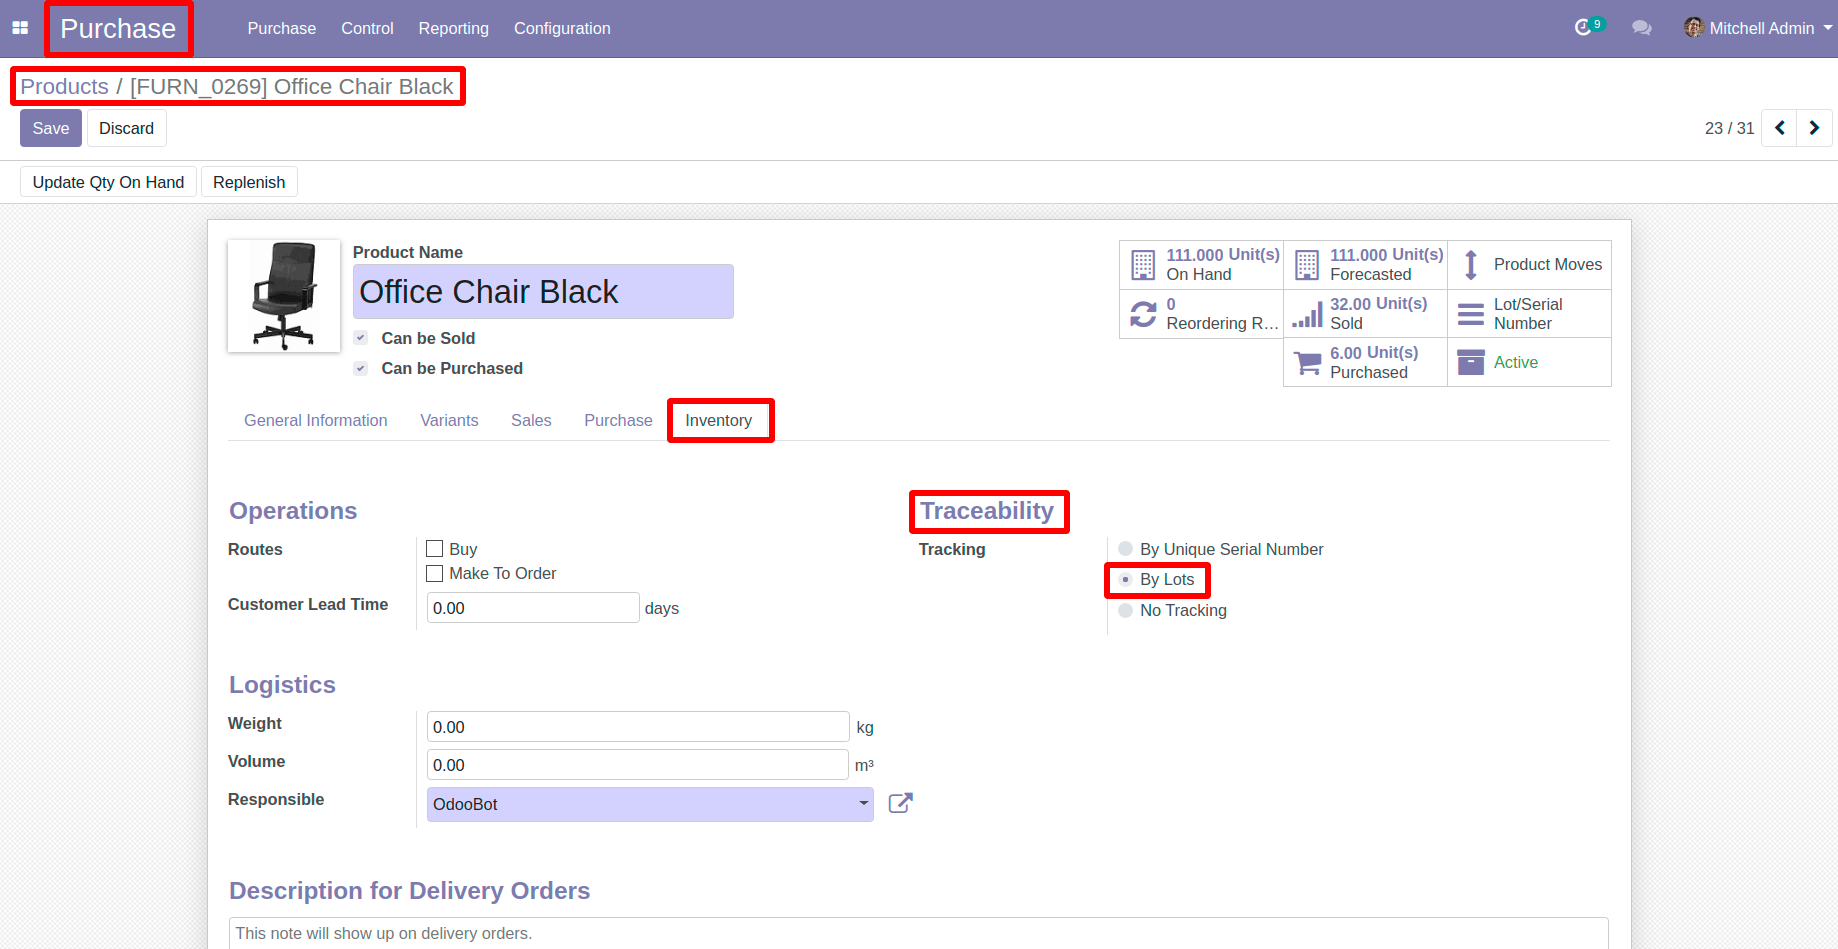
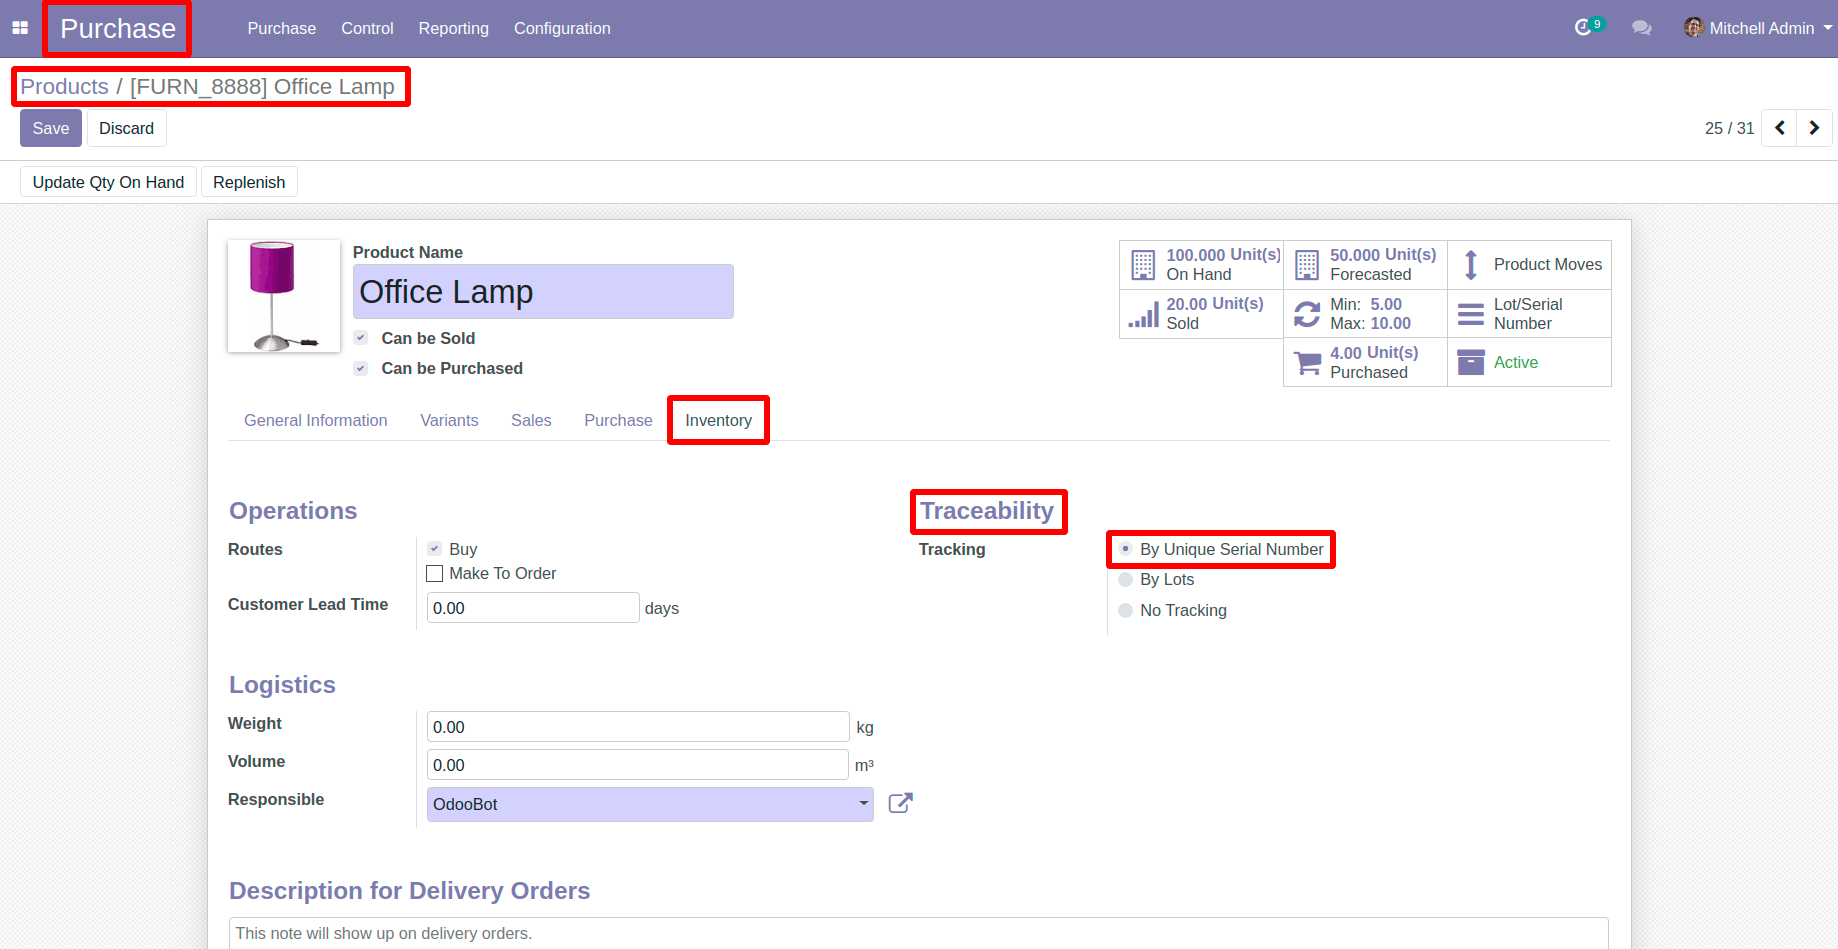
Here I have selected three products ,which are as Follows;And Their related Configuration you can see In pictures.
Note : Selected type must have Storable Type.
1 - Three-Seat Sofa
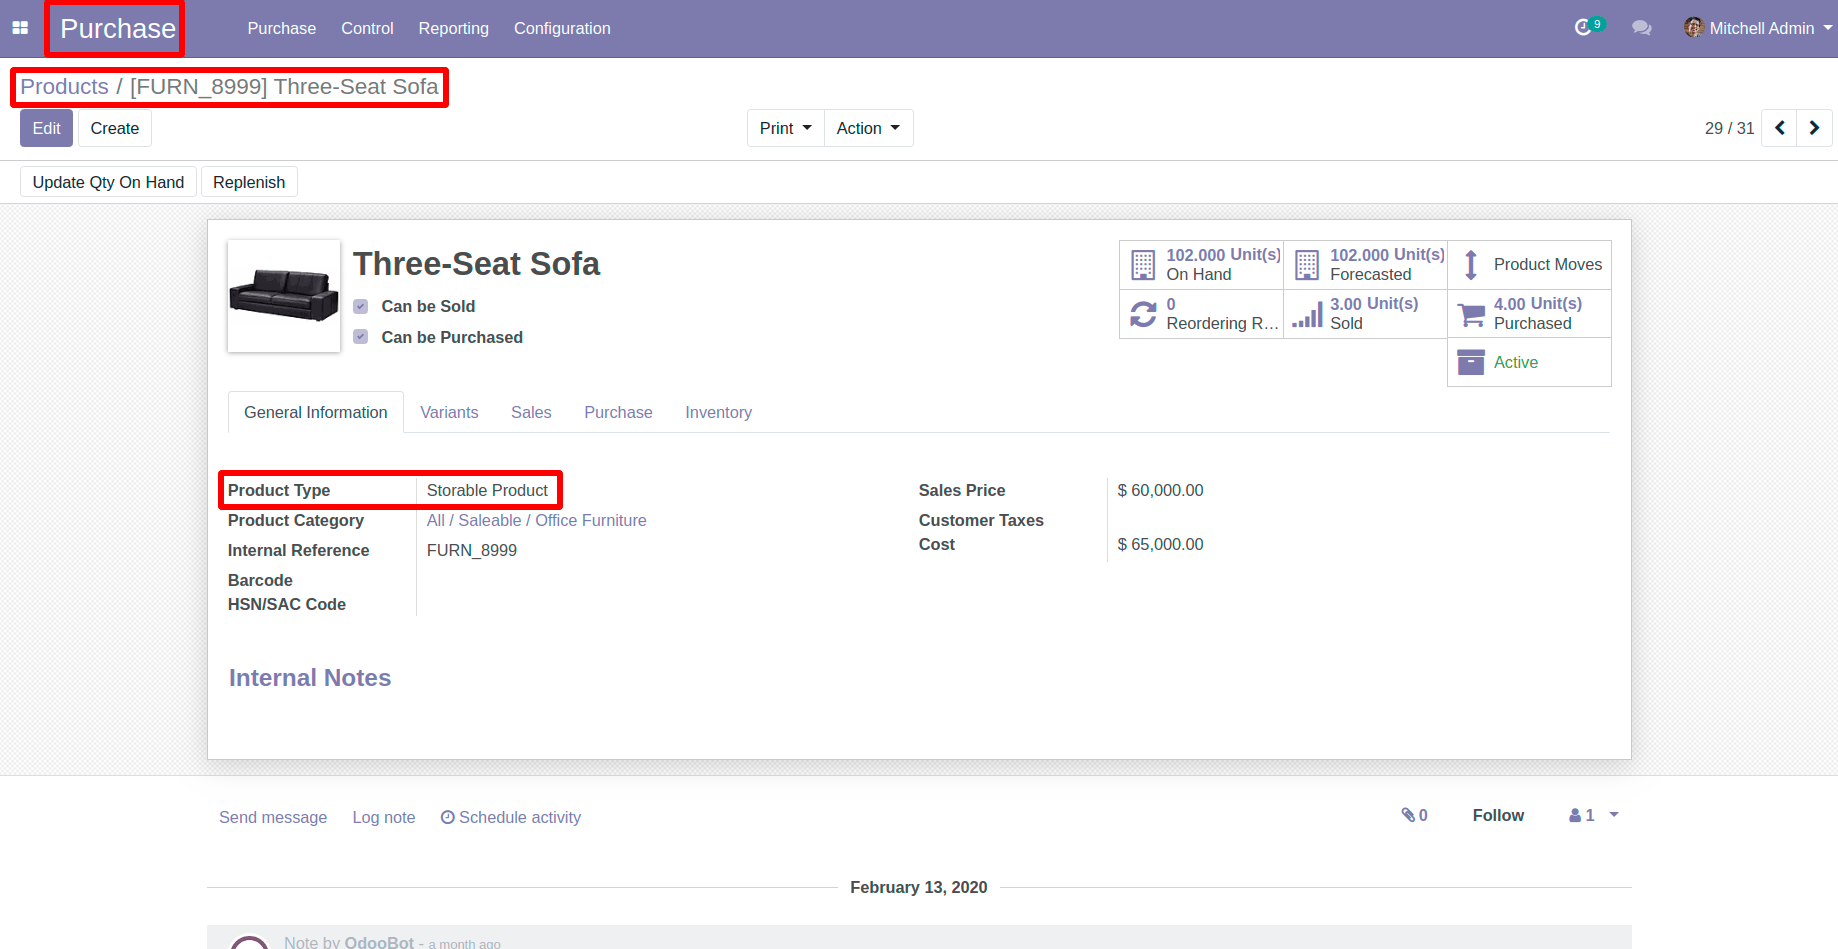
![Select a Product and Product Type must have Storable in Odoo Select a Product and Product Type must have Storable in Odoo](/cr_blogpost_image/static/src/img/553/content_images/2_content_image.png)
![In First Product Goto Inventory Tab in Odoo In First Product Goto Inventory Tab in Odoo](/cr_blogpost_image/static/src/img/553/content_images/3_content_image.png)
2 - Office Chair Black
![In Second Product Goto Inventory Tab in Odoo In Second Product Goto Inventory Tab in Odoo](/cr_blogpost_image/static/src/img/553/content_images/4_content_image.png)
3 - Office Lamp
![In Third Product Goto Inventory Tab in Odoo In Third Product Goto Inventory Tab in Odoo](/cr_blogpost_image/static/src/img/553/content_images/5_content_image.png)
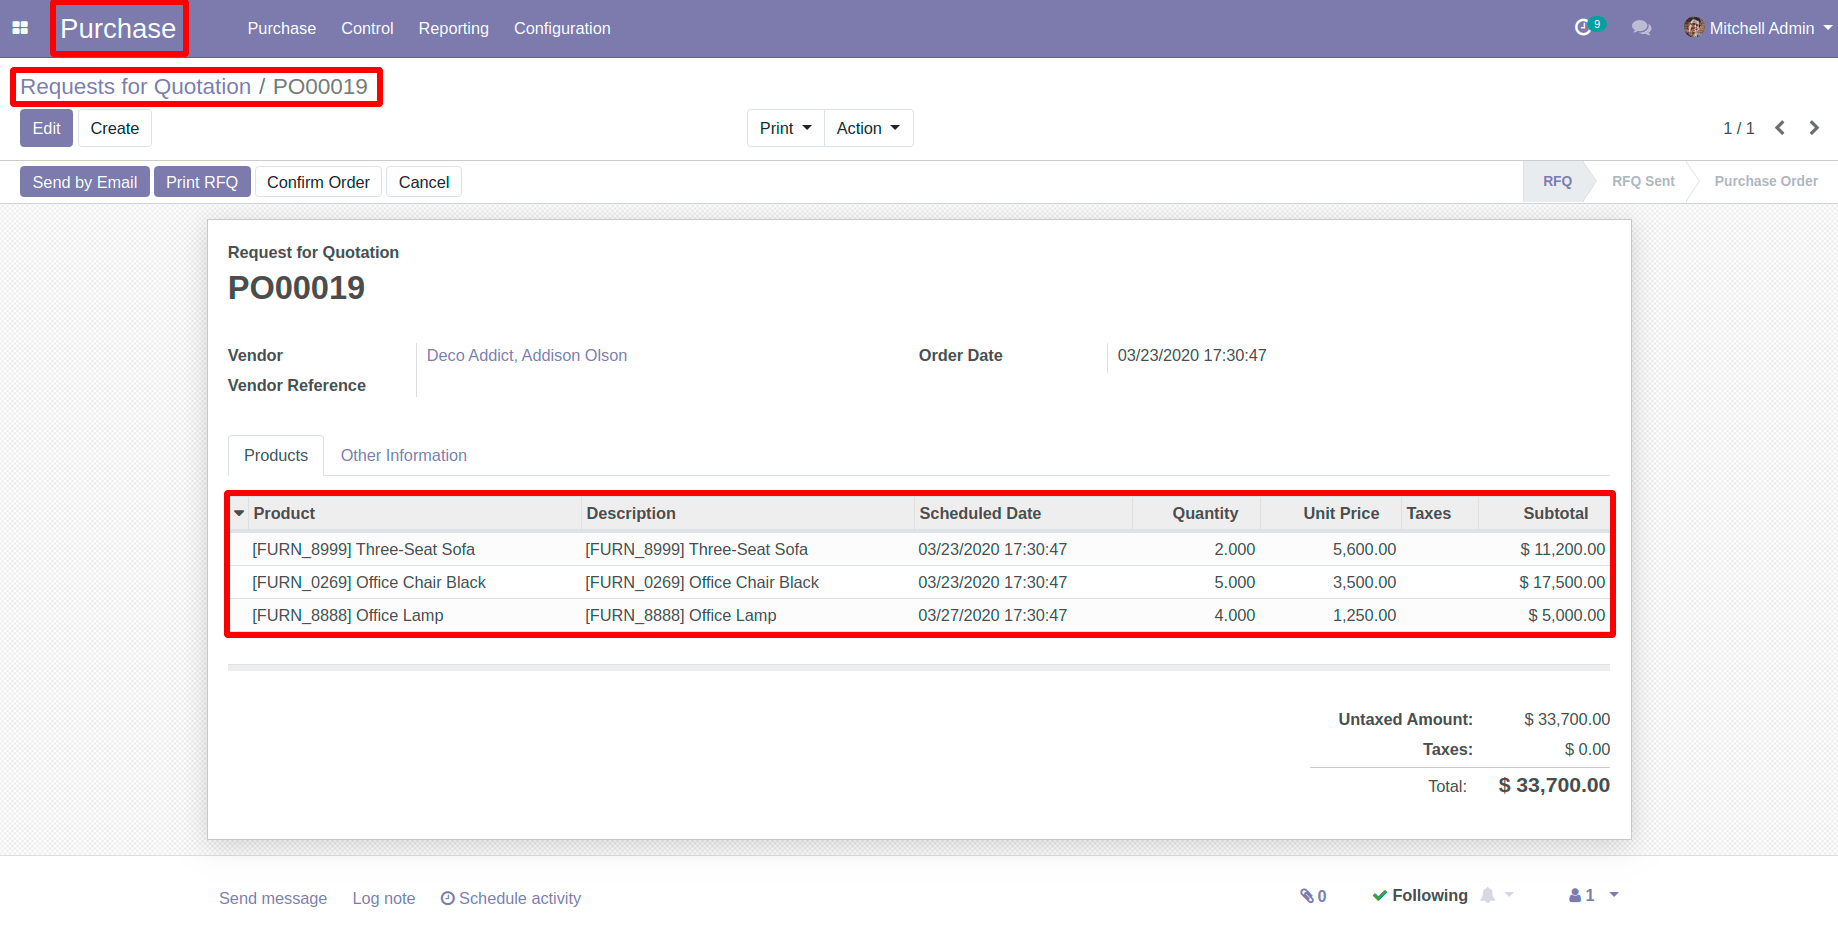
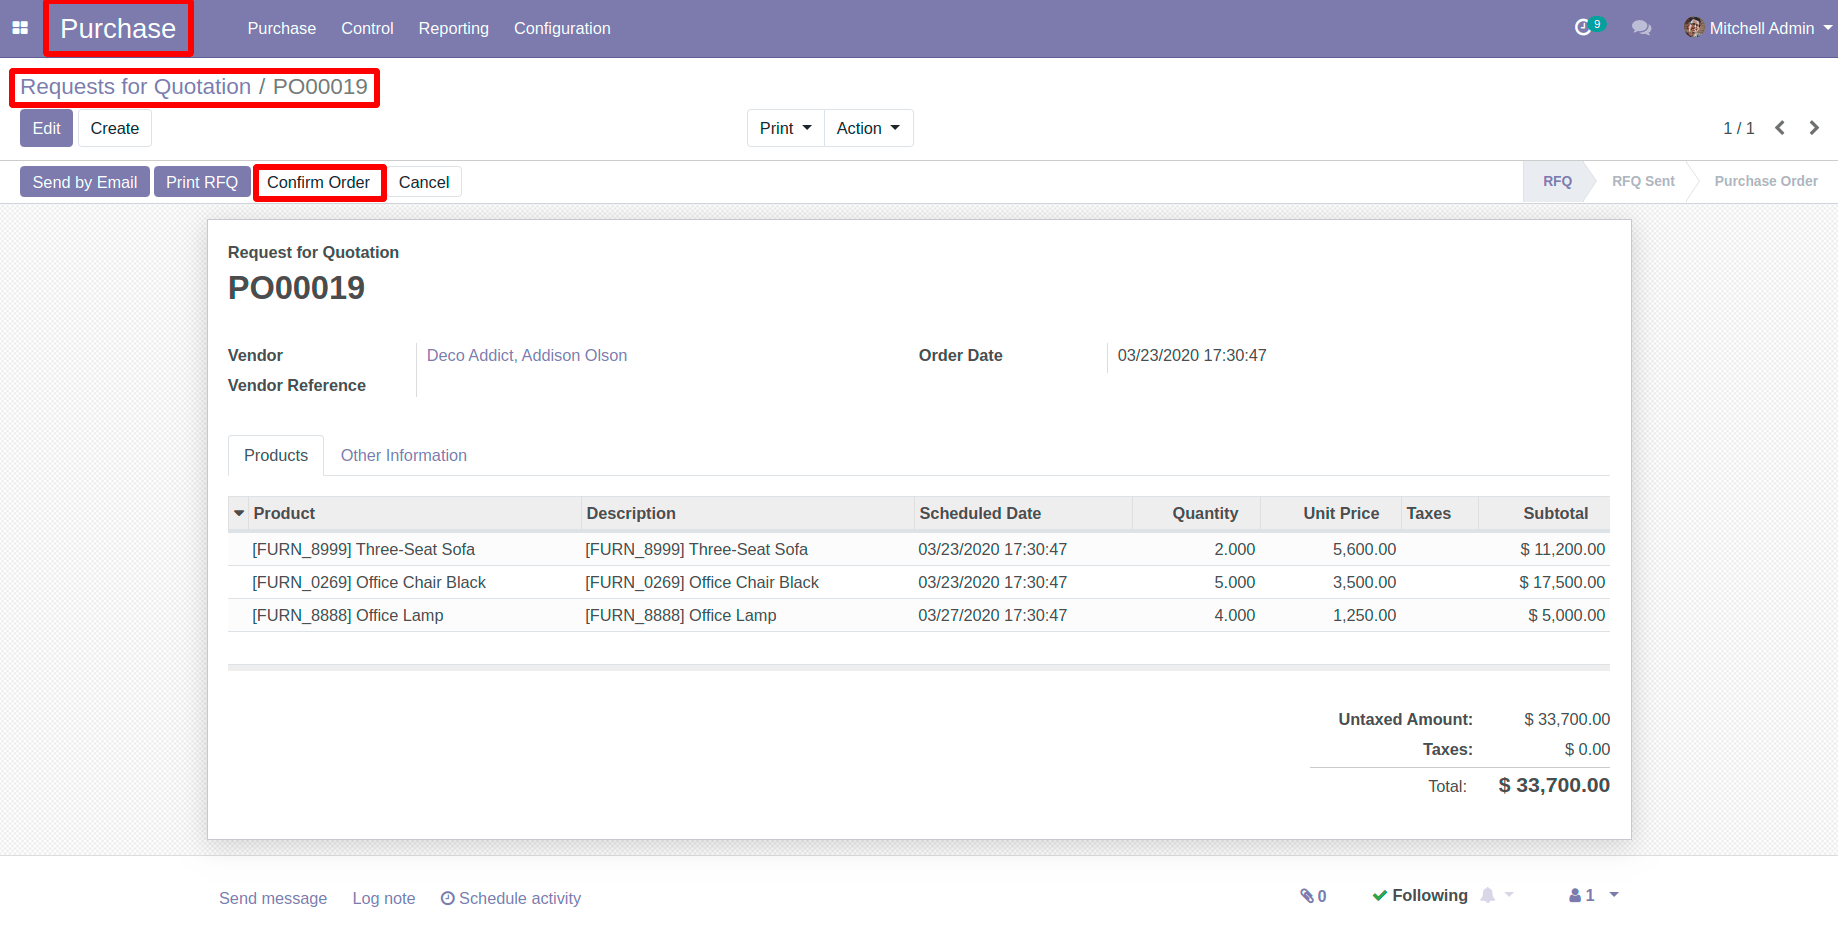
Now ,Create a Purchase Quotation with these products that we have configured recently And Confirm it.
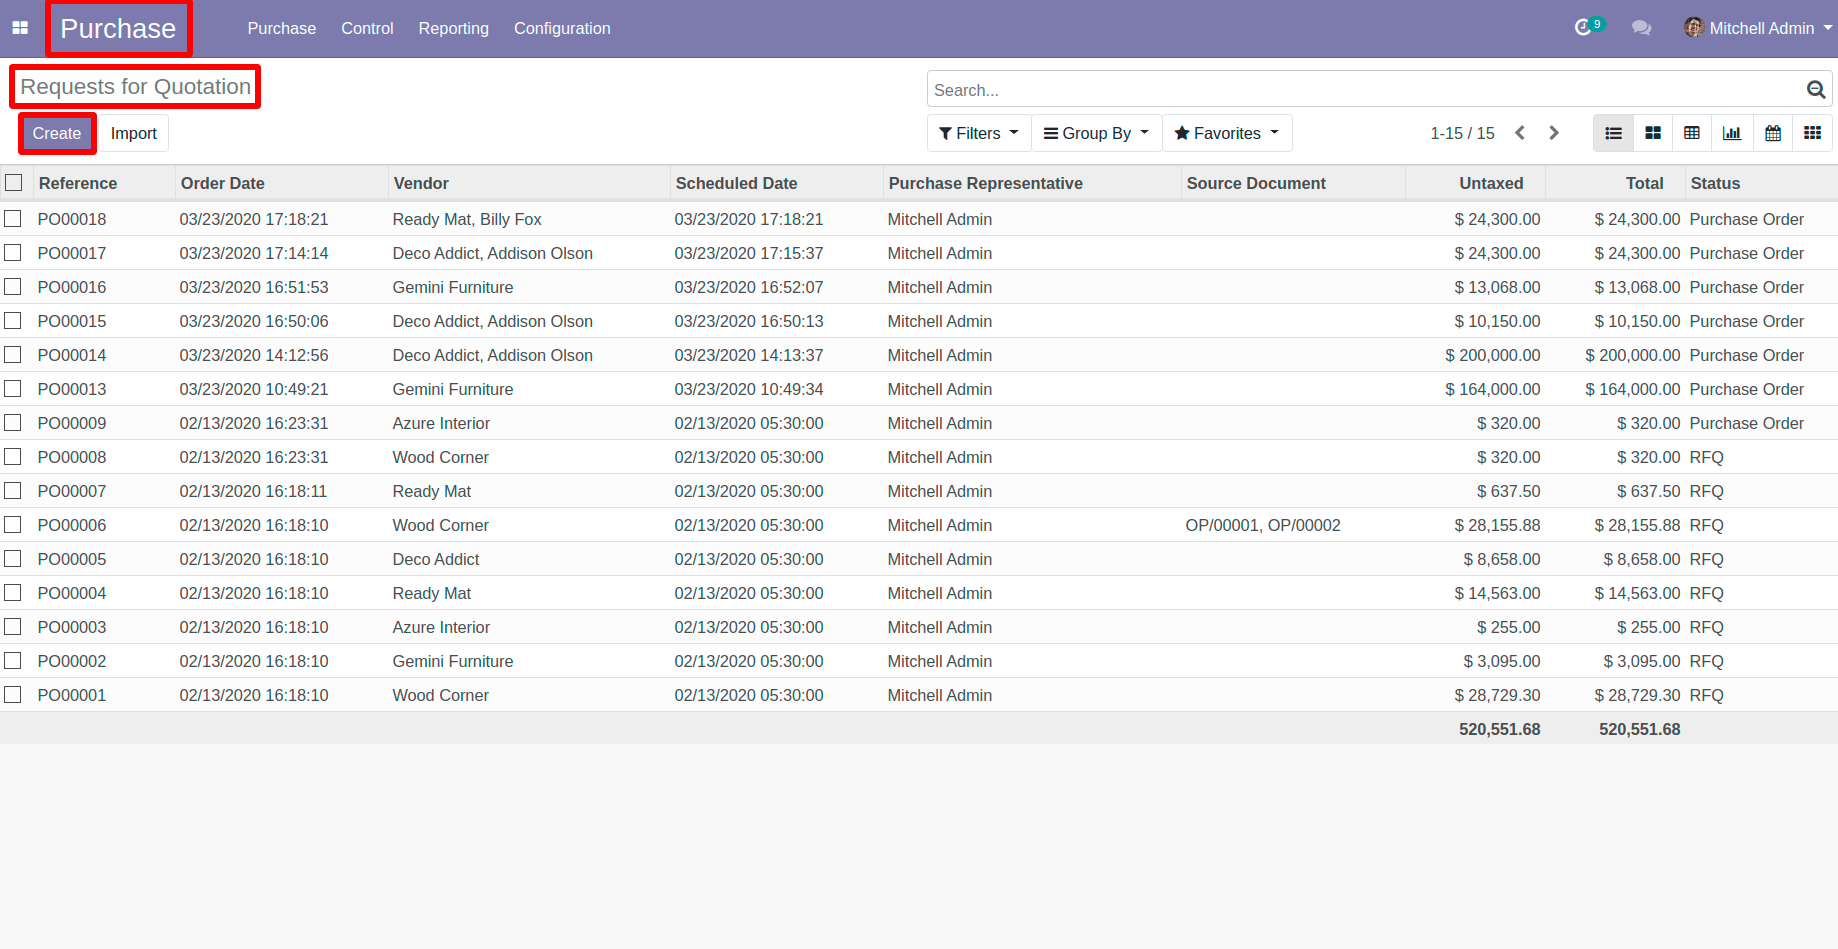
![Click on Create Button in Purchase Quotation in Odoo Click on Create Button in Purchase Quotation in Odoo](/cr_blogpost_image/static/src/img/553/content_images/6_content_image.png)
![Add Products in Line in Odoo Add Products in Line in Odoo](/cr_blogpost_image/static/src/img/553/content_images/7_content_image.png)
![Click on Confirm Order in Odoo Click on Confirm Order in Odoo](/cr_blogpost_image/static/src/img/553/content_images/8_content_image.png)
Now ,Go to your Purchase Quotation > Receipt
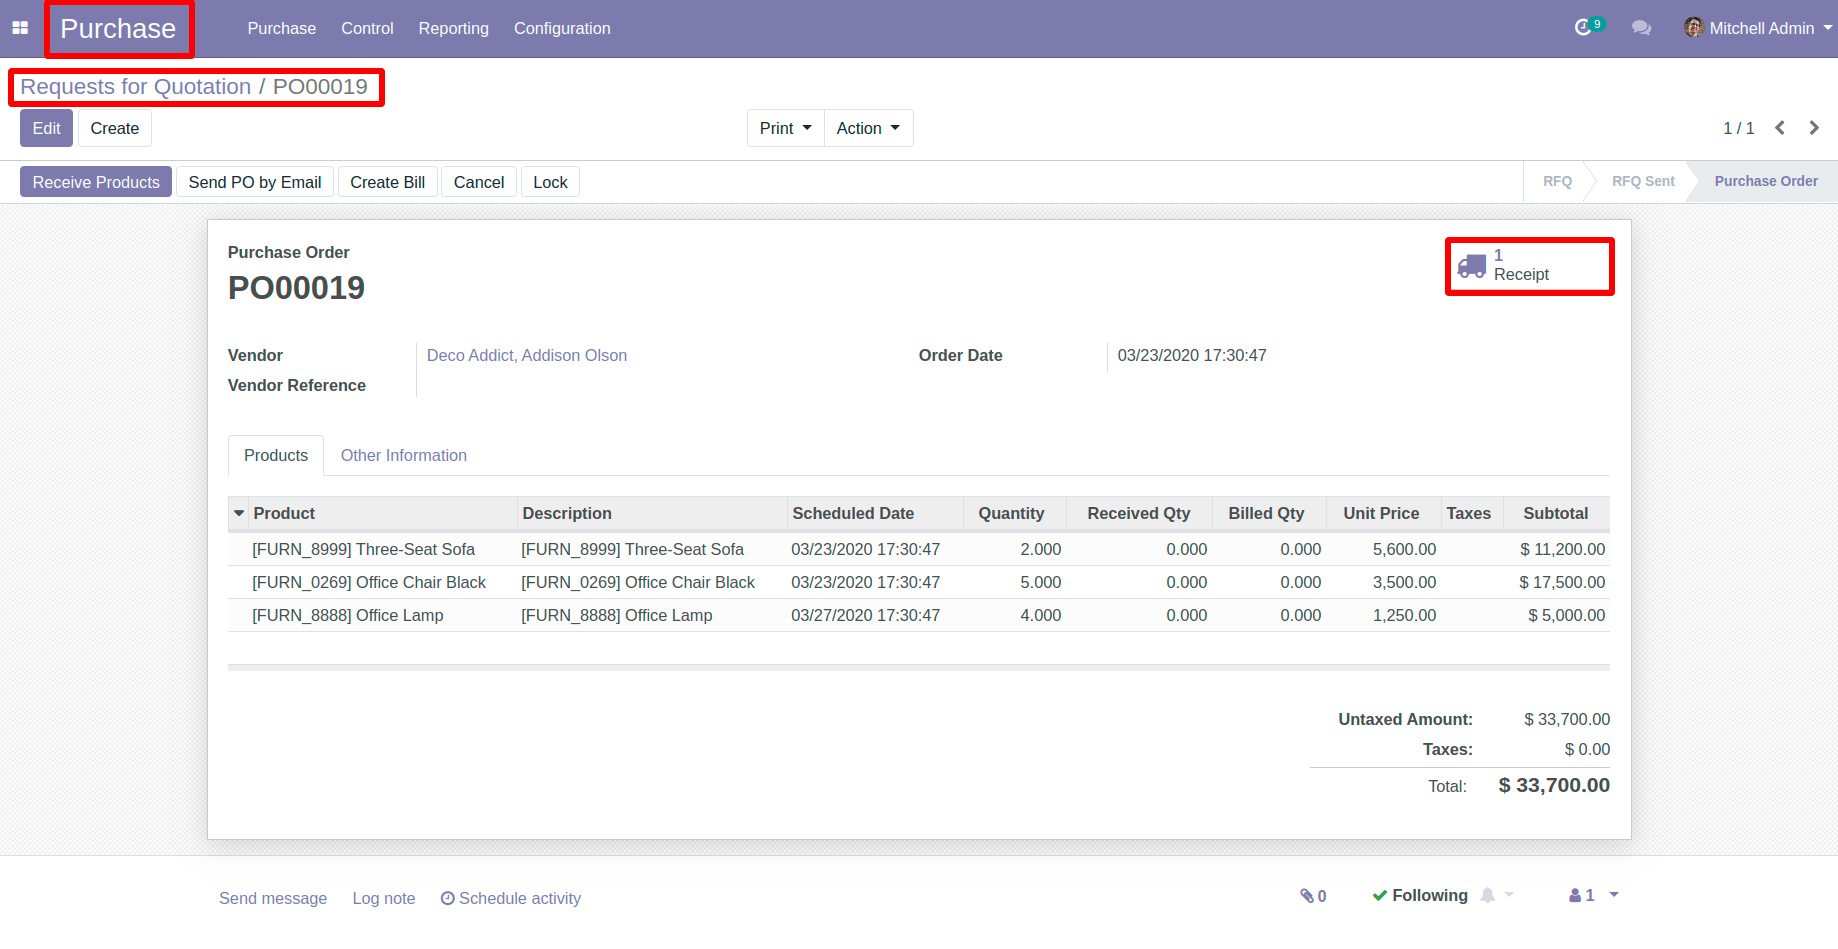
![Click on Receipt Smart Button in Odoo Click on Receipt Smart Button in Odoo](/cr_blogpost_image/static/src/img/553/content_images/9_content_image.png)
Now, Encode Done Quantity For Three-Sofa Seat Directly, Because Traceability was selected No Tracking
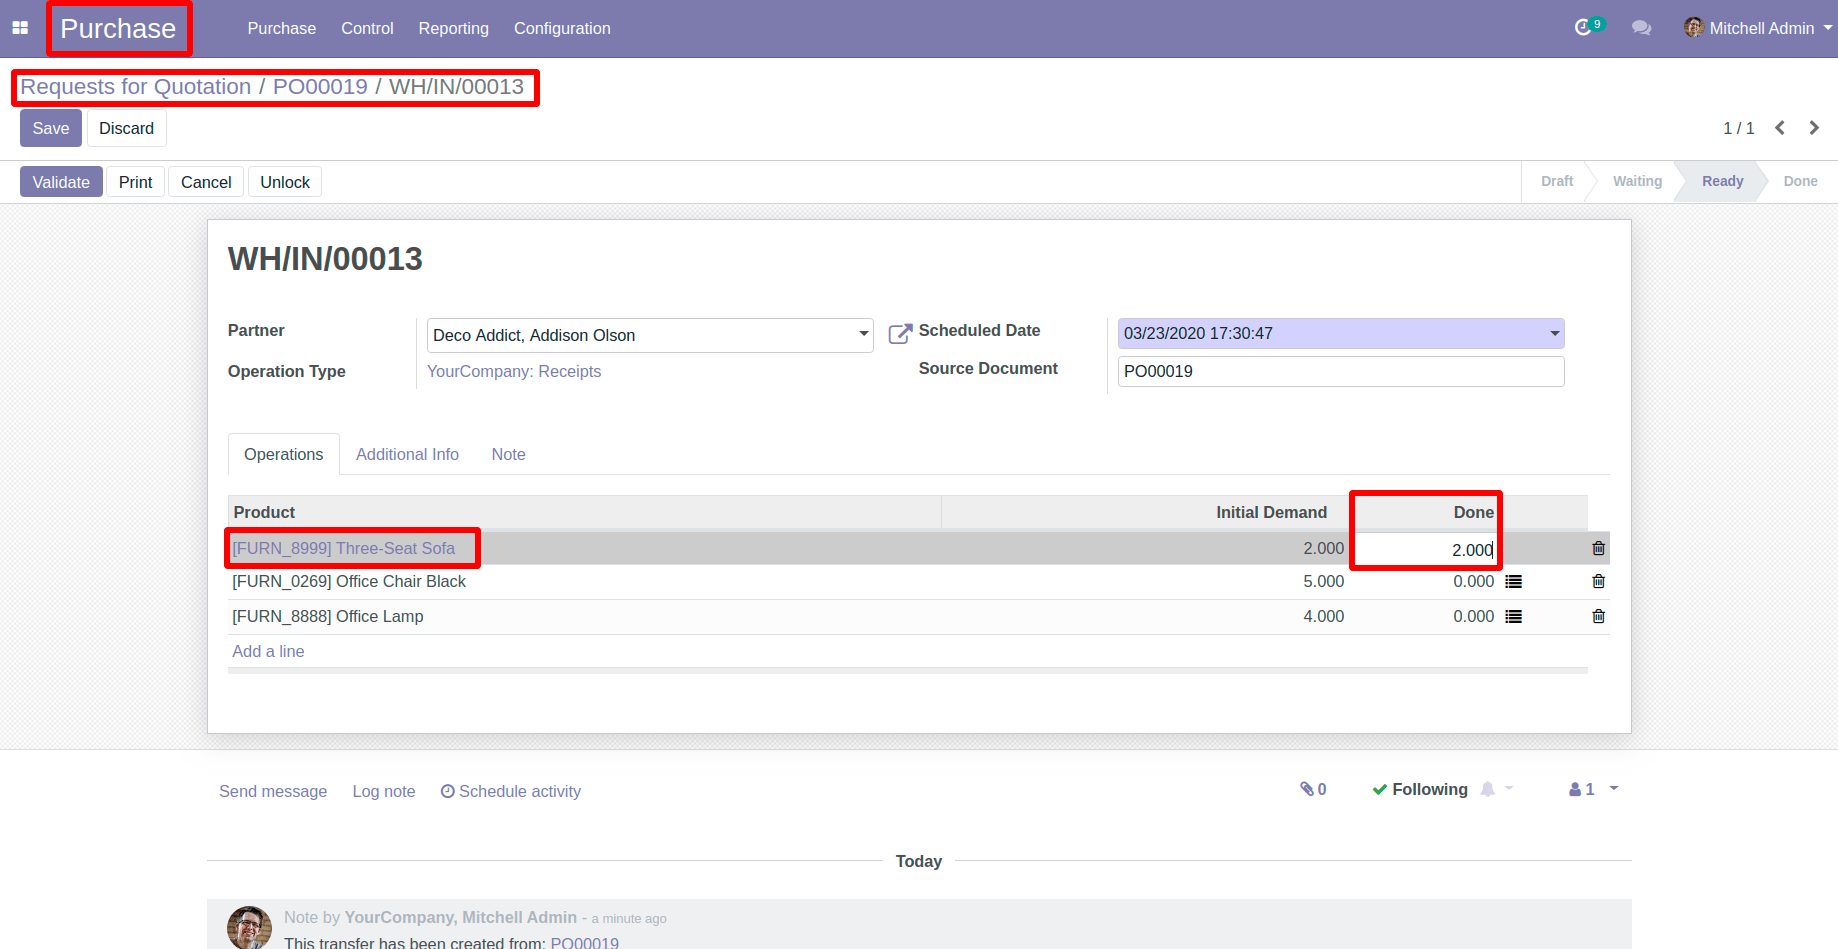
![Encode the Done Quantity for Product in Odoo Encode the Done Quantity for Product in Odoo](/cr_blogpost_image/static/src/img/553/content_images/10_content_image.png)
For Office Chair Product, Select on button as mentioned in below image
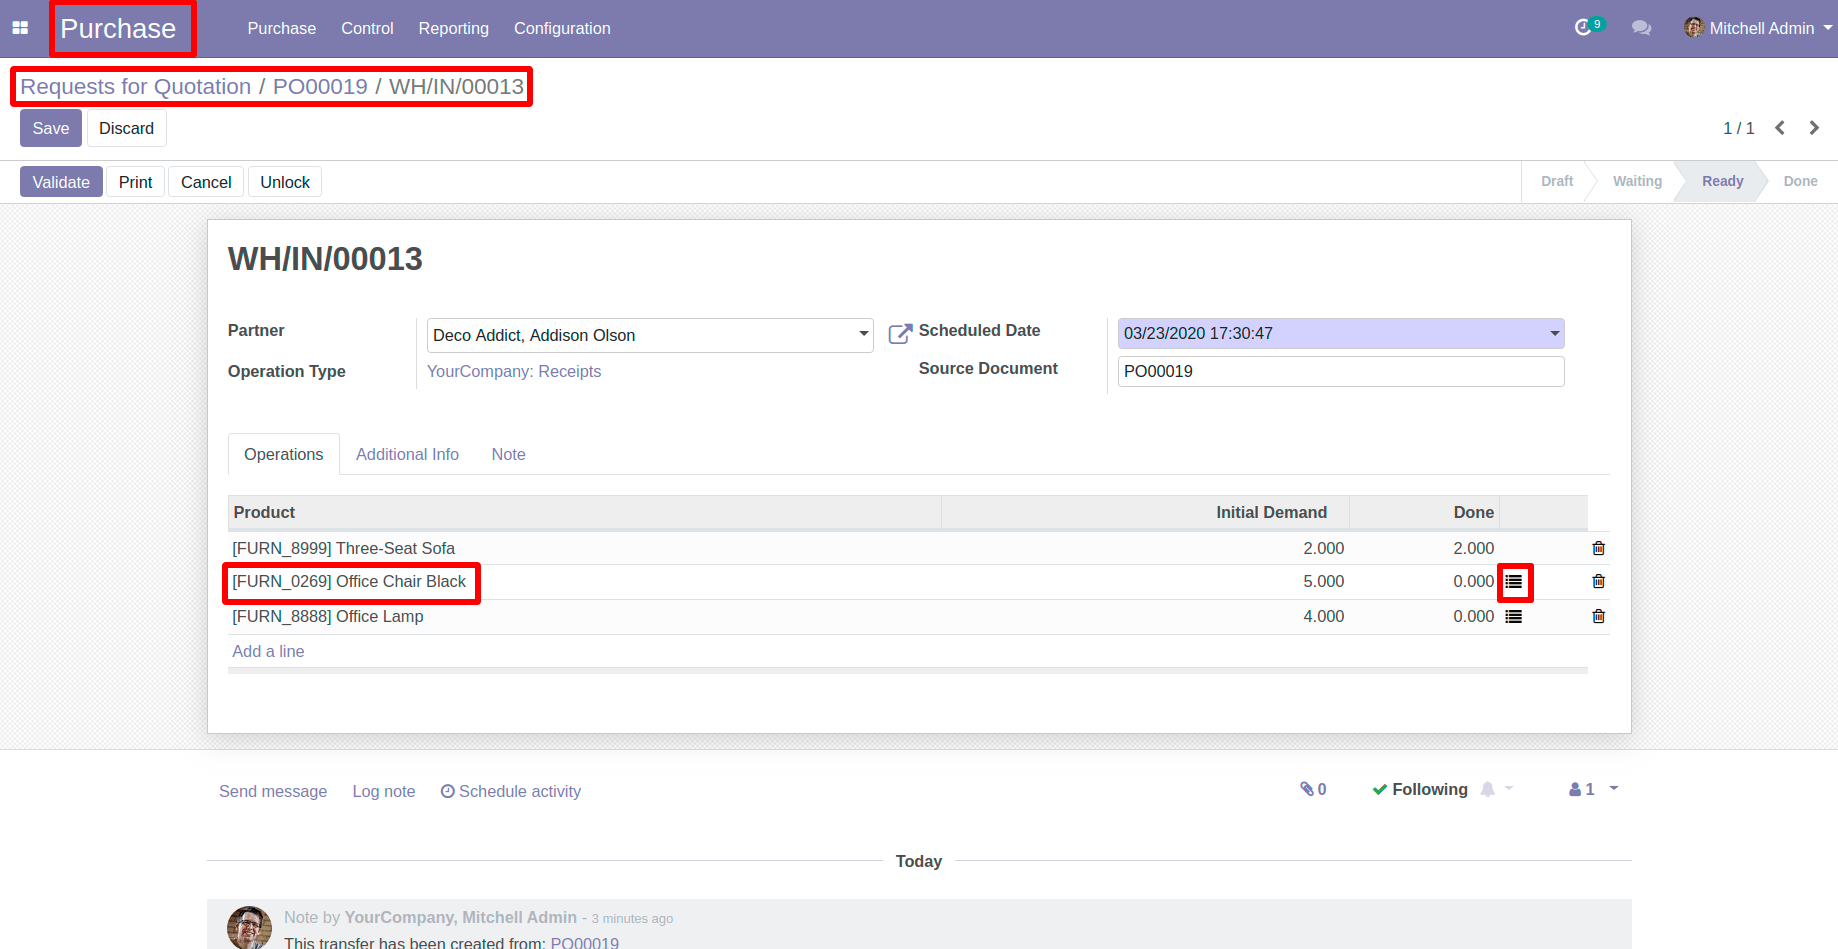
![Click on Button in Line in Odoo Click on Button in Line in Odoo](/cr_blogpost_image/static/src/img/553/content_images/11_content_image.png)
A new wizard will pop-up here create your product lot serial and encode done quantity manually and click on confirm button.
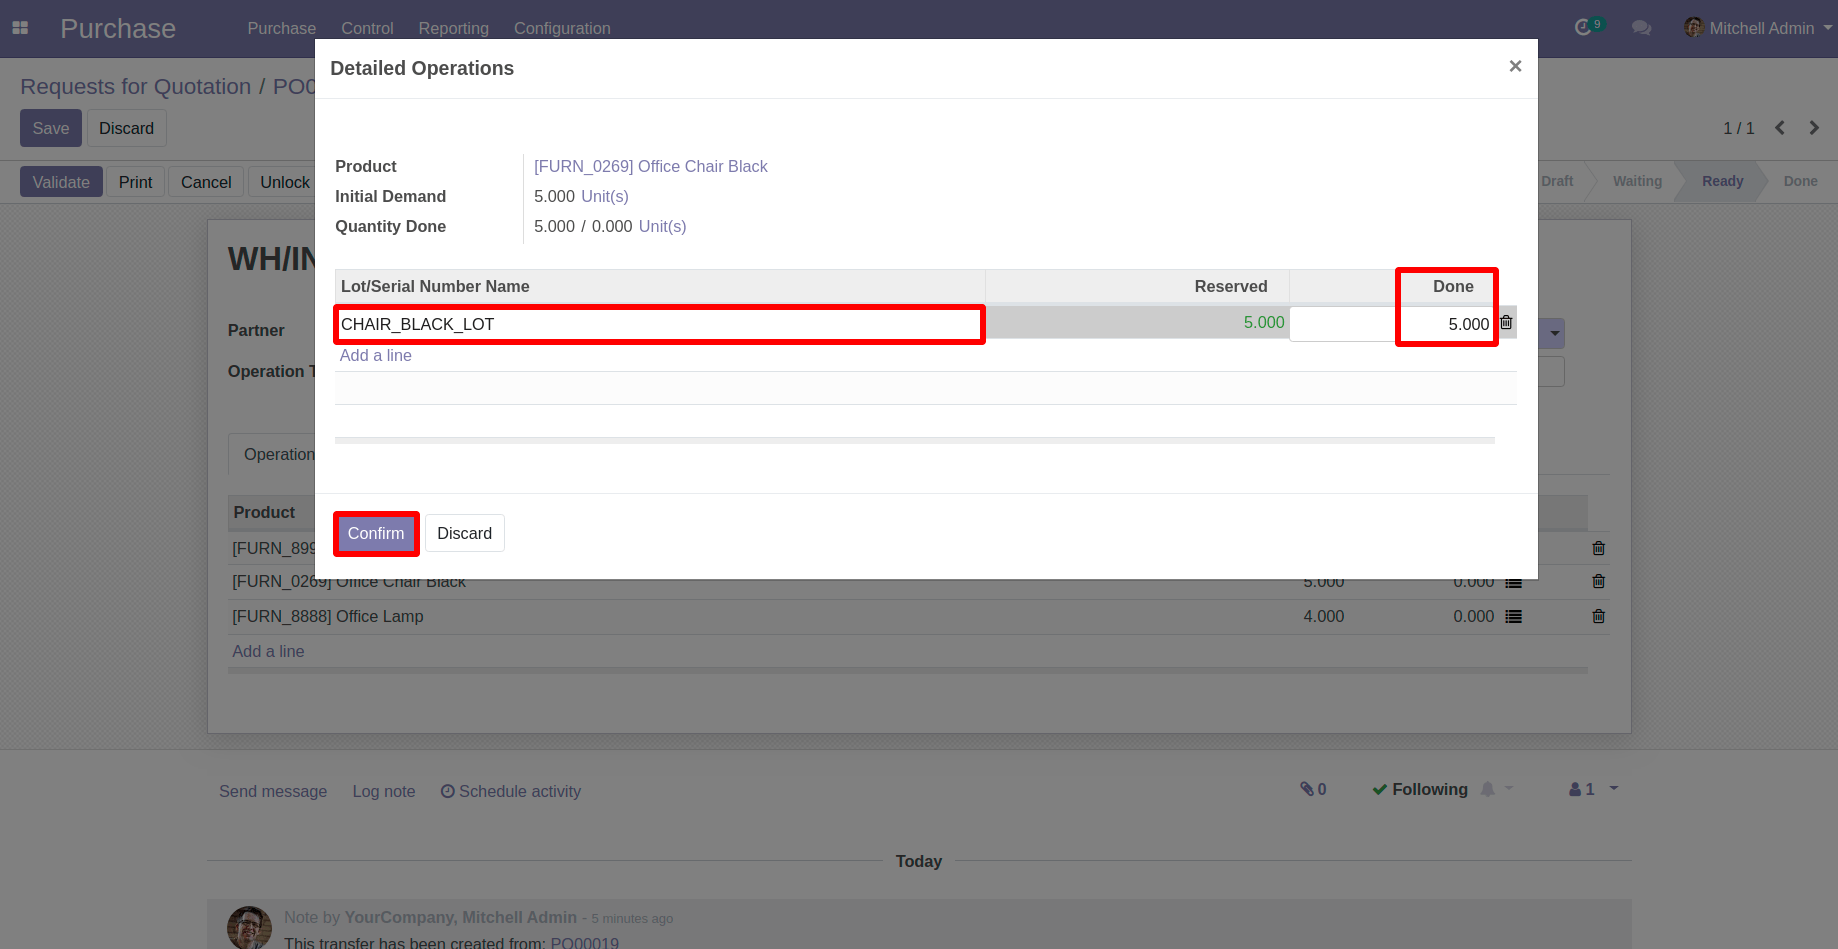
![Create Product with Done Quantity and Then click on Confirm Button in Odoo Create Product with Done Quantity and Then click on Confirm Button in Odoo](/cr_blogpost_image/static/src/img/553/content_images/12_content_image.png)
For Office Lamp, Select on button as mentioned in below image
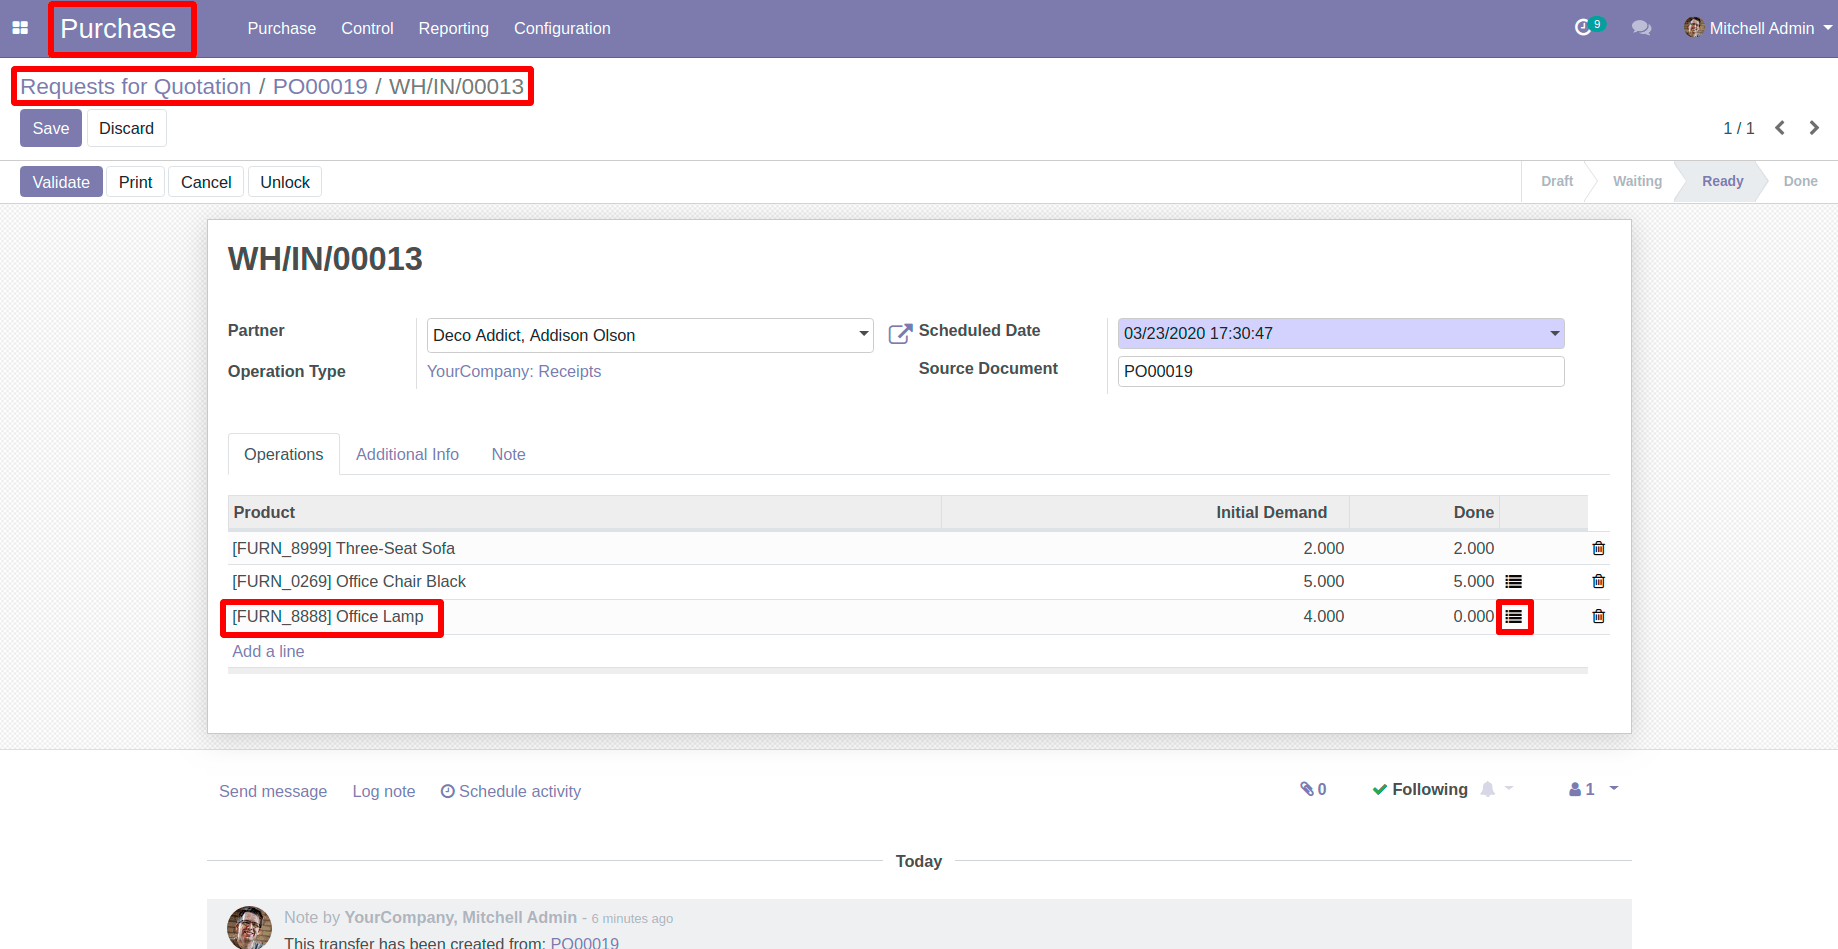
![Click On Button in Line in Odoo Click On Button in Line in Odoo](/cr_blogpost_image/static/src/img/553/content_images/13_content_image.png)
A new wizard will pop-up here then create your product lot serial ,and encode the done quantity then click on confirm button.
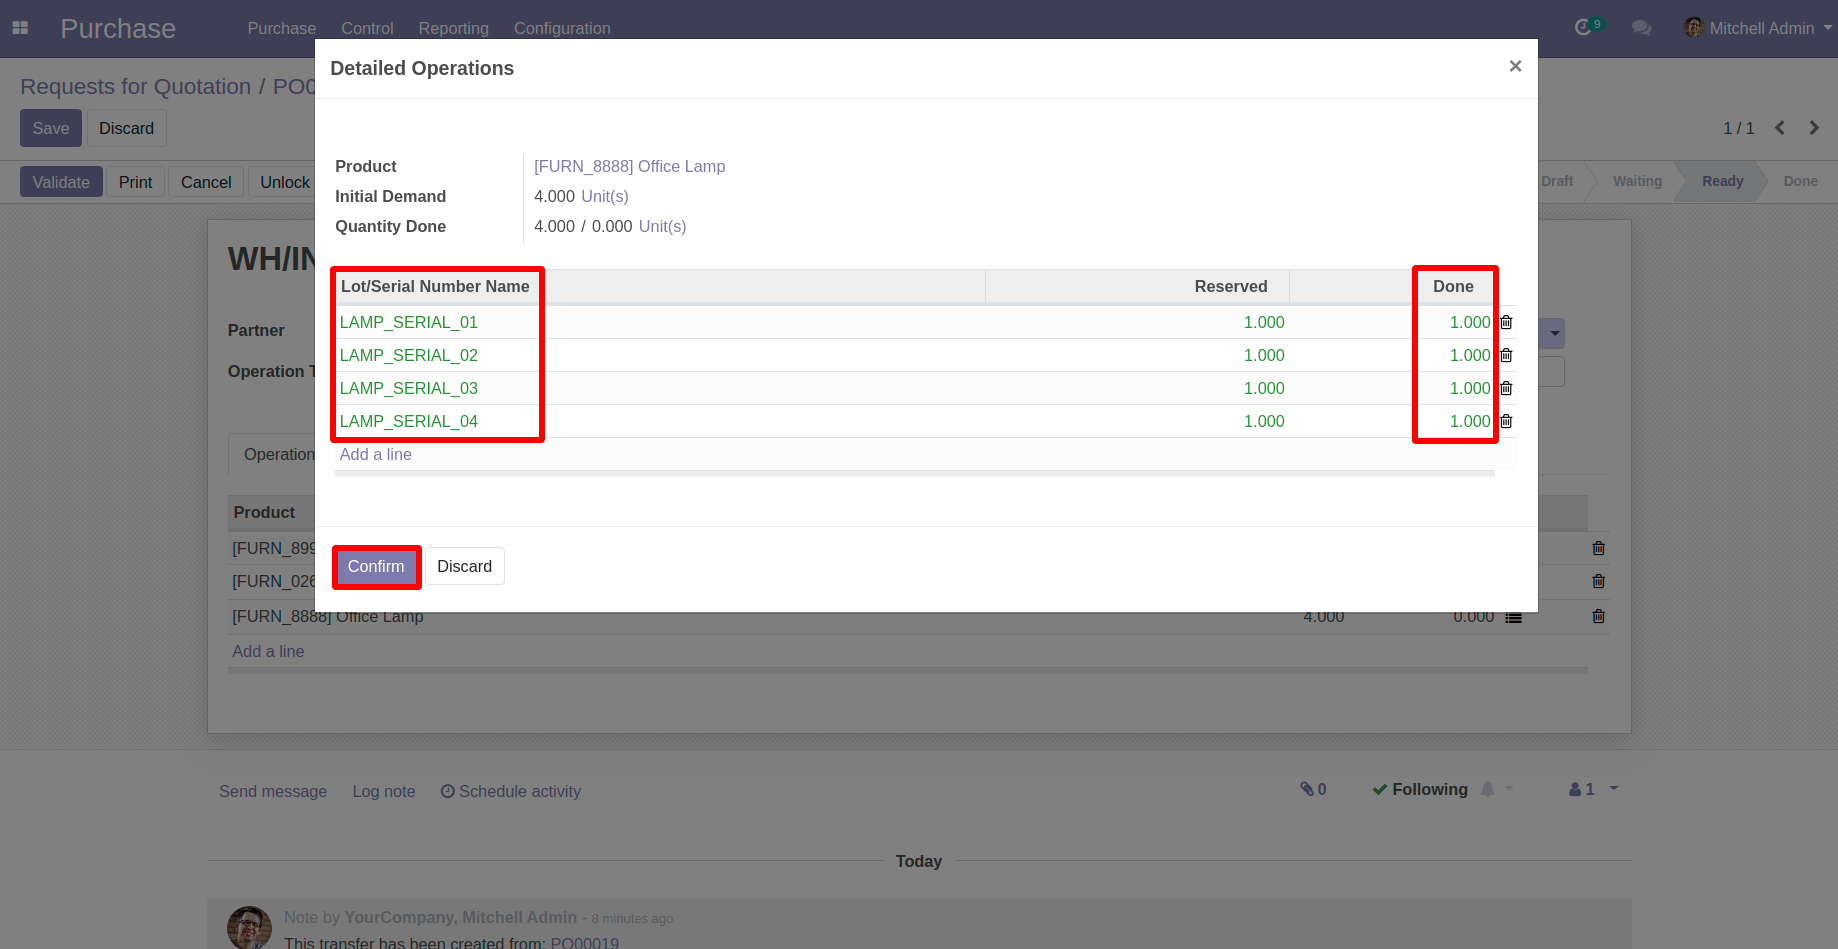
![Create a Product with Done Quantity in Odoo Create a Product with Done Quantity in Odoo](/cr_blogpost_image/static/src/img/553/content_images/14_content_image.png)
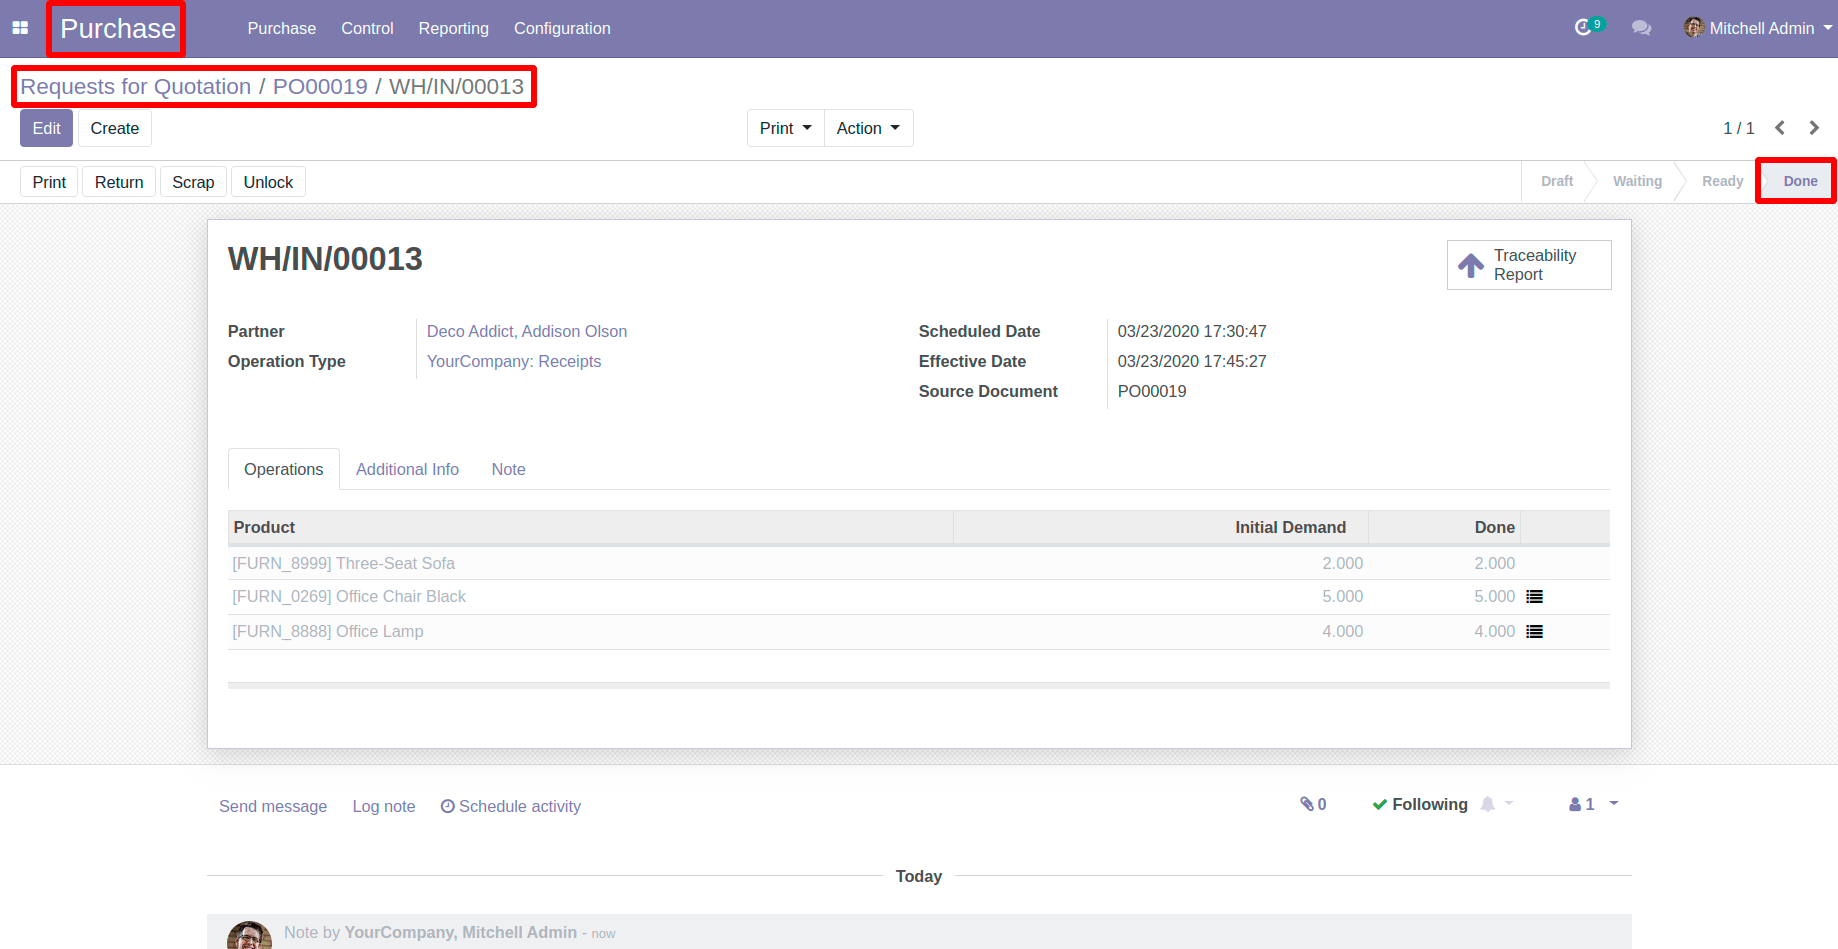
After Completing these processes then click on the Save button ,Then Validate button ,Your Receipt will get in done state.
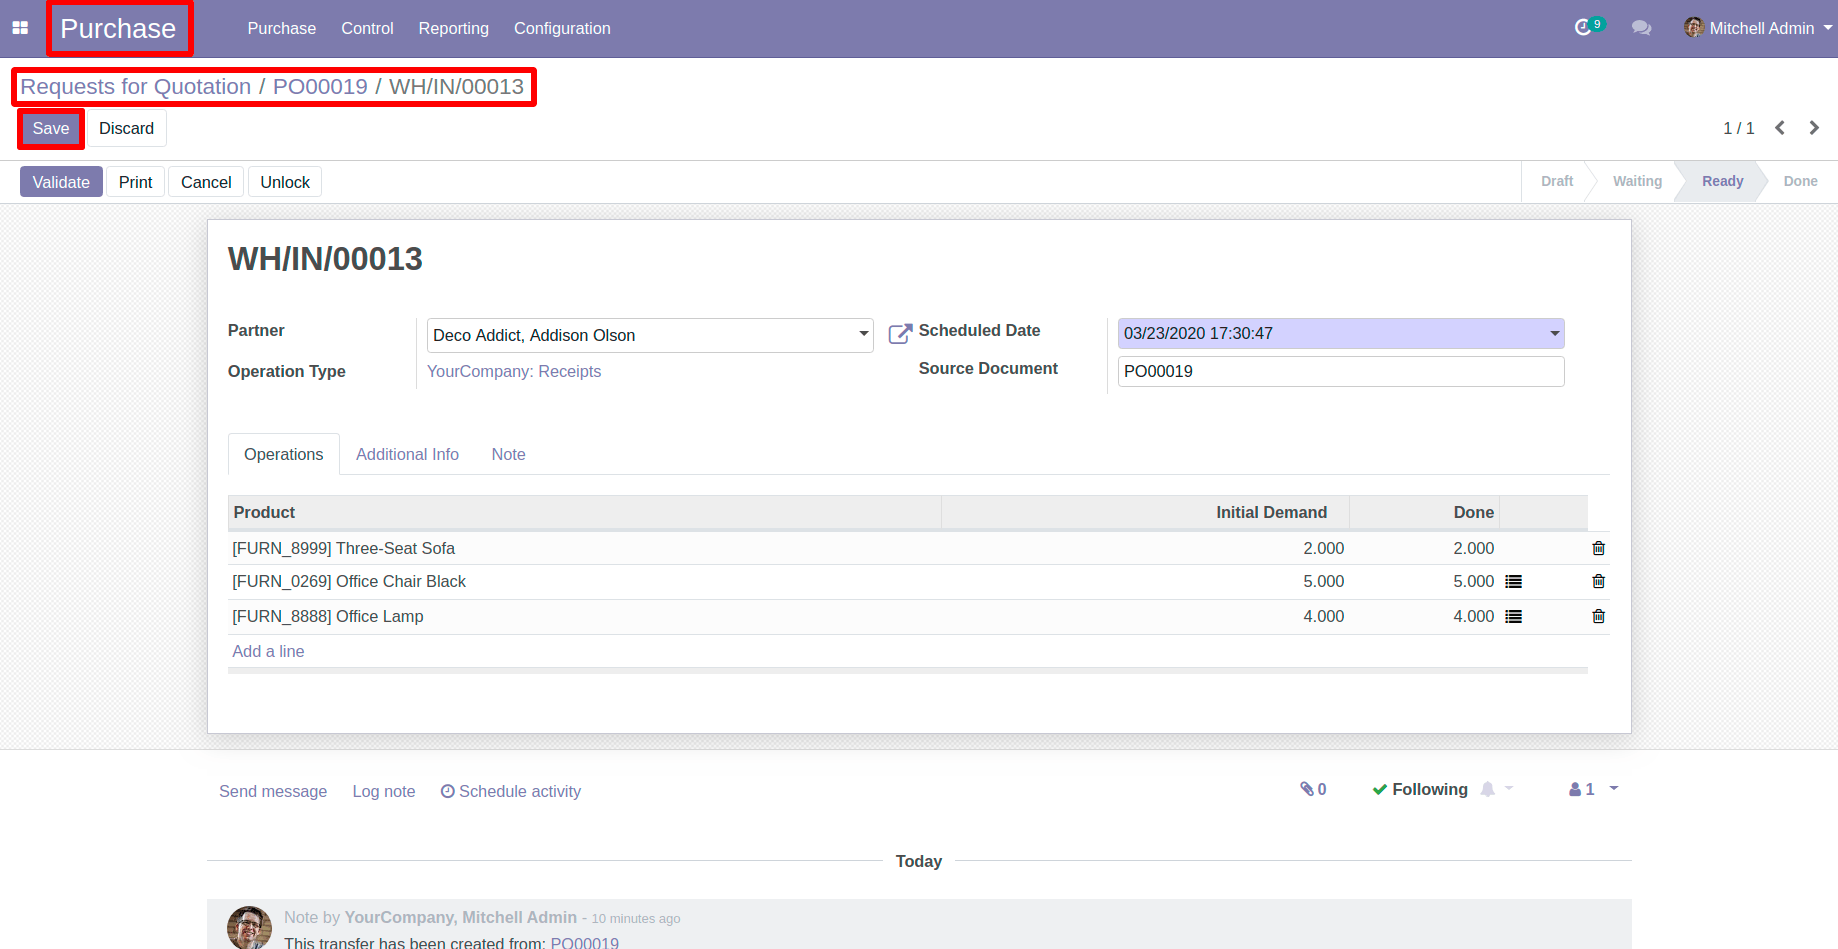
![Click on Save Button and Then Click on Validate Button in Odoo Click on Save Button and Then Click on Validate Button in Odoo](/cr_blogpost_image/static/src/img/553/content_images/15_content_image.png)
![State Will Changed to Done in Odoo State Will Changed to Done in Odoo](/cr_blogpost_image/static/src/img/553/content_images/16_content_image.png)
Related Post: