Odoo’s inventory management allows organizations to efficiently track and control inventory stock levels, monitor inventory movements, and improve inventory warehouse operations. In some warehouse management systems, recorded inventory counts may differ from real inventory counts.
This difference could be caused by damage, human mistakes, or other circumstances, so inventory adjustments are required to reconcile those variances and effectively maintain inventory counts.
In Odoo inventory, adding opening stock is critical for good inventory management. Opening Stock is the amount of inventory available at the start of a given period, such as the accounting period.
Accurate opening stock accounting is required for optimal inventory levels.
Importing opening stock: Quickly add existing inventory levels.
Importing inventory revisions: Easily update stock levels for better accuracy.
Manually entering large amounts of data into a database is inefficient. In such instances, importing bulk data can be the best option for increasing accuracy and efficiency.
Importing Product in Odoo 17
To import the opening stock of a new product in Odoo 17, first import the product we want to include in the opening stock. To import the product, first download the product template. Navigate to the Inventory app. What about products?
Choose the list view of the product page. The list view displays the page in a tree or tabular structure, allowing us to pick data for numerous products at the same time.
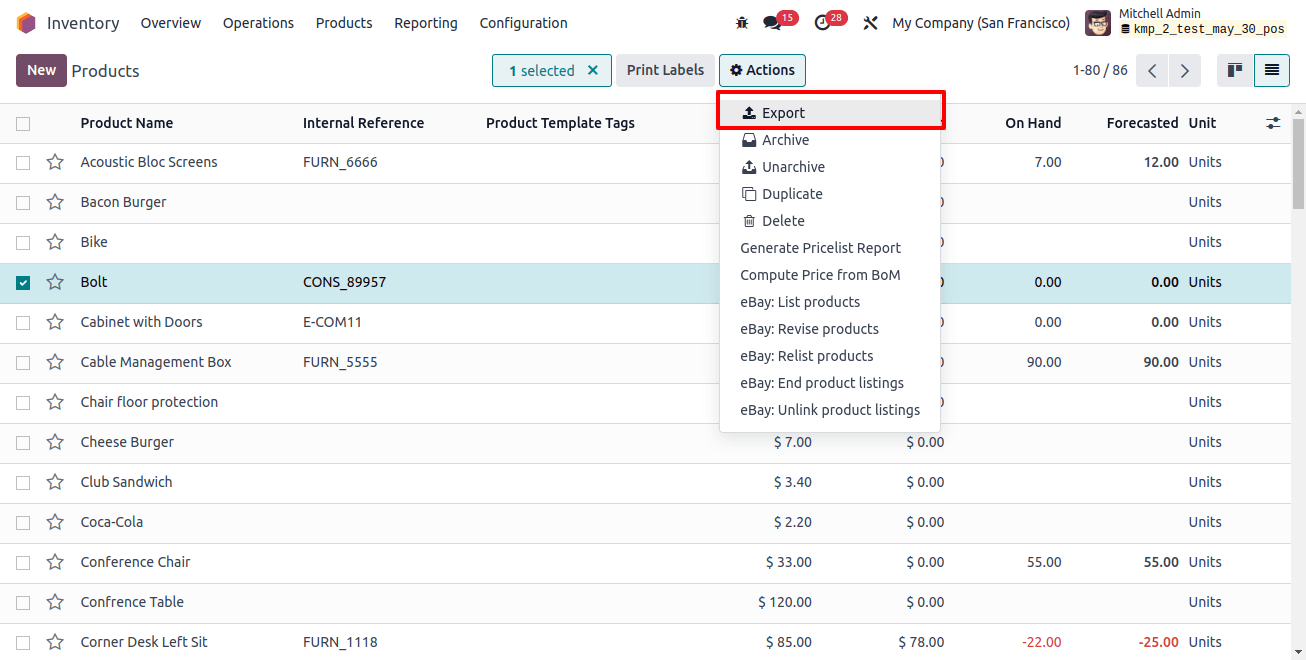
We can select a product and then click the Actions button to expose the Export option, which allows us to add the desired fields to the template and download it. To export the product, select the export option and download the import template.
When we click Export, a new window opens, with available fields on the left and fields to export on the right. By clicking on the Add icon, we can select the fields that we wish to export and add them to the export area. A name can be given to the template to save it, and this template can be used several times while exporting data.
There is also an option called I Want to Update Data (import-compatible Export). If we select this option, only fields that can be imported will be displayed.
If we wish to change any existing data, we may add an external ID field to the file we're exporting to specify which data needs to be updated, and when we import the data, Odoo maps the field to the unique ID we gave.
When the box is left unchecked, all of the fields are displayed, not only those that can be imported, providing you with a much wider range of field selections.
We can export in two formats:
.csv and .xlsx. To reveal more sub-field possibilities for each field, click the > (right arrow) button, then use the search bar to select specific fields. We can also drag the fields into the desired order in the generated file and delete unneeded fields using the trash icon.
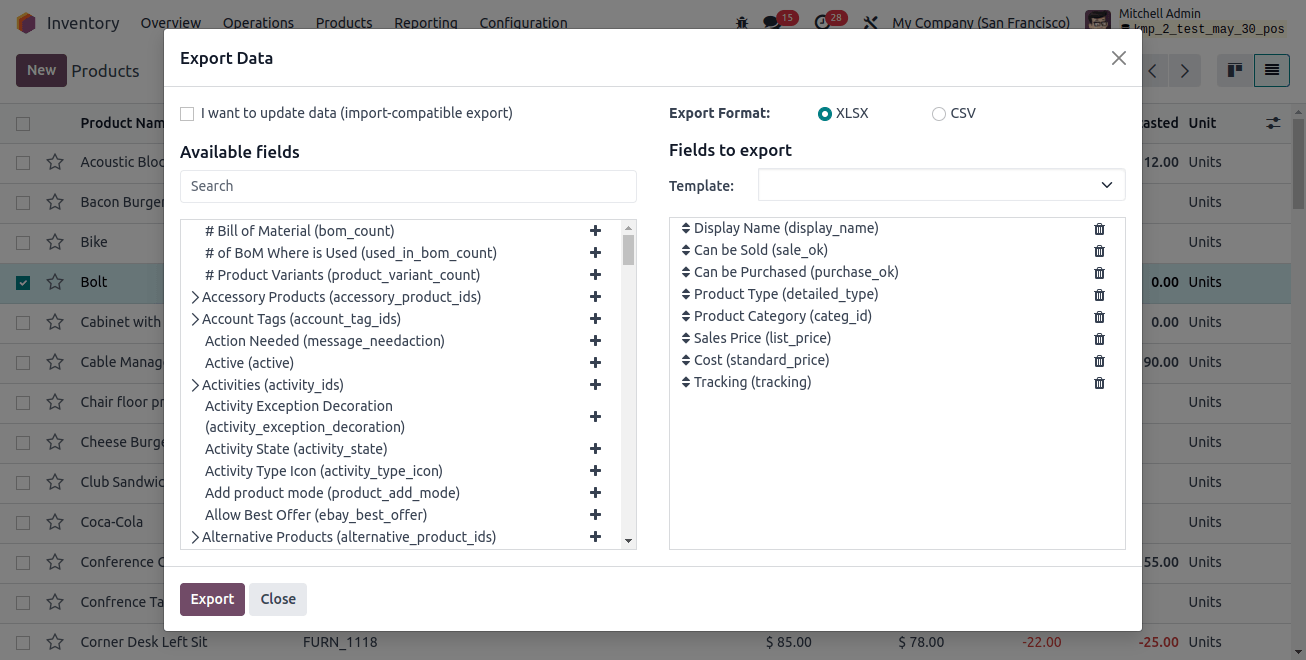
We can add the following fields to export:
Display name: This is the product's display name.
Can be Sold: A boolean field. We can give 1 if the product can be sold, and 0 otherwise.
Can be purchased: This is a boolean value. We can give 1 if the product is available for purchase, and 0 otherwise.
Product type categorizes Products based on their properties, such as storability or consumability.
Product category: Organizes and categorizes products based on shared characteristics and features.
Sales price: This is the price used to sell the goods.
Cost: This is the price paid when purchasing the product.
Tracking: This field allows you to specify whether the product is tracked by lot, unique serial number, or no tracking at all.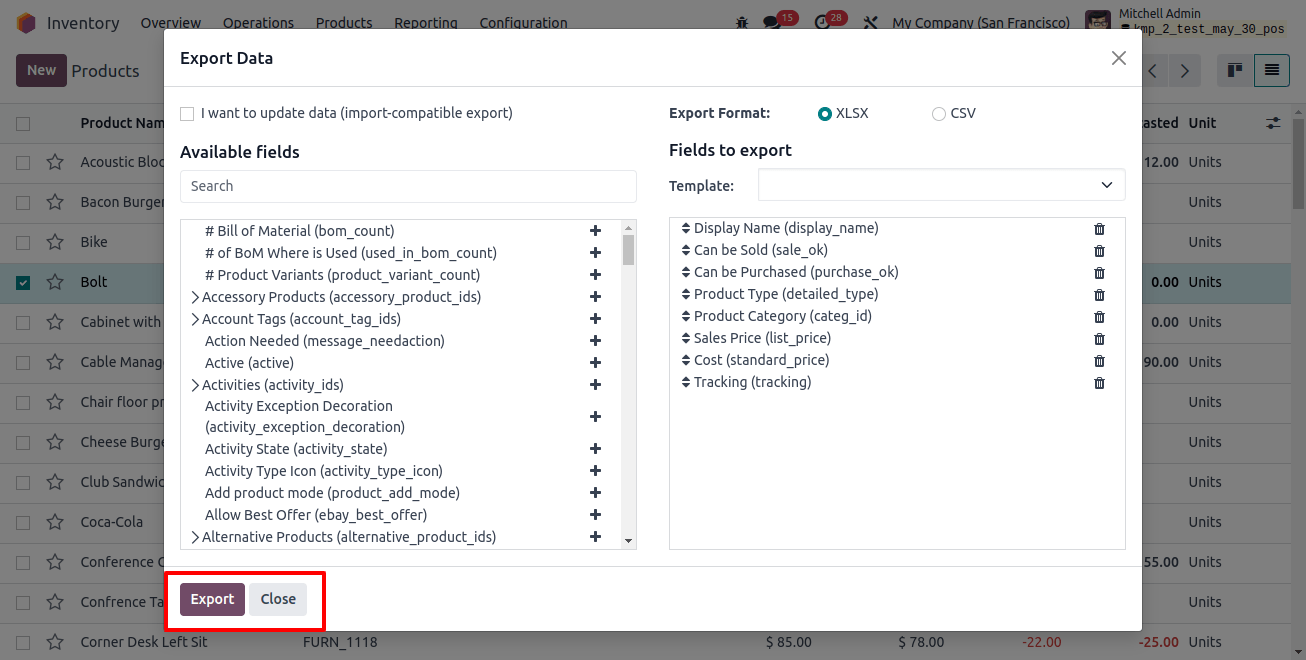
After adding the fields to export, click the Export button to export the template and amend it as needed.

After modifying the product template spreadsheet, we may return to the products page, click the gear icon?? in the upper left corner, and choose import records.
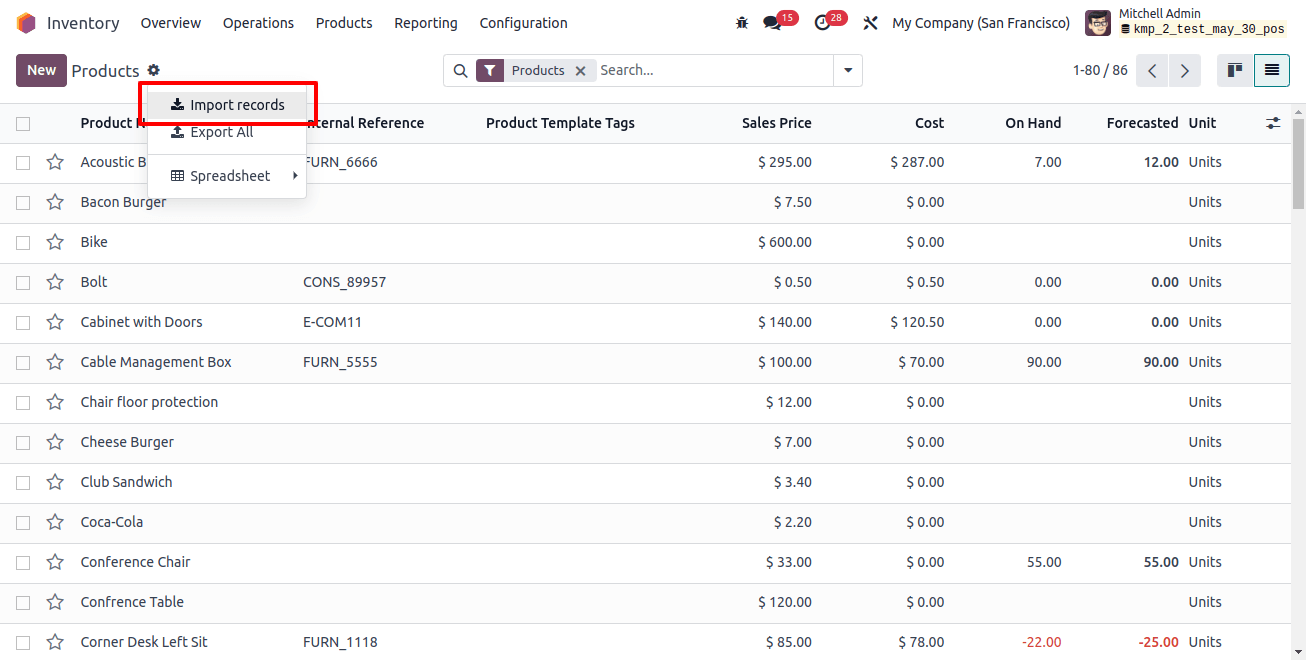
A window emerges, and at the top left, we can upload the file from our system.
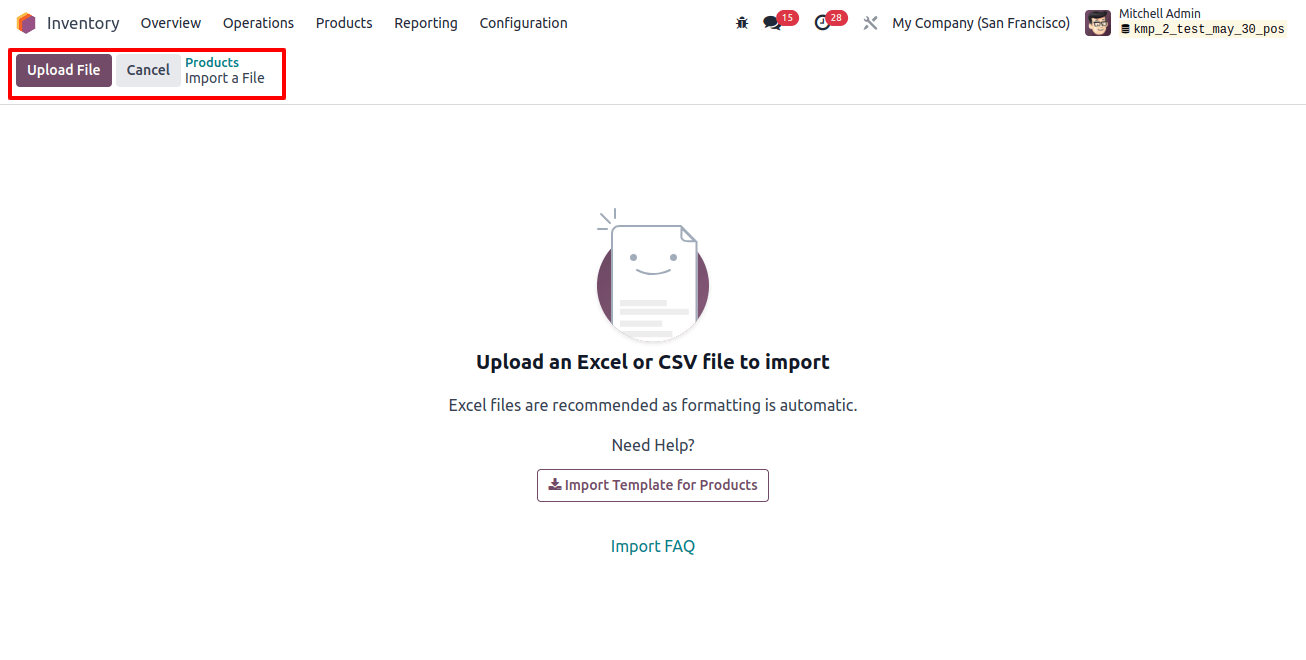
After uploading the file, a page with all of the elements of the newly configured vendor template spreadsheet, including the File Column, Odoo Field, and Comments, appears.
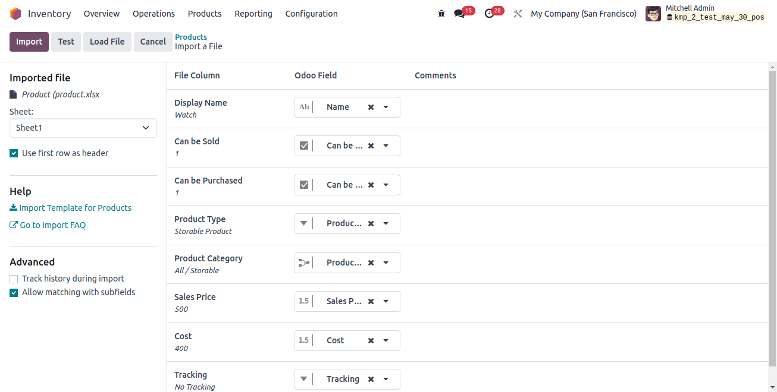
From this page, we may manually assign the file column to the Odoo Field if necessary, and then click the Test button in the upper-left corner to ensure that all columns and fields are properly aligned.
If everything is applied correctly, a blue banner appears at the top of the page, telling the user that everything appears to be valid.
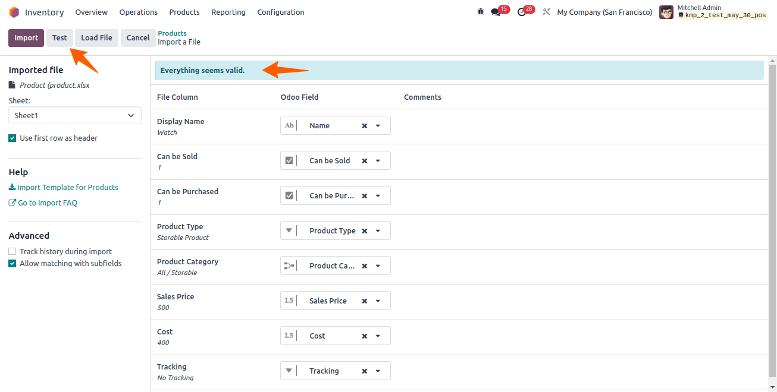
If any issues prohibit the records from being imported, a red banner will appear at the top of the page, along with advice on how to discover and correct the individual errors.
When all of the errors have been corrected, we may click the test button and then the Import button to import the records.
When the records are imported, a pop-up notification appears in the upper-right corner, informing the user of the number of products successfully imported.
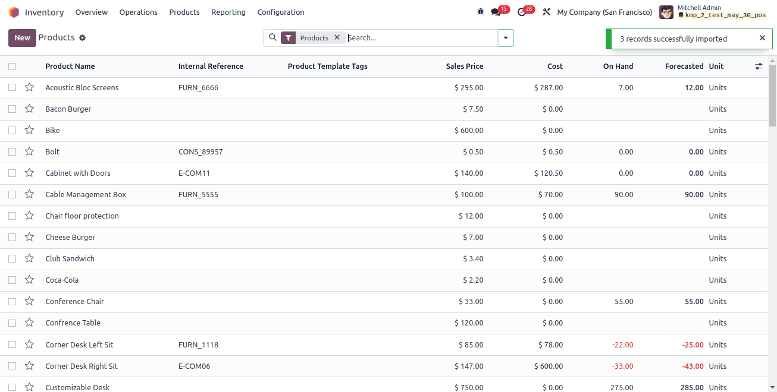
We will be able to examine all freshly imported products and update them from the products page.
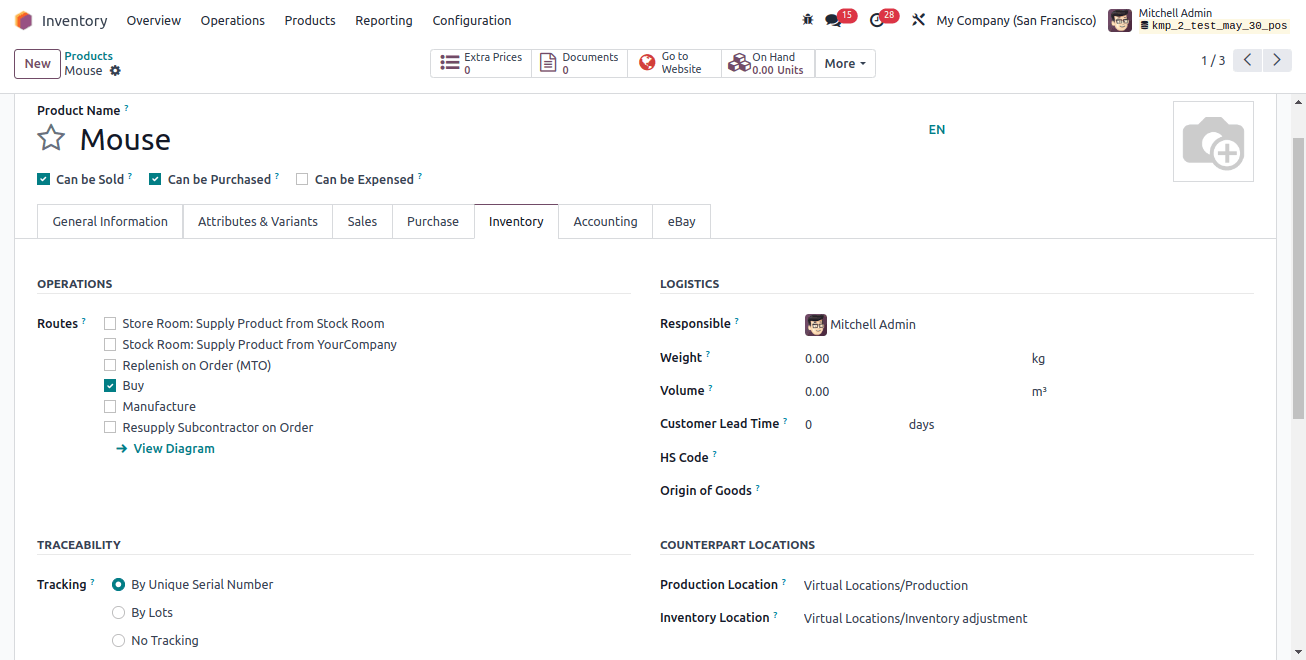
Import lots or serial numbers.
Since the product provides tracking information by serial number or lot number, we must import the predetermined serial number and lot number into Odoo before adding the opening stock.
Only then will we be able to specify the lot or serial number when importing opening stocks?
We may now import the product's lot/serial number. Navigate to the Inventory app. What about products? Lot/serial number.
Select a record to export, then click the Actions button to access the Export option.
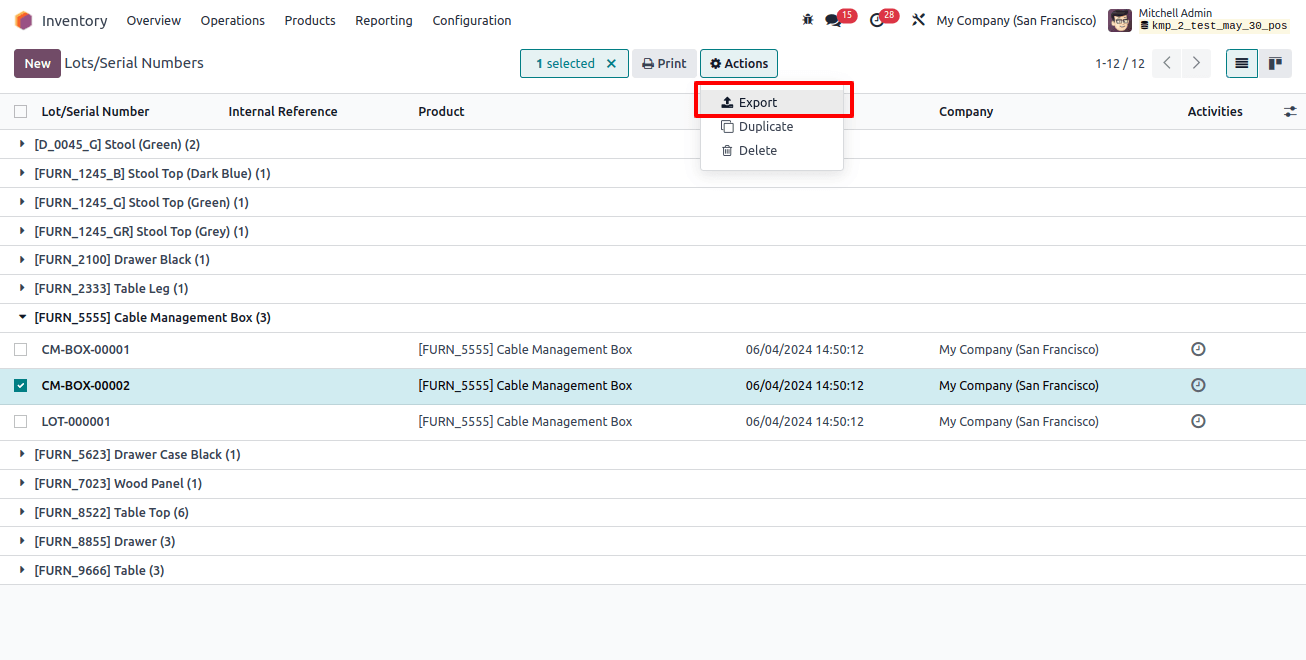
When you click Export, a new window emerges, with available fields on the left and exportable fields on the right.
By clicking on the Add icon, we can select the fields that we wish to export and add them to the export area.
A name can be given to the template to save it, and this template can be used several times while exporting data.
To import the lot and serial number, we can add the following fields to the export:
*Lots/Serial number: The product's lot or serial number.
*Product: Name of the product.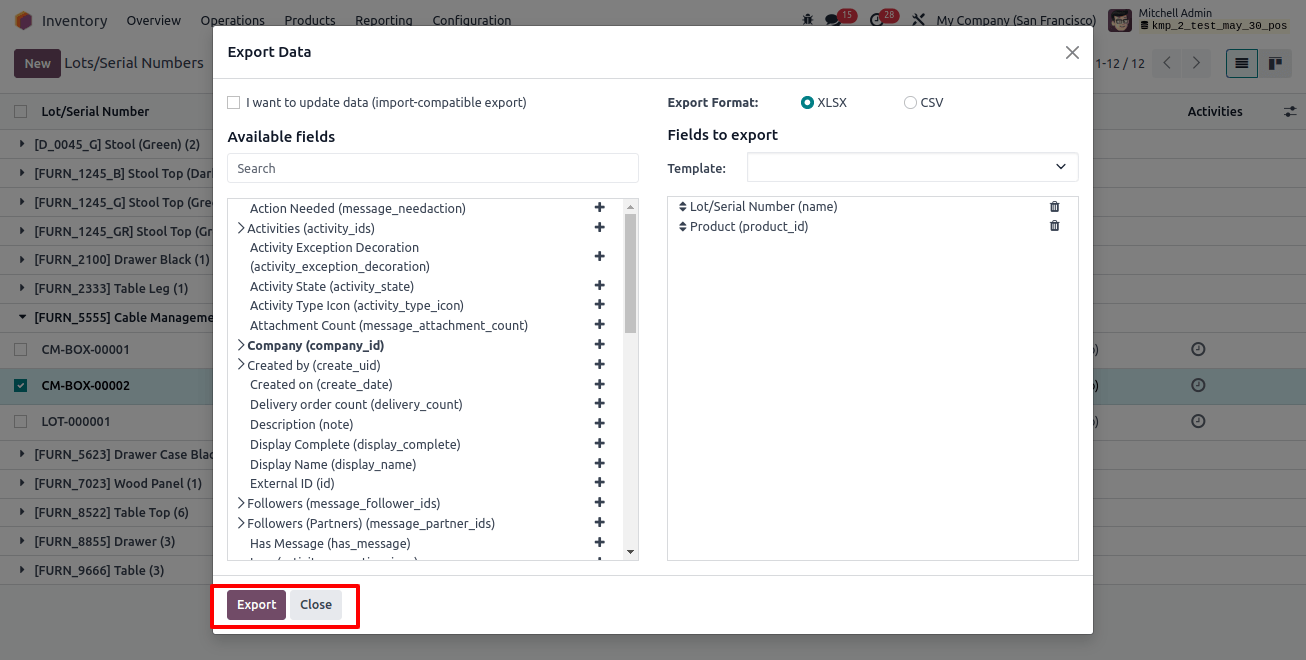
After we've added all of the fields for export, we can click the export option to save the template and change it as needed.

After we've finished changing the Lots/Serial number template spreadsheet, we can return to the Lots/Serial number page and select Import records by clicking the gear icon?? in the upper left corner.
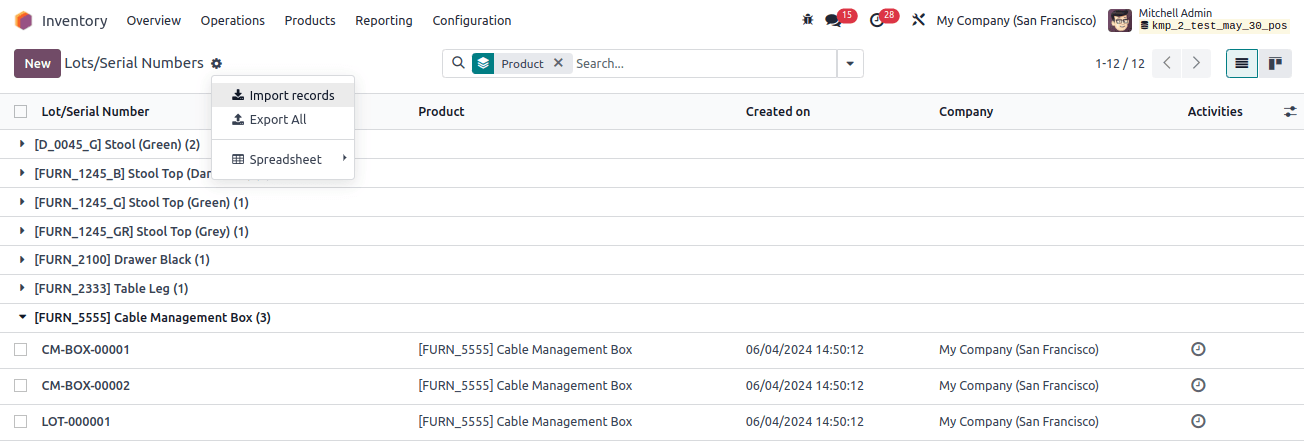
A window emerges, and at the top left, we can upload the file from our system.
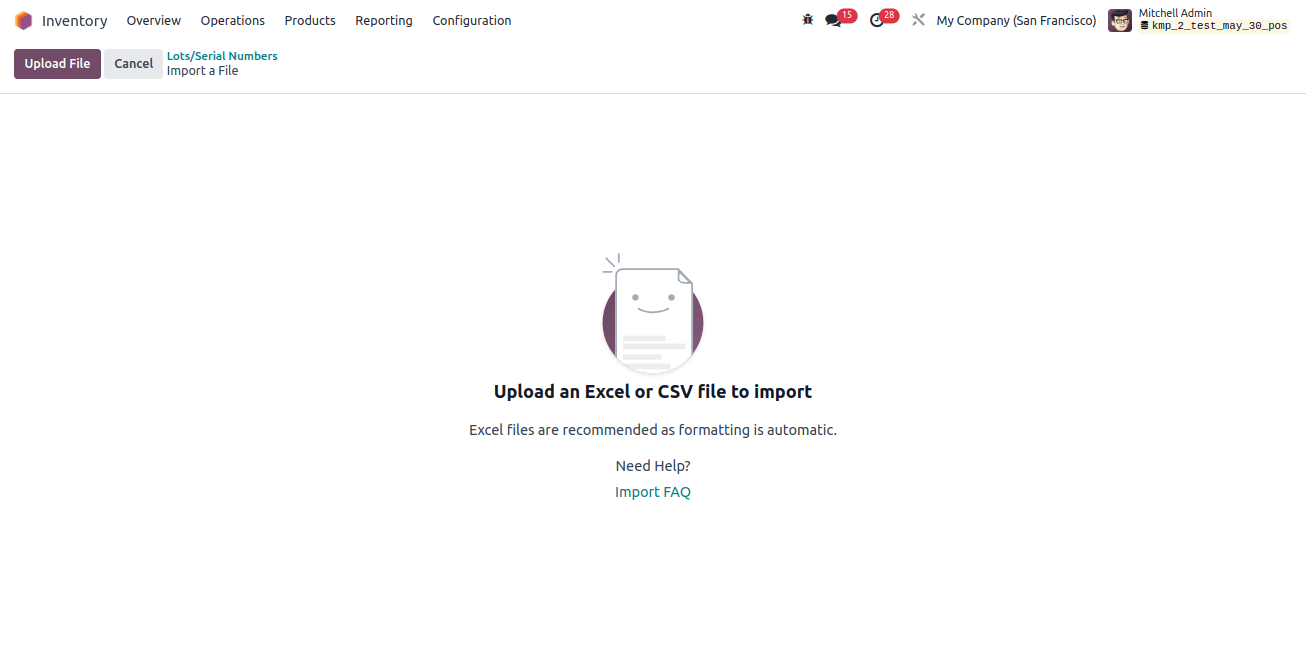
After uploading the file, a page with all of the elements of the newly configured Lots/Serial numbers template spreadsheet displays, separated by File Column, Odoo Field, and Comments.
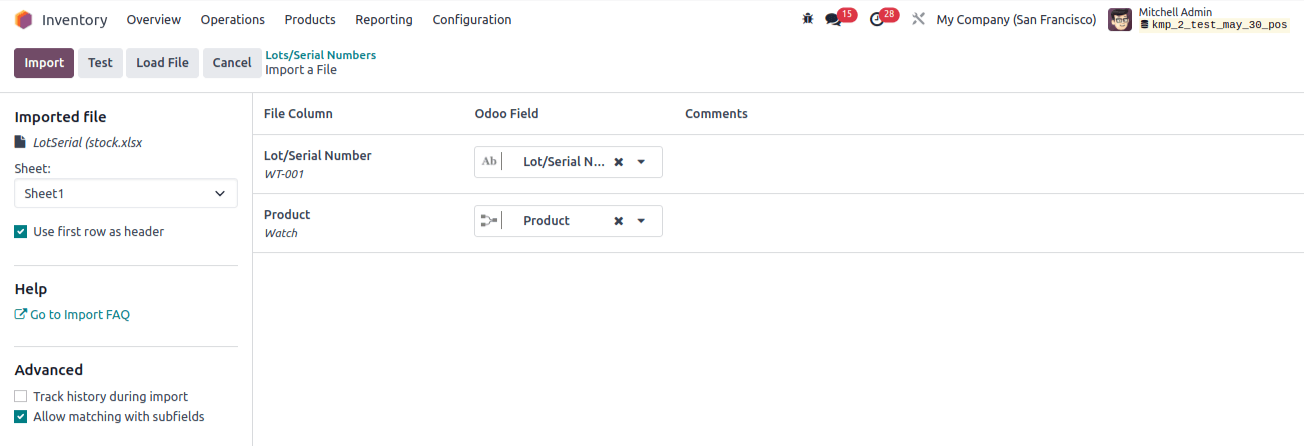
From this page, we may manually assign the file column to the Odoo Field if necessary, and then click the Test button in the upper-left corner to ensure that all columns and fields are properly aligned.
If everything is applied correctly, a blue banner will display at the top of the page, indicating that everything appears to be valid.
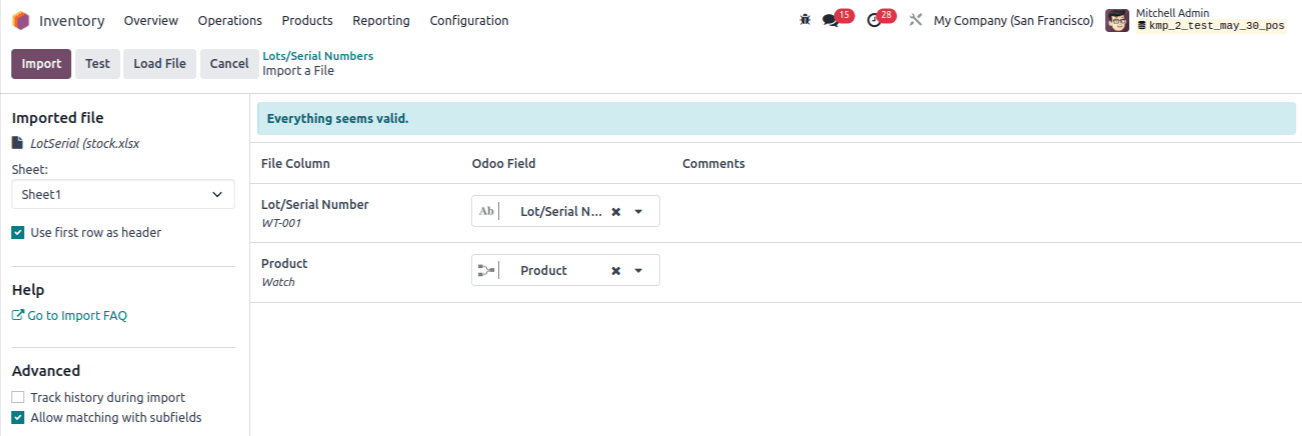
If any issues prohibit the records from being imported, a red banner will show at the top of the page, along with advice on how to discover and correct the individual errors.
Once all of the mistakes have been corrected, we may click the test button and then the Import button to import the entries.
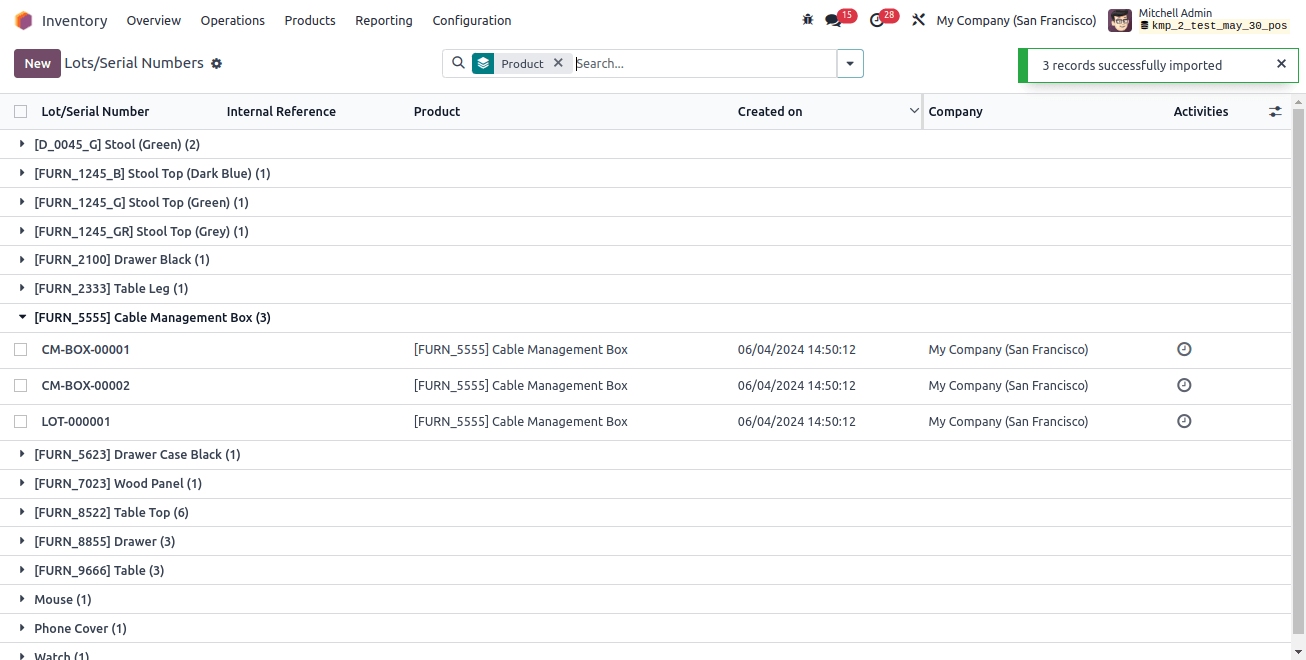
When the records are imported, a notice appears in the upper-right corner informing the user of the number of customers who were successfully imported.
Streamline Inventory in Odoo 17: Import Opening Stock and Adjustments.
Now that we've imported the product to which we want to add the opening stock, we can bring in the opening stock and make inventory adjustments.
To export and download the template for importing opening stock and inventory adjustments, go to the Inventory app. What about operations? Physical inventory.

Select a record and then click the Actions button to access the Export option.
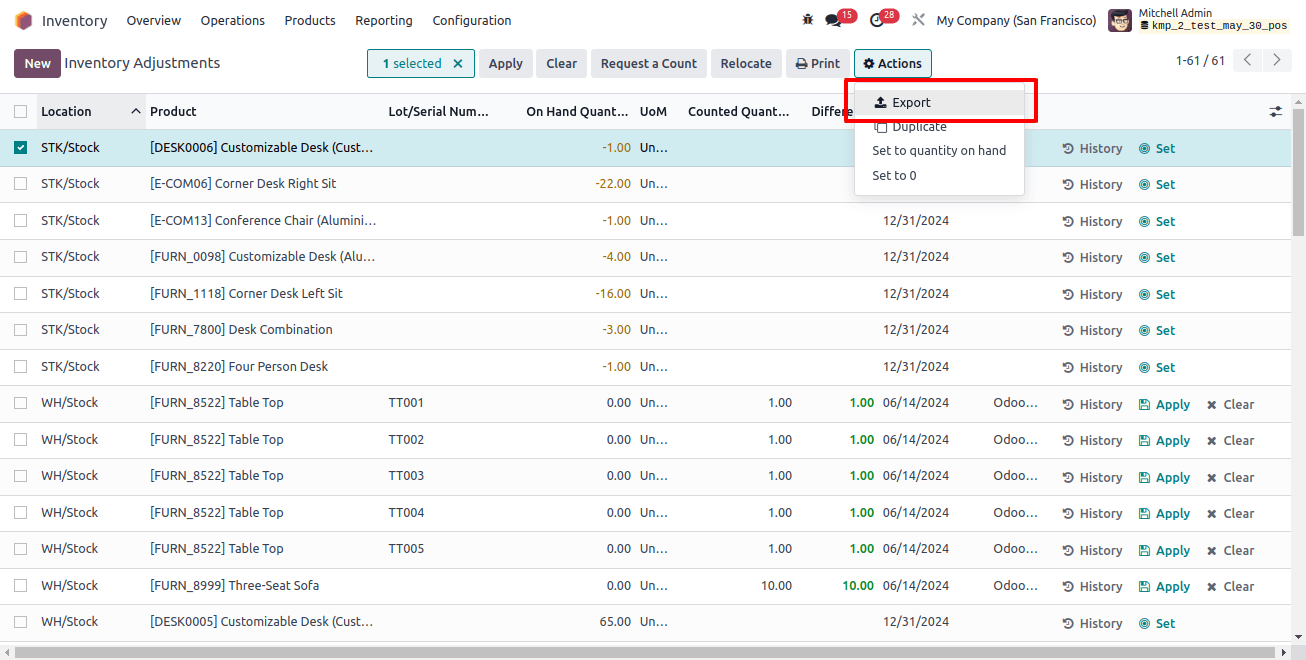
When you click Export, a new window emerges, with available fields on the left and exportable fields on the right. By clicking on the plus icon, we can select the fields that we wish to export from the list of accessible fields.
A name can be given to the template to save it, and this template can be used several times while exporting data.
We can add all of the information required to import inventory adjustments for a product. The following fields were added:
* Location: The product's location, name, and lot/serial number are listed.
* Counted Quantity: Product quantity recorded during physical inventory.
* Scheduled Date: This is the date set for the inventory adjustment.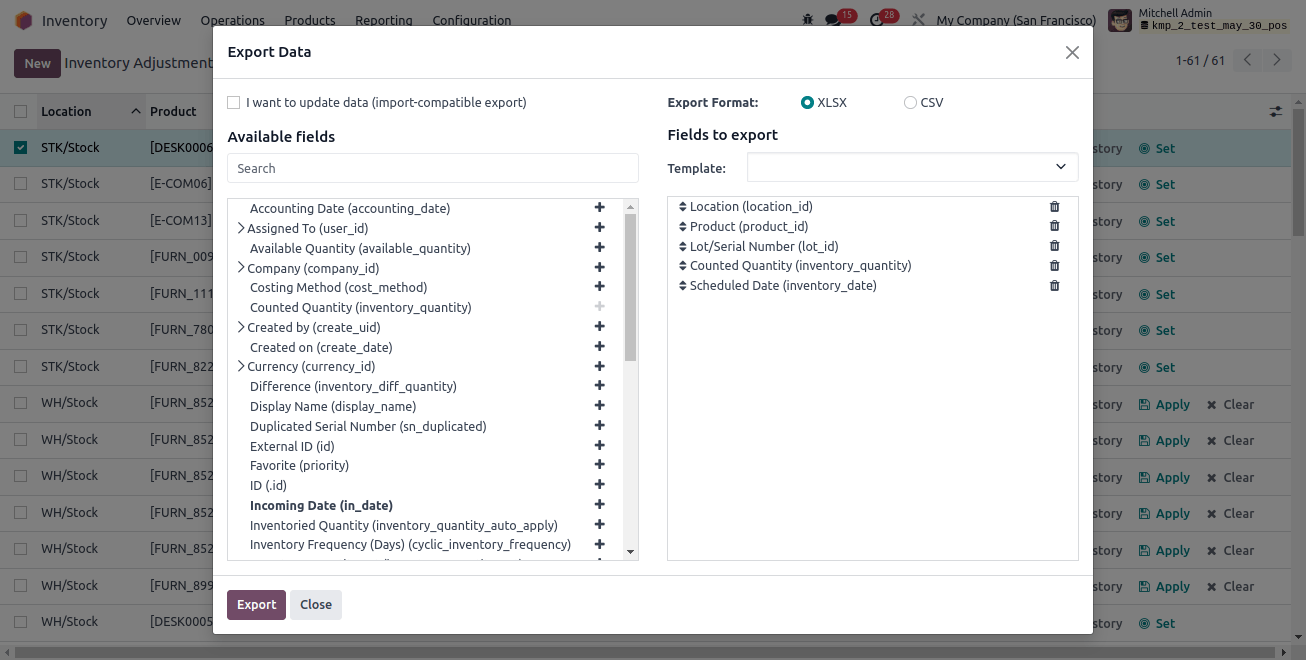
After selecting all of the fields to export, click the Export button to export the template. And edit the template as needed.

After modifying the inventory adjustment template spreadsheet, click the gear icon?? in the upper left corner of the physical inventory page and choose Import records.
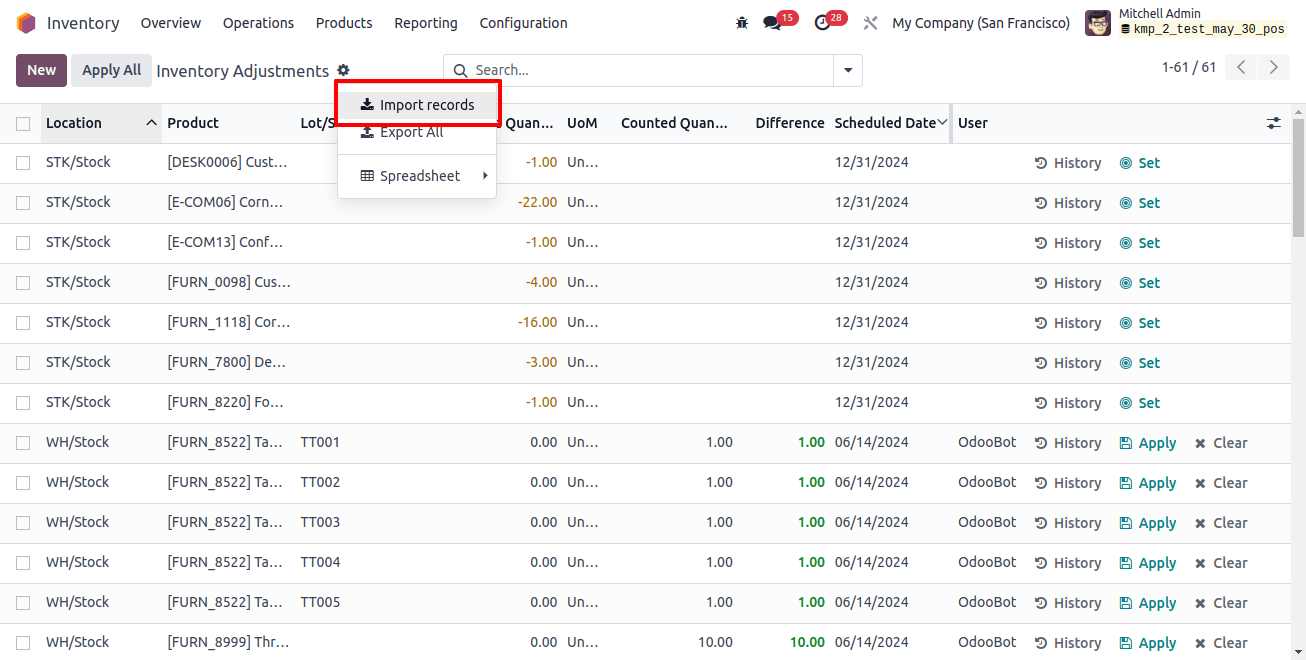
At the top left, we can upload a file from our system.
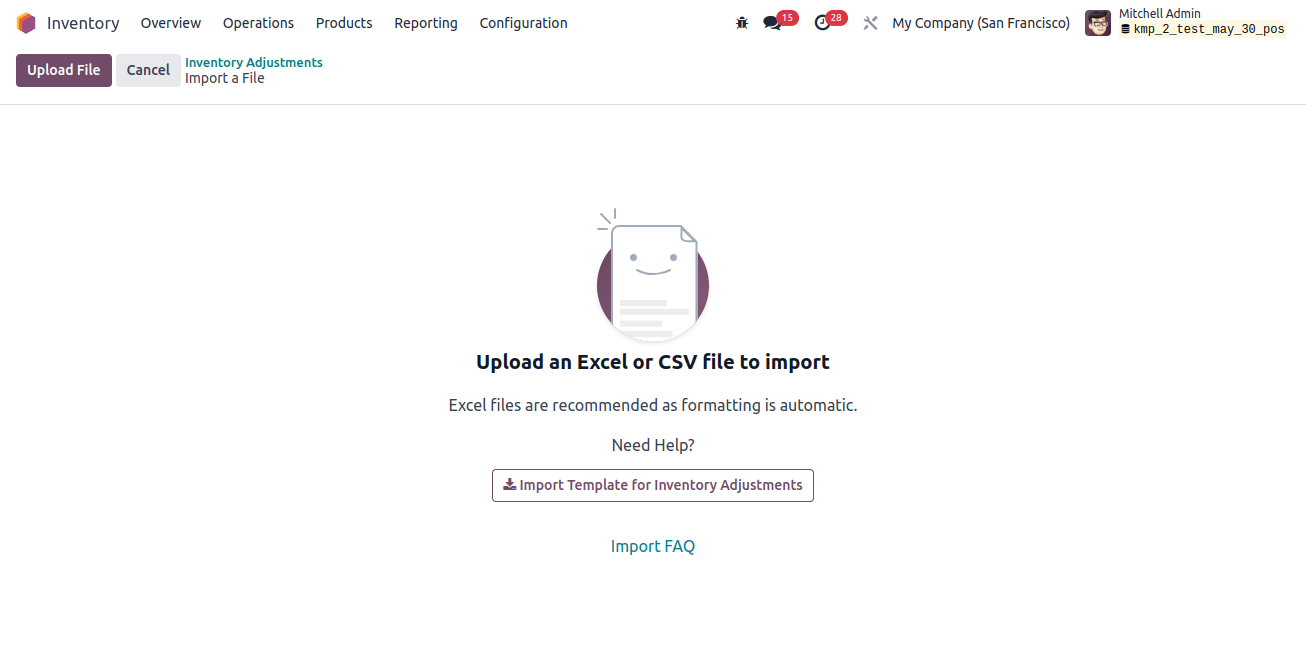
After uploading the file, a page with all of the elements of the newly configured vendor template spreadsheet, including the File Column, Odoo Field, and Comments, appears.
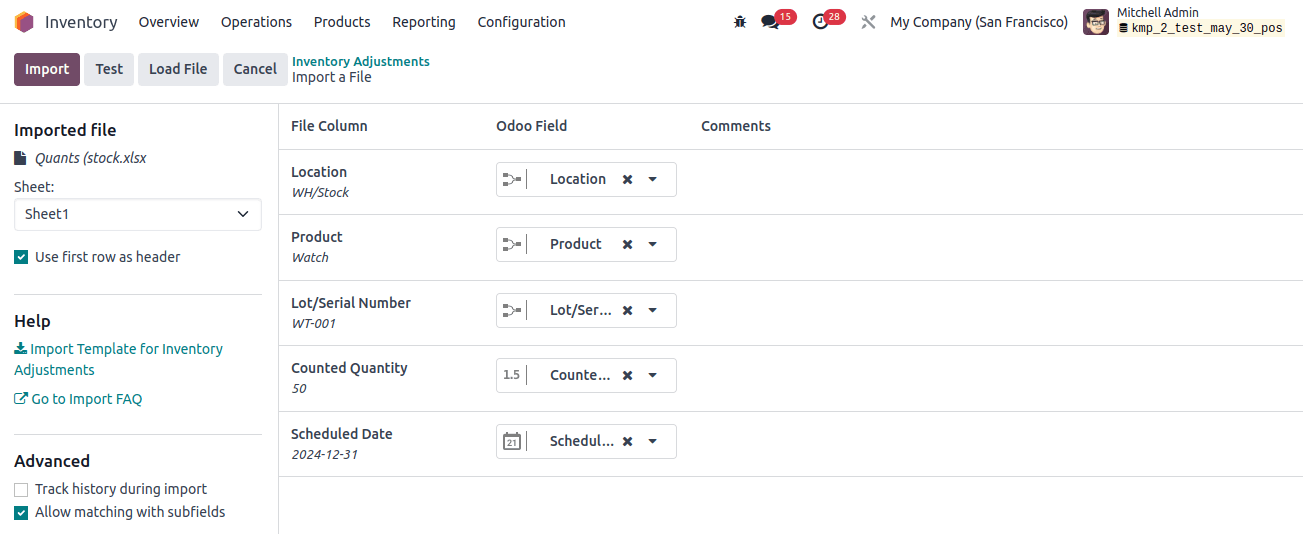
From this page, we may manually assign the file column to the Odoo Field if necessary, and then click the Test button in the upper-left corner to ensure that all columns and fields are properly aligned.
If everything is applied correctly, a blue banner appears at the top of the page, telling the user that everything appears to be valid.
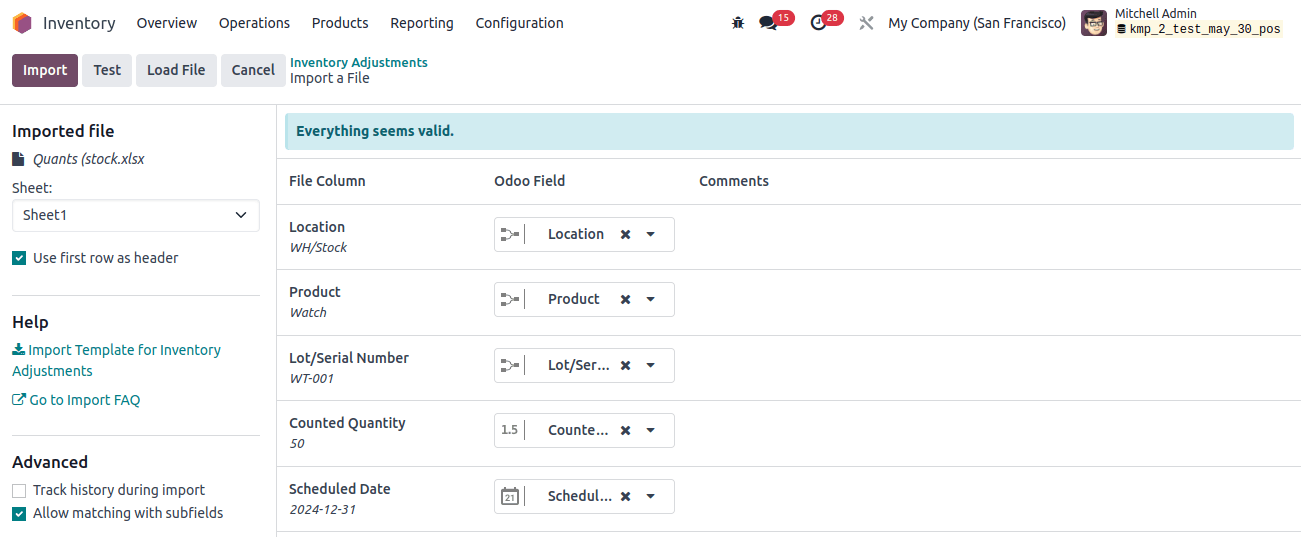
If any errors prohibit the records from being imported, a red banner will appear at the top of the page, along with advice on where to find and resolve the individual errors.
Once all of the mistakes have been corrected, we may click the test button and then the Import button to import the entries.
When the records are imported, a notice appears in the upper-right corner informing the user of the number of customers who were successfully imported.
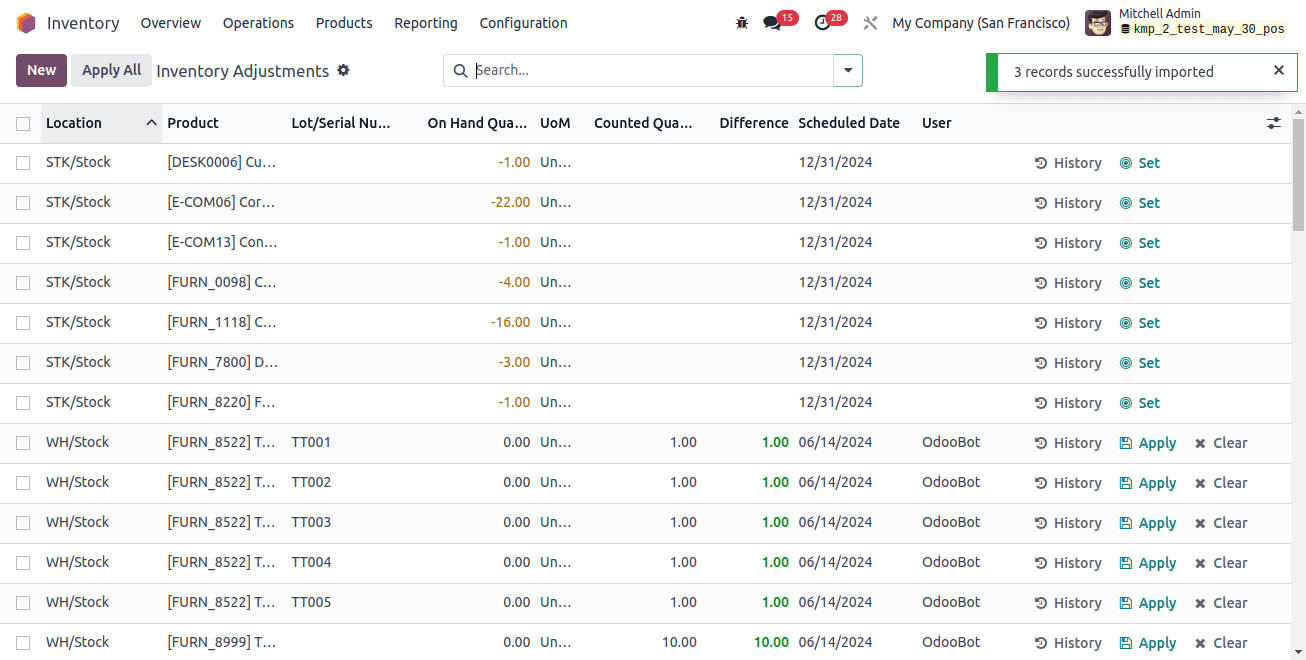
The screenshots below show the imported inventory modifications.
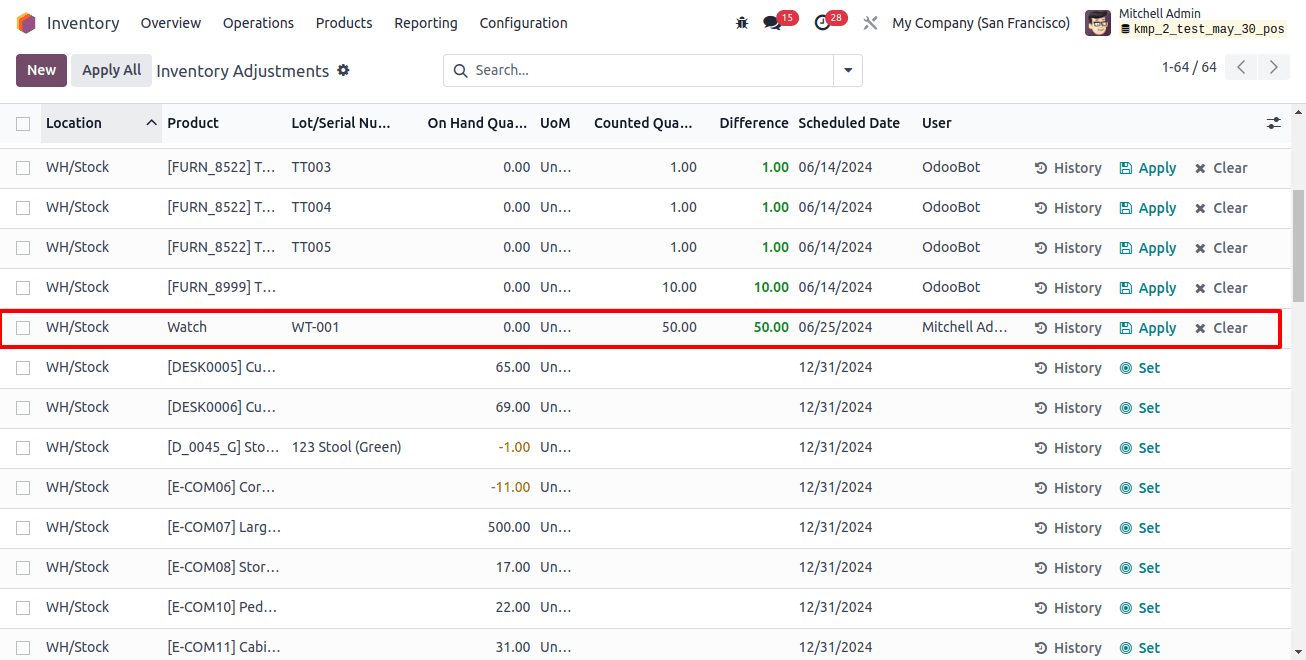
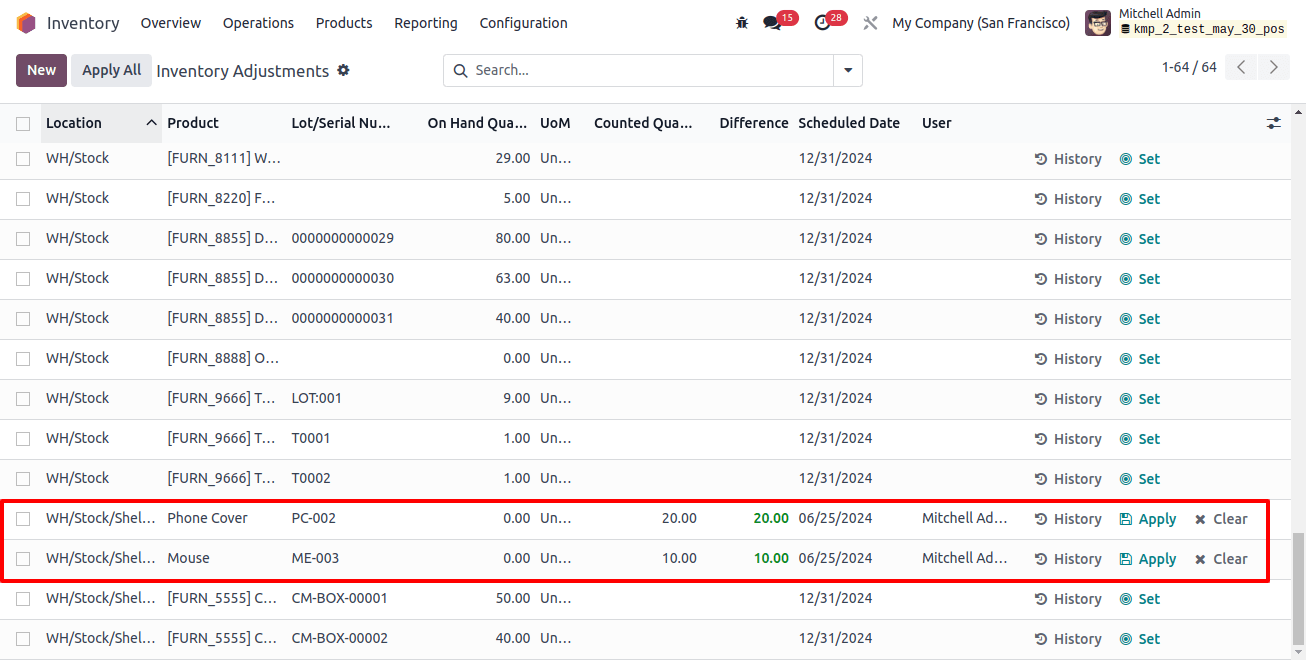
In this blog, we learned how to import opening stock and inventory modifications in Odoo 17. We’ll focus on importing the opening stock quantities for existing products.
So, if we want to import many data sets from a spreadsheet into the Odoo database at the same time, we can use Odoo 17's importing option. It can be significantly more effective and efficient in adding records.
With good management of opening stock and inventory modifications, we can reduce anomalies in inventory management caused by numerous circumstances and keep correct inventory records, ensuring a smooth business operation in an organization.
This ultimate guide has covered the processes required to import and change opening stock, ensuring that your inventory is up to date and correct. Using Odoo Services can help to streamline the process by providing expert guidance and improving your overall inventory management skills.

