To improve a business's productivity, Odoo 17 offers a wide range of products and many choices for product administration. In Odoo, categories are primarily used to arrange goods and services according to certain standards, like kind, purpose, etc.
Odoo has tools for importing items and product categories, which can aid with bulk data entry, efficiency gains, and data accuracy enhancements.
We'll talk about importing product categories and items in this blog.
Importing the category of products in Odoo 17
Creating a suitable template for the new product category import is the first stage in the import process. Therefore, it's imperative to create a new template and export an existing category.
You can do so by going to the sales module's setup tab, which has a section on product categories under it. On that section of the product category, click. There, all of the product categories are visible.
To export product categories, choose any category. Next, select the action button. An export option will appear under it.
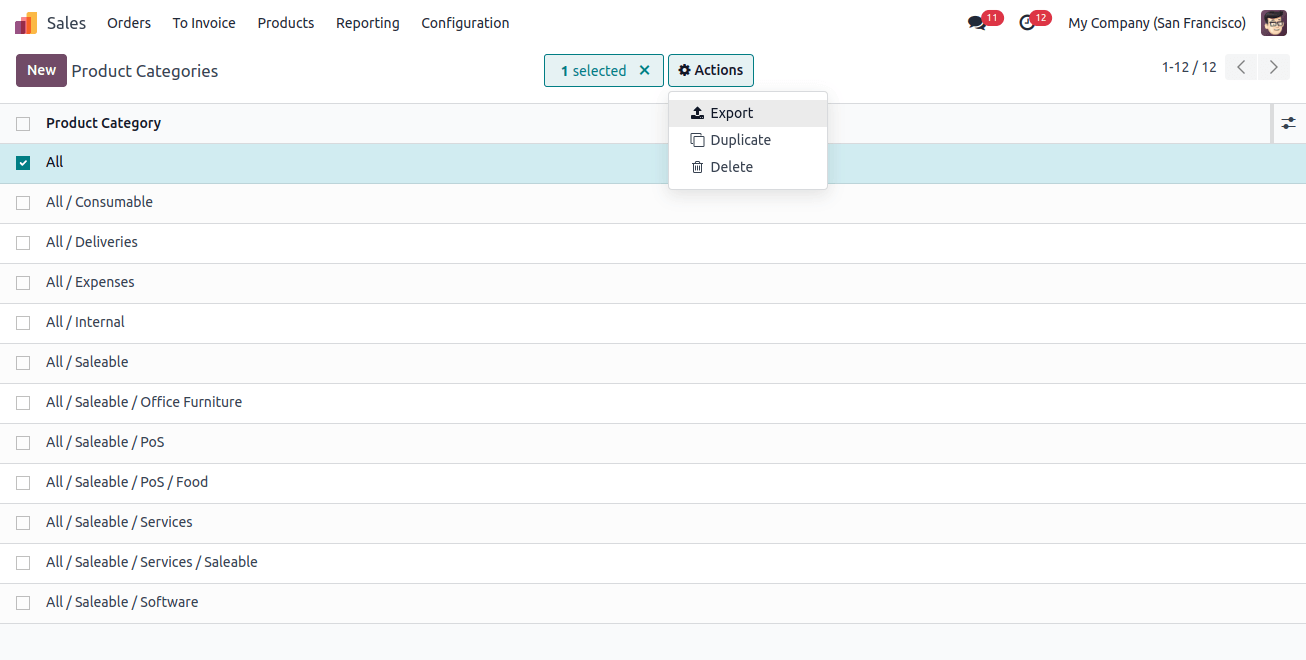
When you select the export option, a popup box with the titles "available fields" and "fields to export" will appear.
Available fields: this lists the various data fields you may include in your exporting file to provide specifics about the items you're bringing in.
Fields to export: These are the particular data fields we wish to have in the file that is exported.
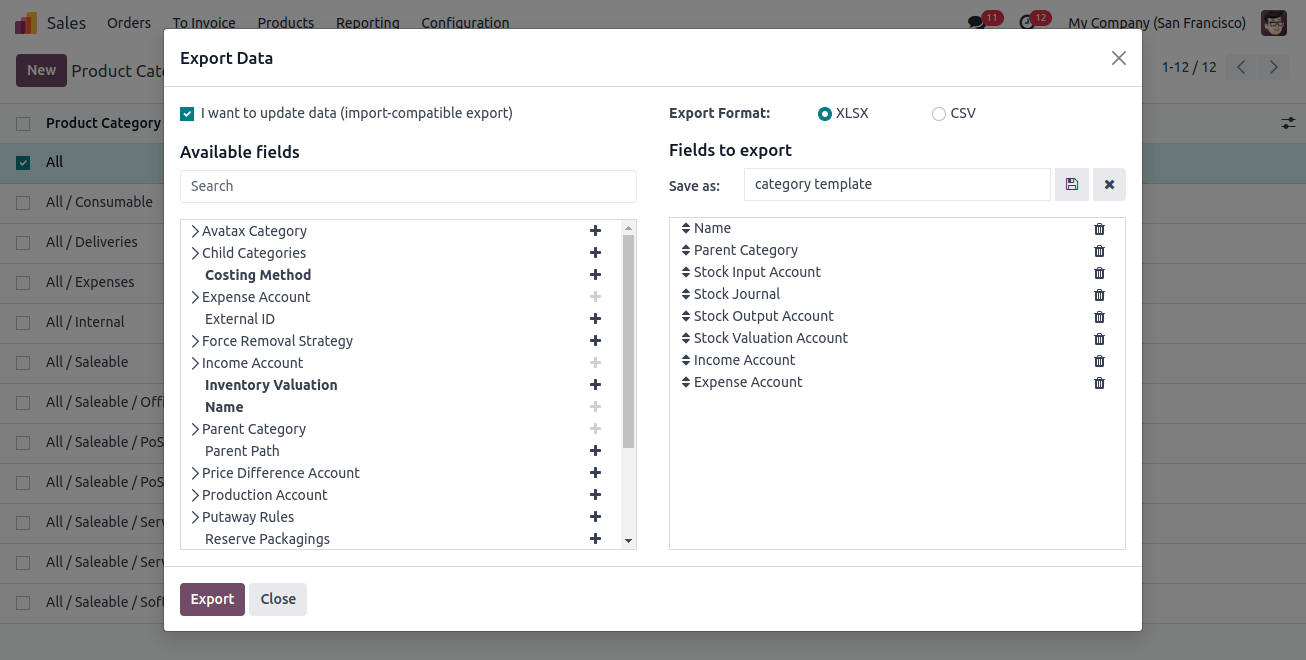
To utilize the saved template to export the data numerous times, give our new template a name in the popup window and save it.
To import the product category, choose the fields that are required. "I want to update data" (import-compatible export) can be enabled.
We can update the current data when we accept the update data option. To do this, we add a field called external ID to the file we are exporting to identify the data that already exists and needs to be updated.
Odoo 17 then imports the data and assigns the correct heading to each field when it is mapped. By selecting the plus icon next to each field, we may choose the necessary fields from the list of accessible fields.
The fields that are necessary in this case to import the product category are,
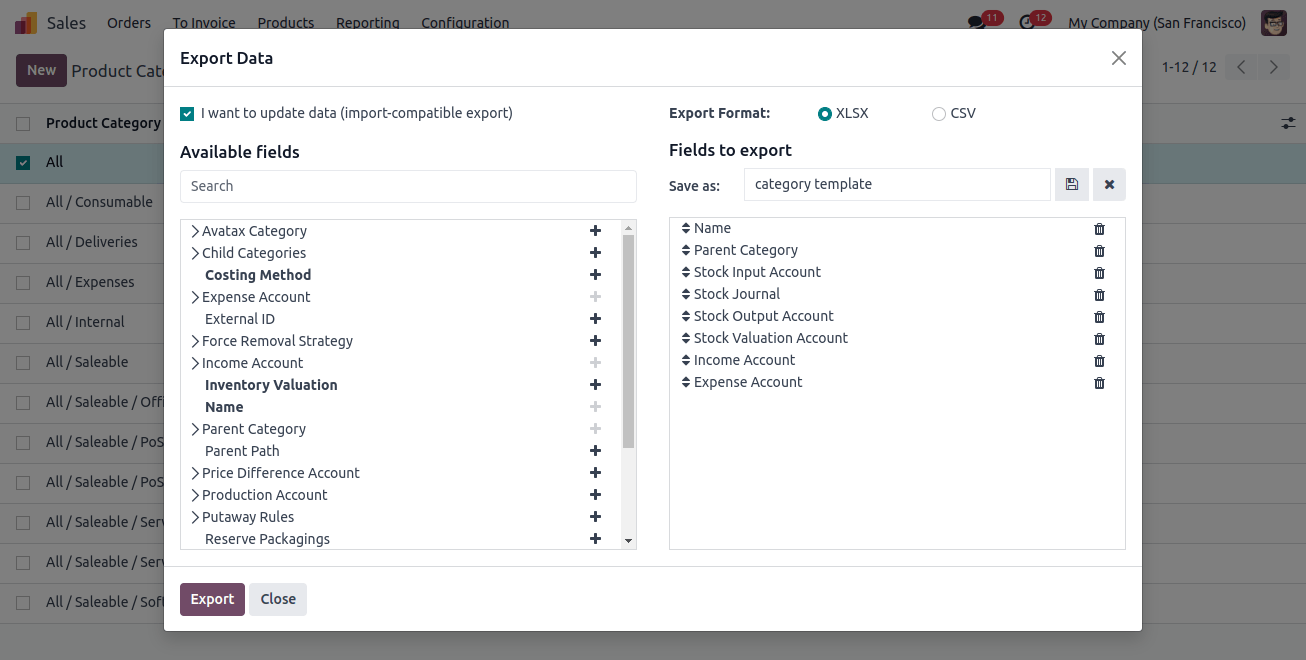
Name: this is the name of the recently created product category.
Parent Category: The subcategory falls under the higher-level category of the parent category.
Stock input account: the value of a product falling under this category is applied to the stock input account upon receipt of the product in stock.
Stock journal: used to keep track of transactions about the stock of goods in this category.
Stock output account: the value of any sold-out products in this category is credited to the stock output account.
Stock valuation account: used to document current total inventory item valuation for this category
Expenditure account: used to specify the default expenditure account linked to a product in this category;
Income account: applied to designate the default income account associated with this type of product.
Following the addition of fields, select the export option from the popup window. The xlsx and CSV file formats are the two available formats for saving. Our system has successfully stored this file once we click the export button.

The information that we are exporting is this. Adding a new product category to our database is what we need to do next.
To do this, update the data by naming the new category that we will be creating. You will also be able to modify all the other features, such as the category's accounting journals. Save the file once all the details have been corrected.

Here, we have saved the file and added a new category called "food" under the parent category "all." After that, we may access the importing feature. Navigate to the product category to find the action button there. Importing records is an option that appears when you click the action button.
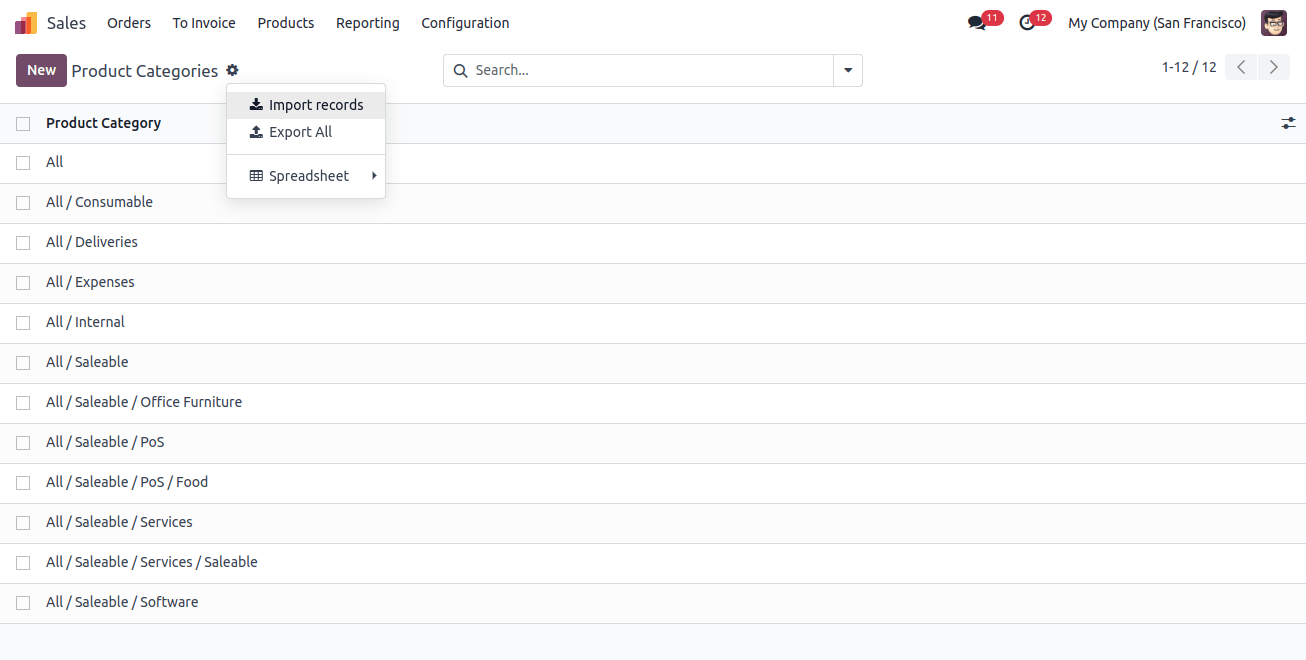
When we select the Import Records option, a file upload option appears. Choose the recently created file from our system by clicking the upload file option, then upload.
After that, click the test button. If all the information is correctly assigned, a message saying "everything seems valid" will show up.
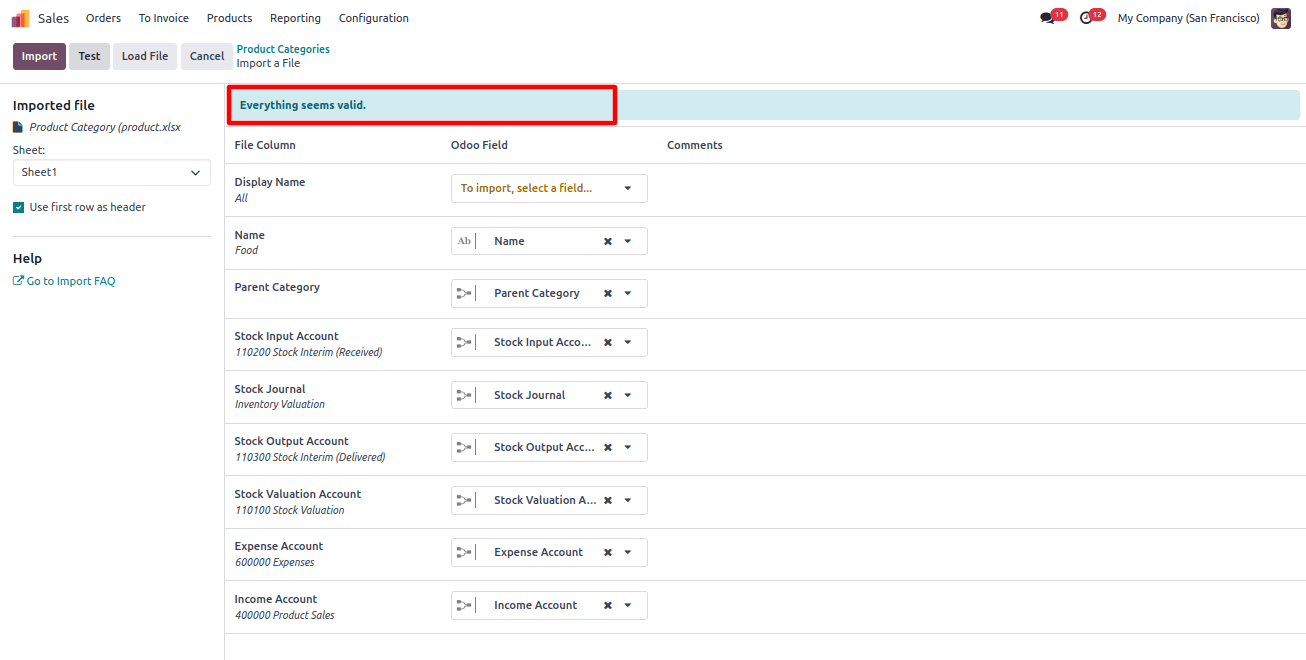
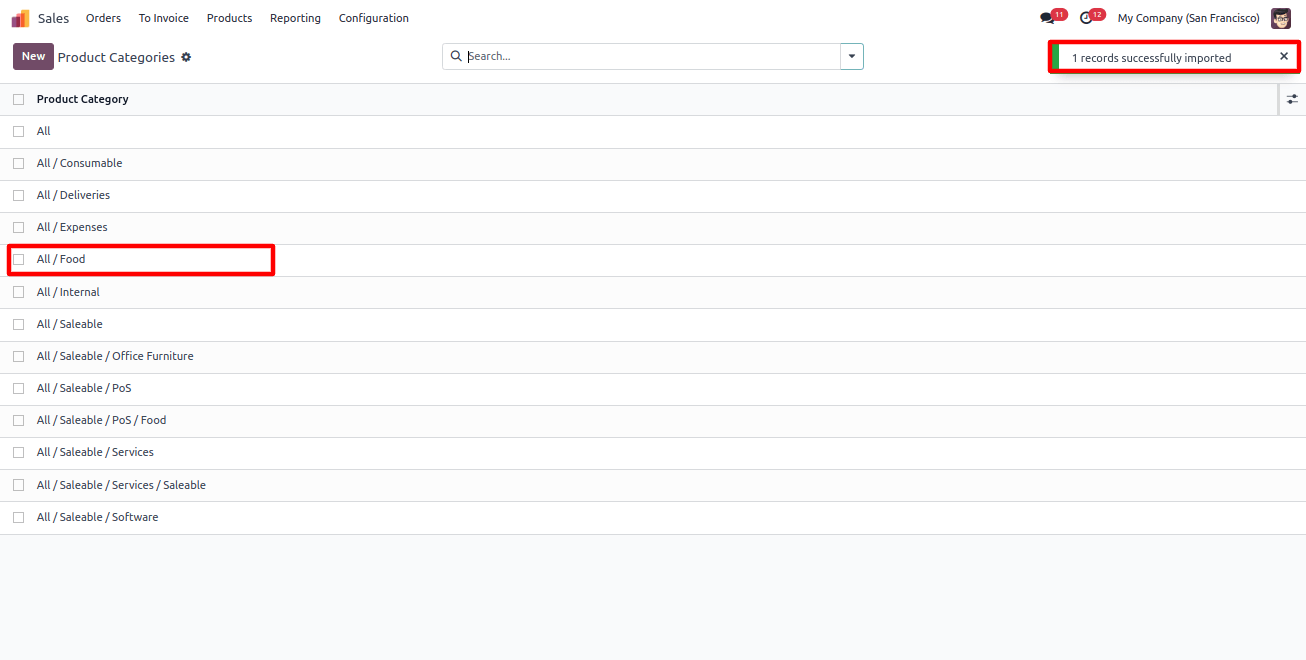
The new product category will then be imported into Odoo when you click the import button next to the test button. A notification about a new record successfully imported will also show up on the screen.
The newly imported product category is shown in the Odoo product category list.
Adding Products into Odoo 17
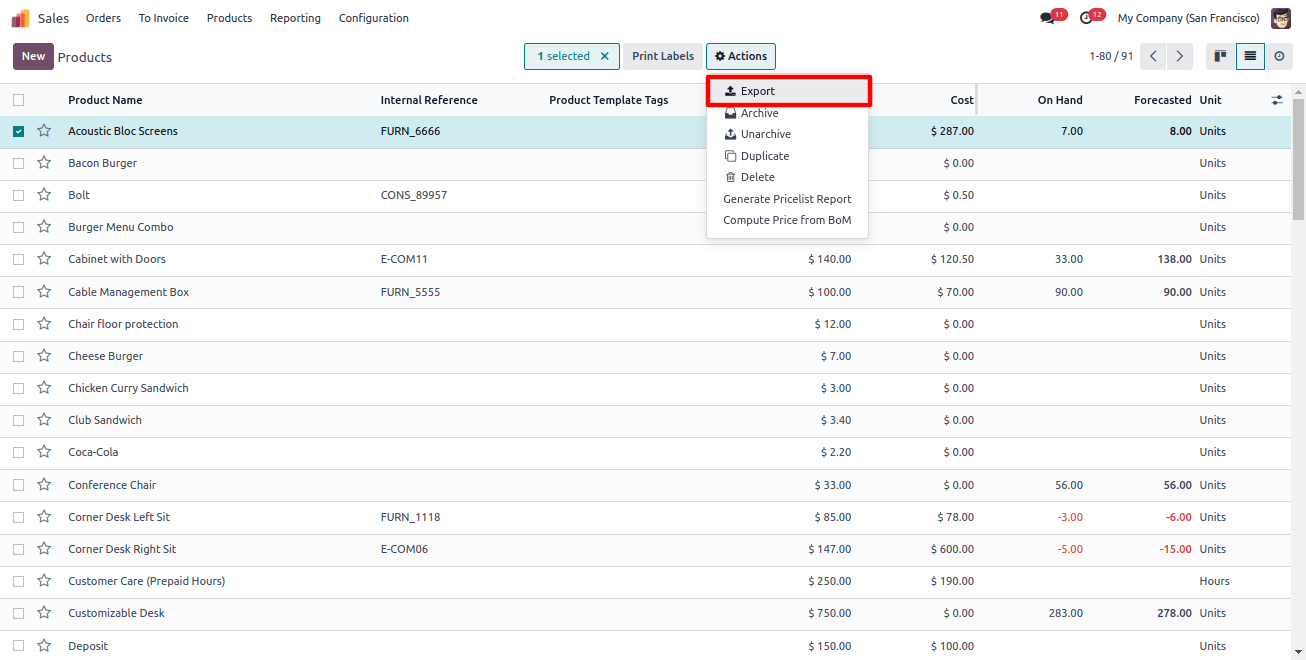
Downloading an import template is the initial step in importing a product. To do it, choose a product from the product's list view and click the action button; an export option will appear.
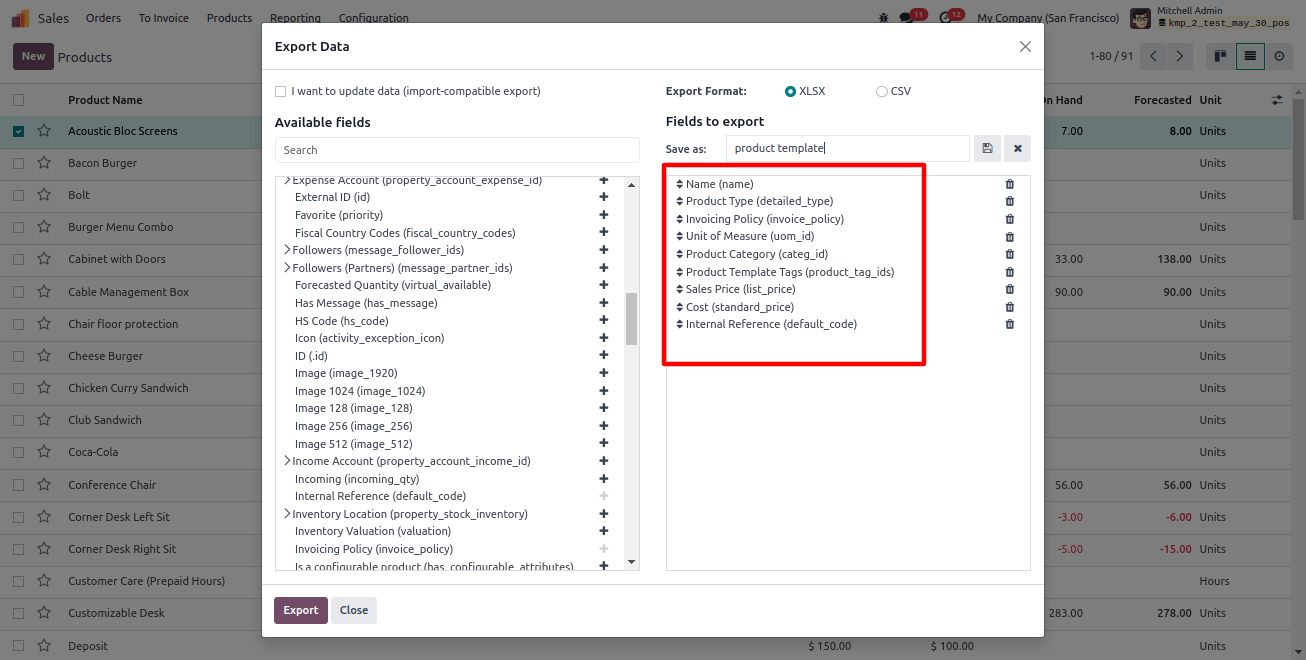
A popup window to export the data opens when you select the export option. The popup window offers the ability to make a new template. Give the template that we are making a name. "Fields to export" and "available fields" are the two components of the popup.
A few fields automatically show up in the fields to export area when we click the export button. By selecting the (+) symbol next to each field, we may add mandatory fields to the export data from the available fields and delete optional fields.
The fields that must be filled out to export and import products are,
Name: the product's name that we are creating;
Product type: the way that products are categorized or classified based on attributes like storability or consumability;
Invoicing policy: the process that determines how and when invoices for sale orders or customer invoices are created;
Units of measure: the units that are available for the product that we are creating;
Product category: a way to arrange and classify products based on shared attributes and features.
Sales price: this is the amount charged when a product is sold.
Product template tag: this is a feature that lets you add tags to the product template, which will be displayed on the website.
Cost: the amount spent on the item at the time of purchase
Internal reference: This is the product's special identification number.
Click the export button in the same window after adding each of the aforementioned fields to the export area of the popup window. The data that we export is saved to our system when we click the export button.
The downloaded file is then visible on our system.

Make any necessary changes to the downloaded file, add the product's name and other features, then save the file.

Importing a new product into the Odoo database is the next step. See the product list for that. Press the action button. We can see the record import option there.
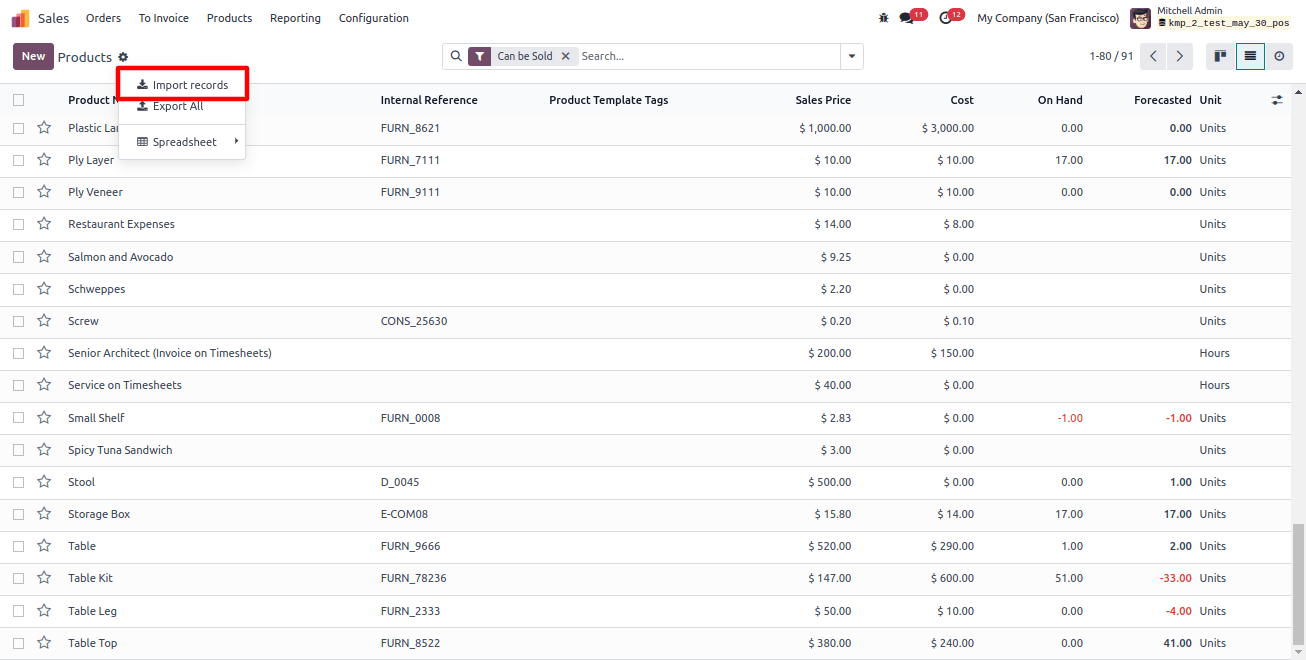
After selecting Import Records, we were able to upload a file. Press the button to upload the file.
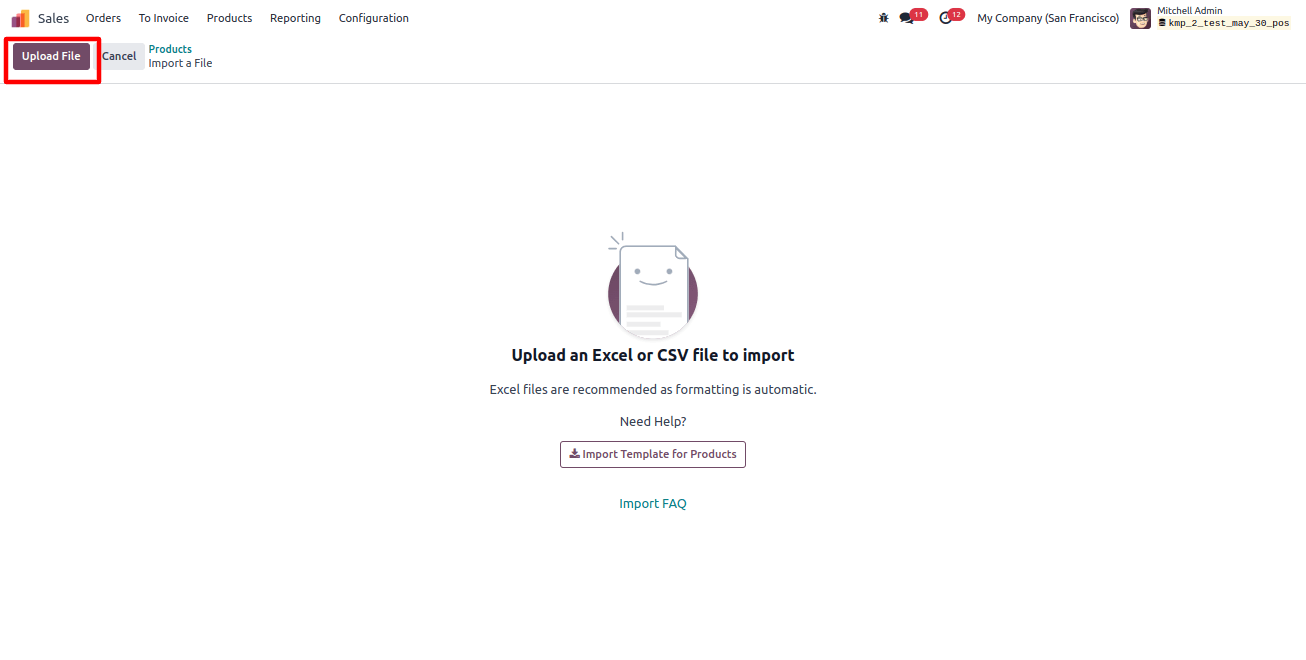
Select the recently created file and press the test button in the newly shown window. A notification will show if all the information we submitted is accurate and everything appears to be valid.
It is possible to enter new values if any of the existing values do not match.
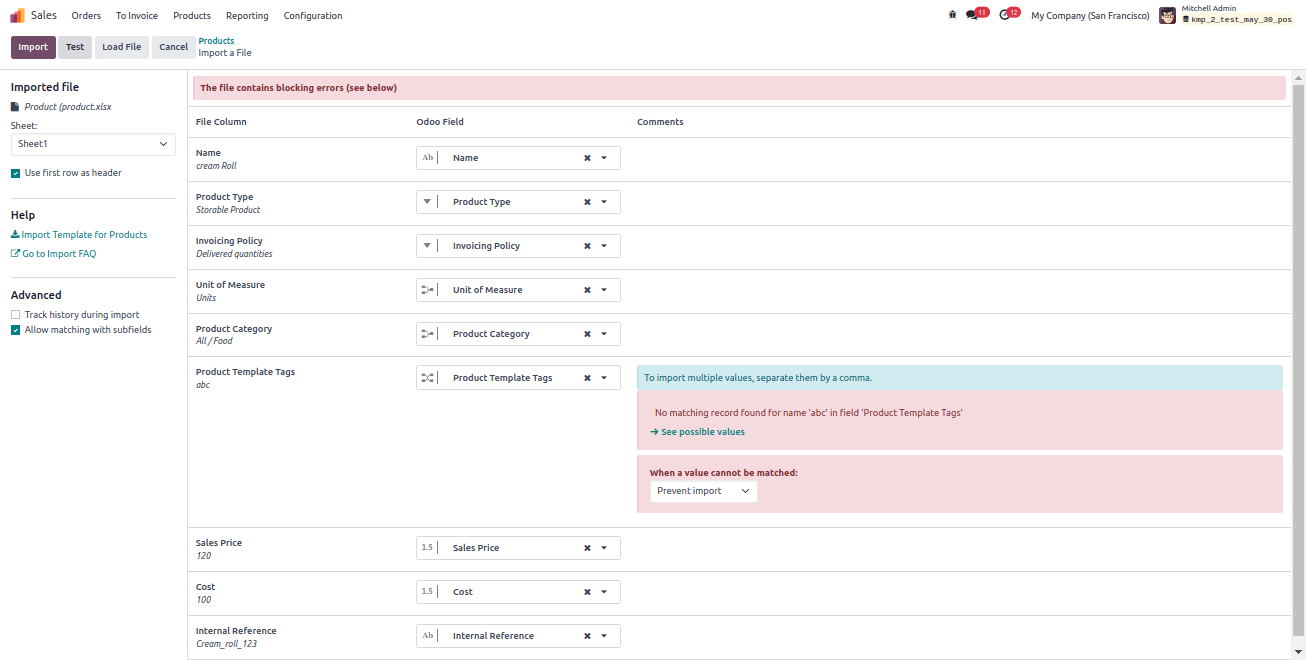
After testing, click the import button next to the test button to get the "everything seems valid" statement. It appears that the product was successfully added to the product list.

Below is a form view of the product we made using Odoo 17.
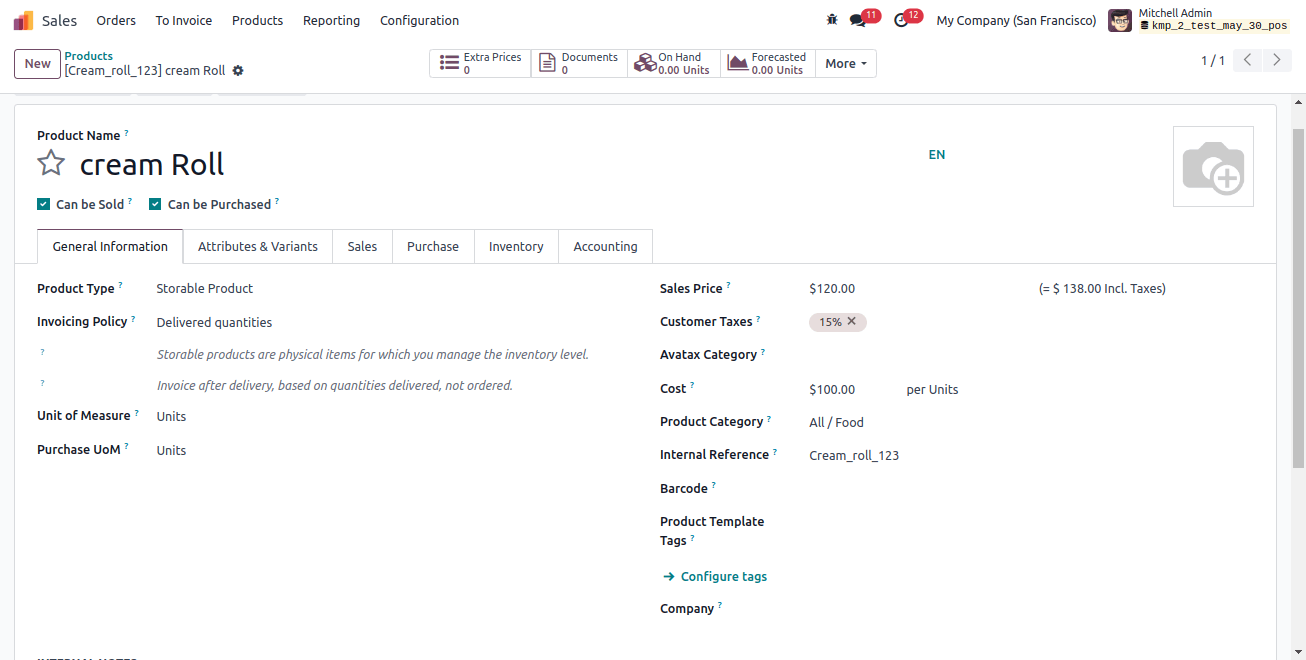
This shows that all detail we entered onto the sheet was correctly imported into Odoo. Therefore, the ability to import products and product categories into Odoo 17 improves the correct and efficient import of vast amounts of data.
To save important time and resources, you can upload and update your product catalog and product category with ease.
To sum up, the process of importing products and categories in Odoo 17 is simplified and greatly improves inventory management.
Businesses can efficiently manage their product data and increase operational efficiency by following the procedures listed.
By using Odoo ERP Services for this purpose, businesses may fully leverage the robust features of Odoo 17 for their inventory needs, as well as ensure a seamless and error-free import procedure.


