Businesses can use Odoo to send follow-up notifications to clients when a payment is past due by automatically scheduling and dispatching follow-up activities based on the number of past-due days.
These notifications can be delivered via email, physical mail, or SMS. Many businesses struggle to effectively manage invoice payments. The complex accounting procedure and delays in consumer payments can provide considerable challenges.
In this article, we'll look at how Odoo 17 Accounting streamlines the payment follow-up process, ensuring prompt reconciliations and minimizing the need for manual involvement.
Step To Automate Follow-Ups with Odoo 17 Accounting
Configuring Payment Follow-up Levels
To begin the process in Odoo 17 Accounting, select the 'Follow-up Levels' option from the 'Configuration' menu item.
As shown below, you will see the Description, Due Days, Send Email, Send SMS Message, Automatic Activity, and Company details for the follow-up levels generated within your Odoo database.

Create a new follow-up level within the new configuration form box by entering information such as the description, due dates, and preferred actions, such as sending emails, letters, or SMS reminders.
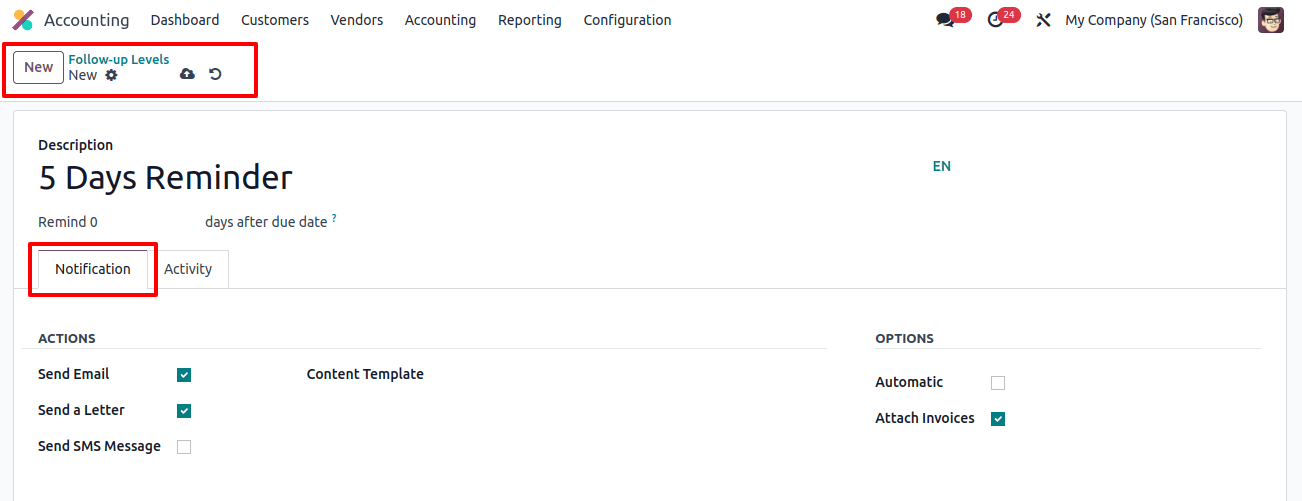
To begin, enter the name of the follow-up level in the 'Description' form and set a date for when you want to send the remainder of your activity after the deadline has passed in the corresponding field.
Activating the 'Send Email' tool in the 'ACTIONS' area allows you to send messages to consumers via email. The 'Send a Letter' option allows you to send real letters to the customer's supplied address. Furthermore, the 'Send SMS Message' feature allows users to send SMS text messages to client phone numbers.
Users can select a message template for the follow-up level and use the 'Automatic' option to eliminate the need for manual interventions. Enabling the 'Attach Invoices' option allows you to include open invoices in the produced follow-up notices.
Scheduling Activities and Notifications
To create a new activity, use the 'Schedule Activity' option under the 'Activity' page. The 'Responsible' option allows users to select a responsive person to schedule the activity, such as an Account Manager, Follow-up Responsible, or Sales Person.
The 'Activity Type' column allows you to select an activity category and then provide a brief explanation in the 'Summary' field.
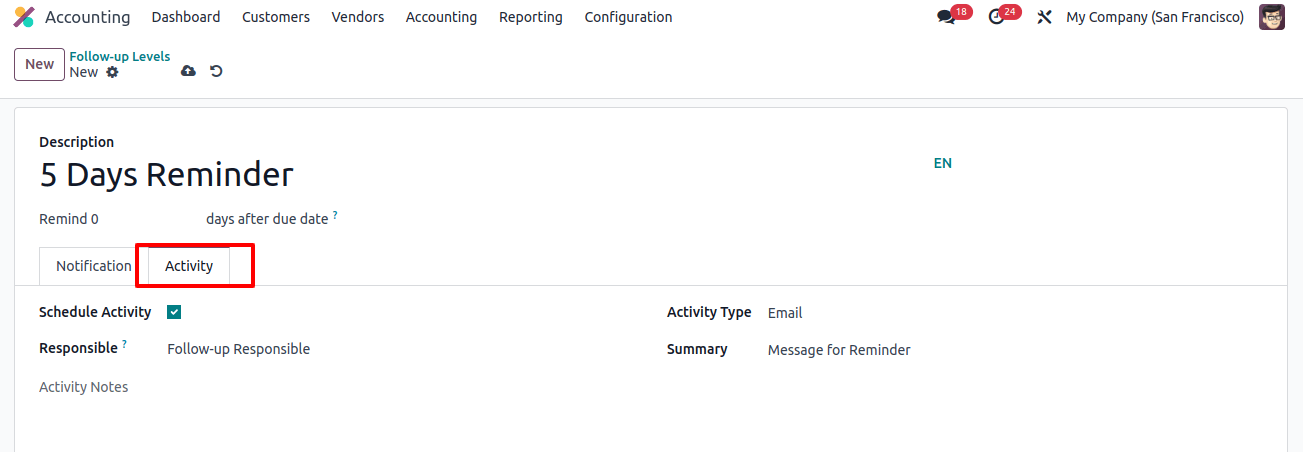
Once you've entered all of the necessary information, click the save icon. This stage guarantees that the organization uses a methodical approach to payment follow-ups. To improve communication, Odoo 17 lets you alter email themes and attach open invoices as PDFs.
Checking Follow-up Reports
Odoo's Follow Up Reports track and handle past-due payments, allowing you to notify clients when their payments are due. To examine a list of past-due clients, go to the 'Customers' menu and select 'Follow-up Reports'. Odoo reconciles bank statements before issuing reminders, avoiding reminders for clients who have already paid.
The report dashboard displays important information such as names, reminders, follow-up levels, and activities. Users can readily identify late payments, and adjustable options allow you to exclude specific invoices from follow-ups.

The ability to batch reminder emails increases efficiency. Choose the desired reports for processing, then select the 'Process Automatic Follow-ups' option from the 'Action' menu. This feature speeds up the follow-up process by reducing manual labor and ensuring a systematic approach to handling delinquent invoices.
Click on any record to view its detailed follow-up report, which will open its configuration form, as shown below.
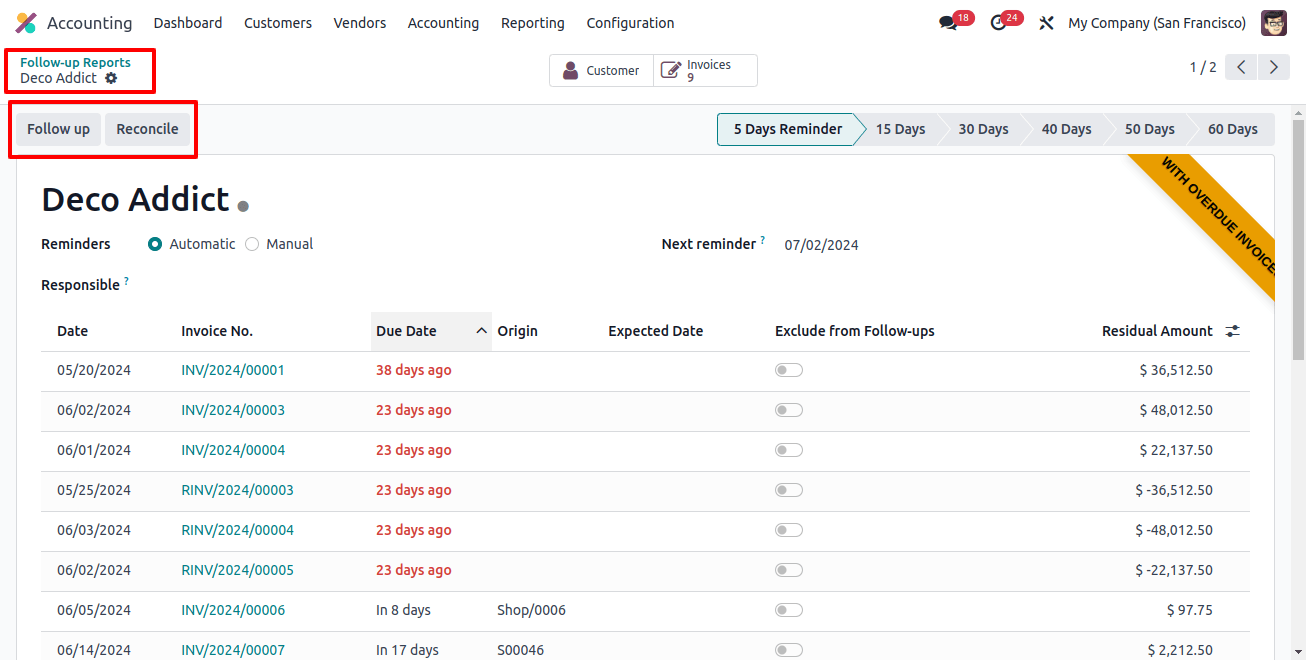
To initiate a follow-up action that will automatically send the client an email with the past-due invoice attachments, click the "Follow-Up" button.
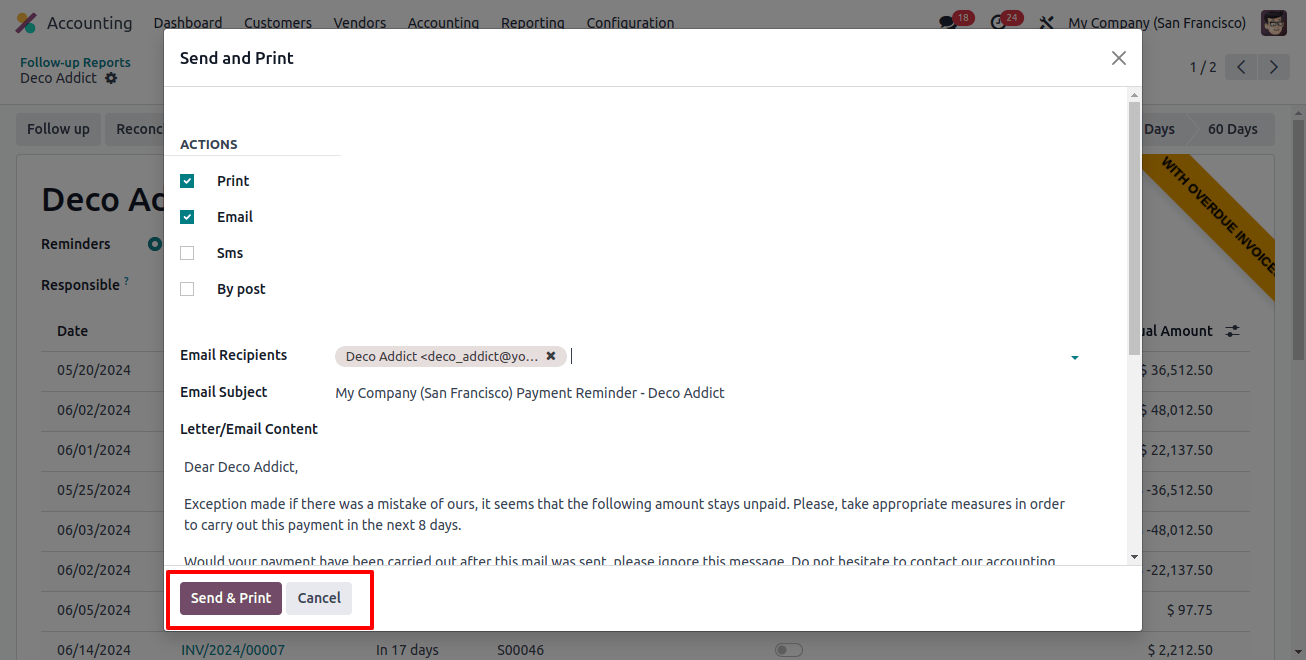
The Reconcile button facilitates the reconciliation of customer payments with the bank. Clicking on this button will bring up another dashboard with several journal items that need to be reconciled, as shown below.

You can use the 'Auto reconcile' button to automatically reconcile all journal entries. Alternatively, click on the same button in each of the record columns. Choosing a journal entry and auto reconciling it will bring up a wizard where you can find entries to automatically reconcile the journal with.
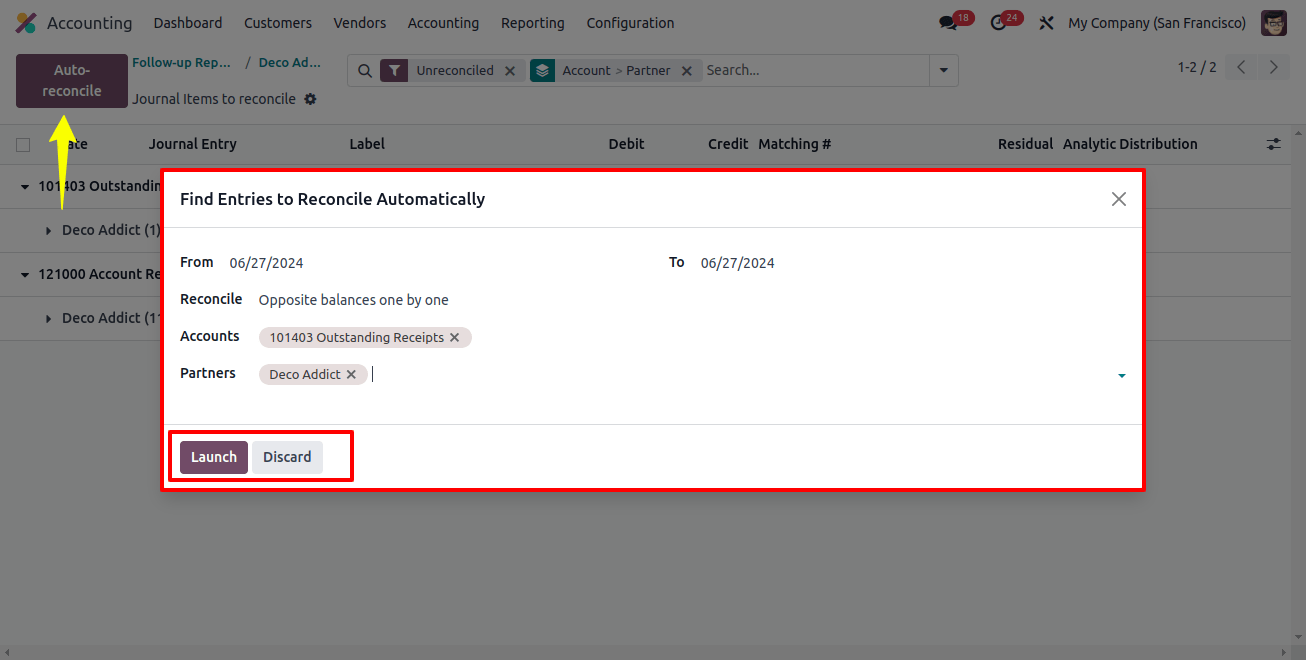
To automate the reconciliation procedure, pick the journal date lengths from one date to another and click the 'Launch' button.
Customer Payments Made Easy
Odoo 16 Payments makes it simple for clients to make payments. The Payments option in the Customers menu lets you customize and handle various payments.
This payments dashboard window allows you to acquire a list of all payment information on your own. Number, Partner, Amount, Status, and further information are all viewable data. To establish a new customer payment, click the 'New' icon.
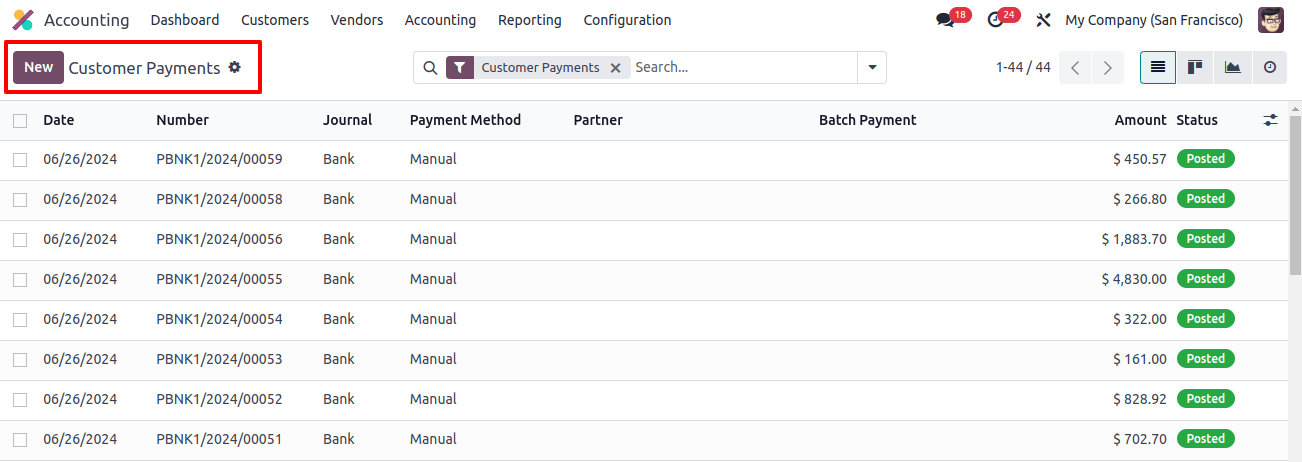
To make an internal transfer, select the 'Internal Transfer' option on the new form page. Select the Amount option to specify the amount to be received, and the payment type as Receive or Send.
The 'Date' is utilized to calculate the eventual payment date, and the Bank is designated as the 'Journal.' Both the bank account and the 'Payment Method' can be set to batch deposit, manual, or cash, and the Company Bank Account field must be selected.
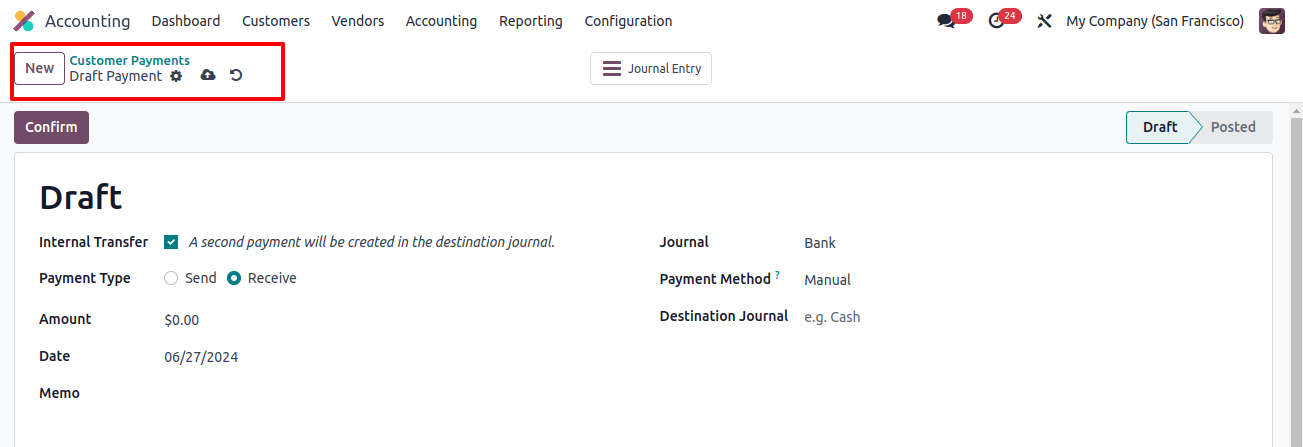
Finally, input the 'Memo' and 'Destination Journal' in the appropriate fields and manually save the form data by clicking the 'Confirm' icon to post the payment after entering the payment information.

You can examine or manage Journal Items, Payment, Reconciled Items, and other details using the 'Journal Entry' smartbutton window, as shown below.
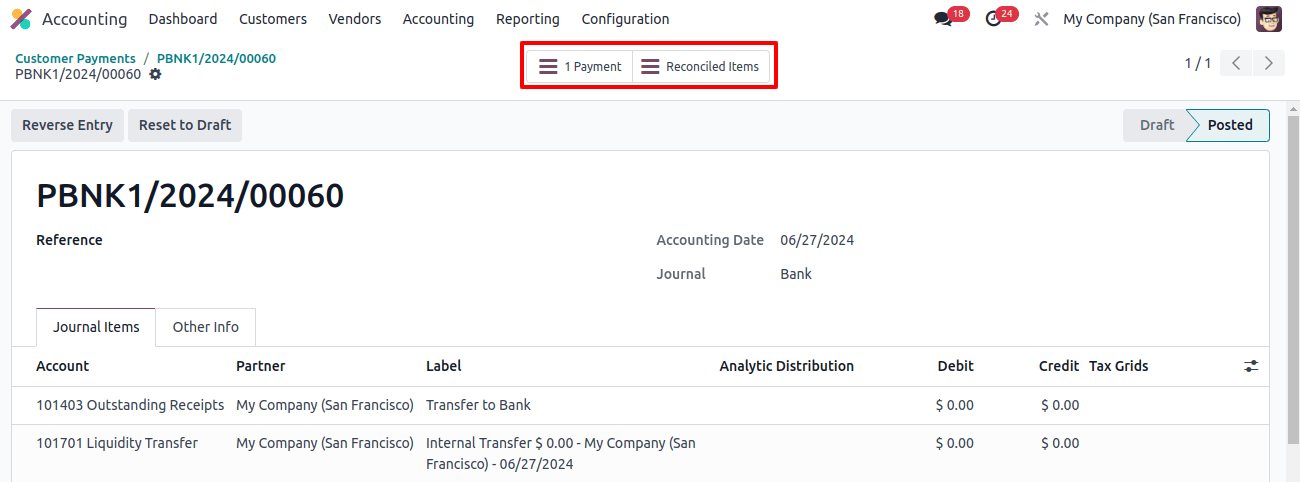
Businesses wishing to streamline their payment processes will find Odoo 17 Accounting to be an excellent solution.
Companies can increase productivity and workflow efficiency by selecting payment follow-up levels, scheduling operations, reviewing follow-up reports, and effectively handling client payments.
Odoo 17's modular structure ensures a comprehensive solution for businesses looking to optimize their accounting processes.
