The events module in Odoo 17 is a powerful solution for managing events of all sizes, from small local events to huge events.
Whether arranging a business event, a charity gala, or a music festival, Odoo Events has features to help you manage every part of your event. This extensive blog will lead you through the Odoo events module’s capabilities and provide a step-by-step process for creating and managing events.
Key Features of the Odoo Events Module
Odoo Events is a full-featured platform that supports every stage of event management, including:
- Planning: Organize and coordinate event arrangements, including scheduling and logistics.
- Ticketing: Control registrations and ticket sales with ease.
- Promotion: Use the built-in tools to increase event visibility and marketing.
The module provides a dynamic platform for holding a wide range of events, such as webinars, conferences, exhibitions, workshops, festivals, and charity events.
It includes simple content management, automated scheduling, advanced filtering, online registration and ticketing, flexible payment options, sponsorship administration, powerful marketing tools, SEO and analytics integration, and a seamless interface with other Odoo apps.
Attendees can sort event listings by date, location, categories, or speakers to make it easier to find and explore them.
The module also supports various payment methods, such as credit cards, tiered pricing, member discounts, and multi-level booking choices. In addition, the module provides excellent marketing options for promoting events, such as SMS, email campaigns, and personalized content.
The module also interfaces with other Odoo modules, such as Email Marketing, Website, Blog, and CRM, to provide a cohesive ecosystem for managing business activities.
How to Make a New Odoo 17 Event
1. Go to the Events Module: To access the event administration field, go to the Odoo dashboard and pick the ‘Events’ module.
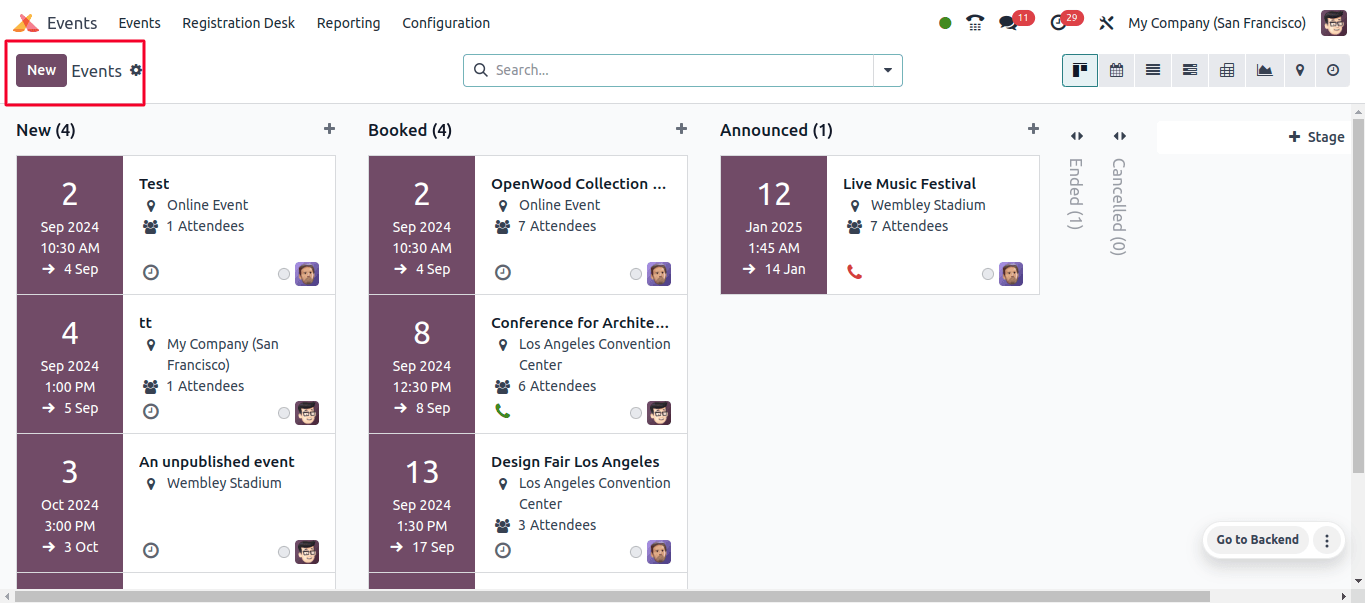
2. View Existing Events: The module starts with a Kanban view of the existing events. This view can be set to display as a list, calendar, Gantt chart, or pivot table. You may also filter for completed or canceled events.
Creating a New Event
Click on the "New" Button: To begin creating a new event, click the ‘New’ button.
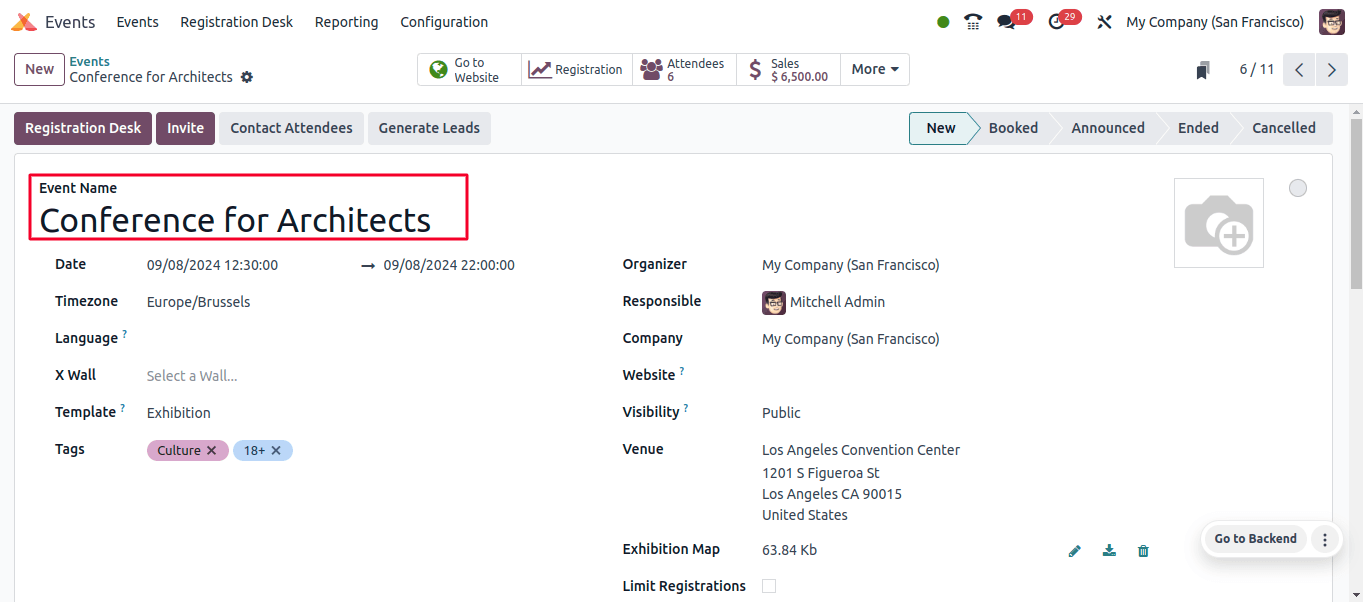
Complete the Event Information field: You will be able to complete a form view with all of the required information about your event.
General Information
- Event Name: Enter the name of the event (for example, ‘Annual Tech Conference’).
- Date: The calendar drop-down allows you to set the start and finish dates and timings.
- Time-Zone: Choose the relevant time zone from the dropdown menu.
- Tags: Assign event-specific tags (for example, ‘Technology’ or ‘Conference’).
- Organizer: Please provide the name of the person or group in charge of arranging the event.
- Responsible: Determine who will be in charge of event management.
- Company: Specify the firm or group that is hosting the event.
- Venue: Give the address of the event venue.
- Limit Registrations: Set a registration limit as needed.
- Auto Confirmation: Allow automated confirmation of registrations.
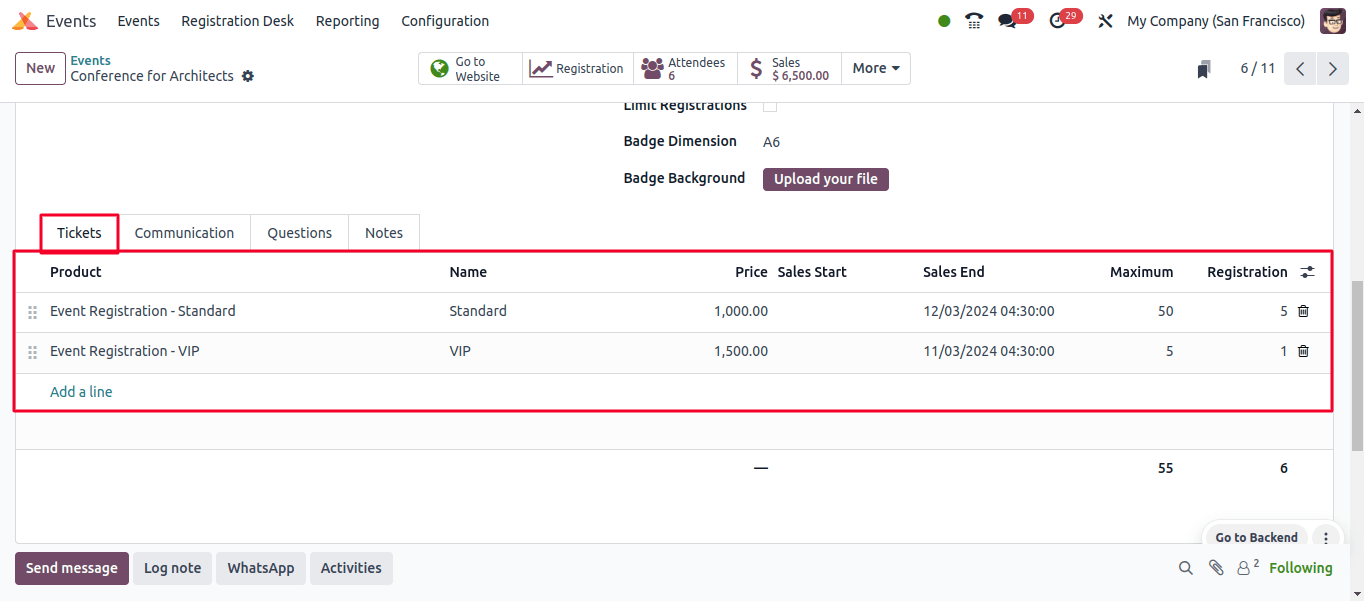
1. Tickets Tab Section
Define the ticketing details for the rent.
- Registration Name: Name the ticket (e.g., ‘VIP Pass’ or ‘General Admission’).
- Product: Select the product linked with the ticket (for example, ‘Event Registration’ or Exhibition Ticket’).
- Price: Set the ticket price.
- Sales Start: Determine the commencement date and hour for ticket sales.
- Sales End: Specify when ticket sales will conclude.
- Maximum: Set a maximum number of tickets available per individual.
- Taken: Track the number of confirmed tickets.
- Color: The color depiction is used to identify the particular.
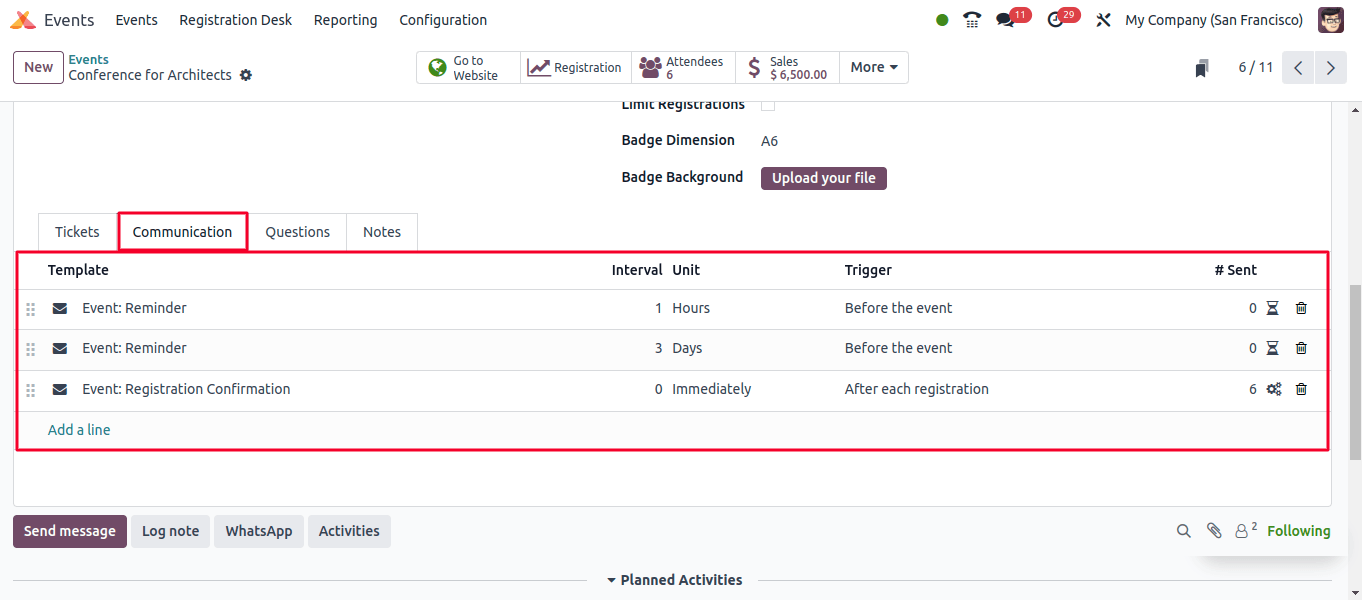
2. Communication Tab Section
Configure automated emails for registration notifications.
- Set up email alerts to notify attendees after registration.
- Customize the time and content of these notifications.
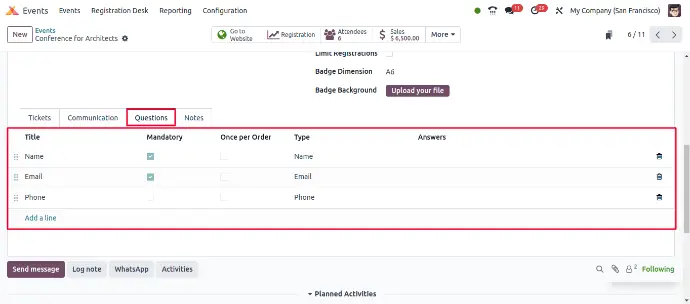
3. Questions Tab Section
Within the Questions tab, click the ‘Add a line’ button to specify the questions that must be answered when registering a ticket.
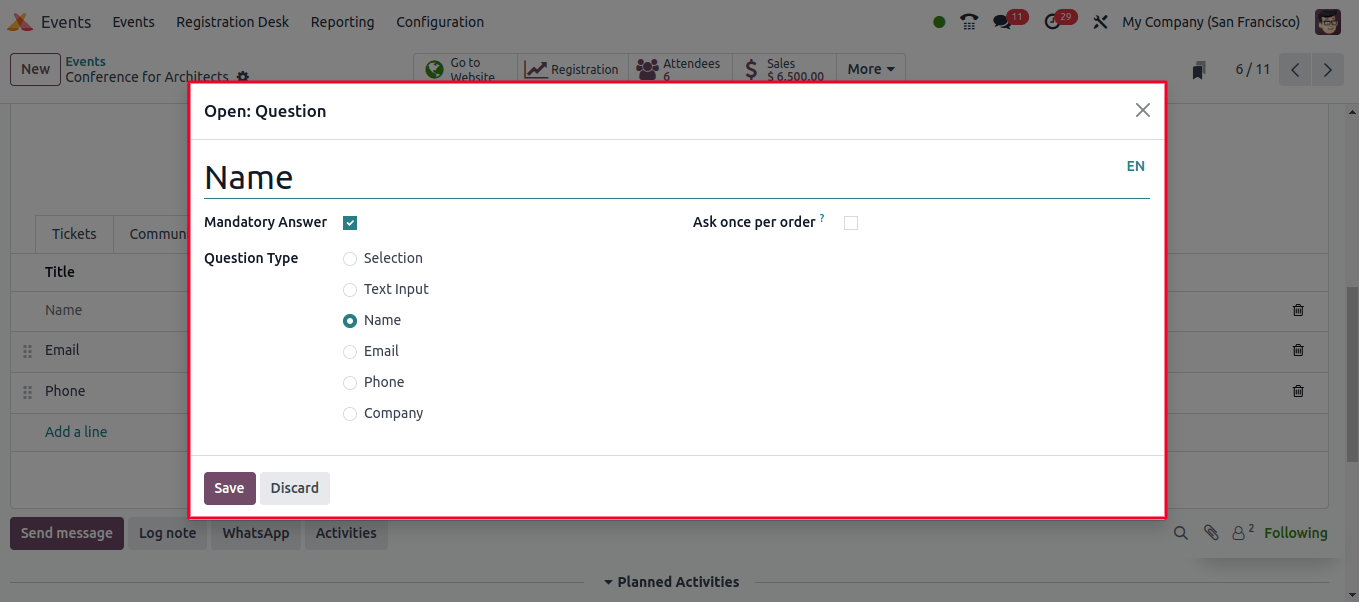
After hitting the Add a Line button, we can choose the Question Name, Question Type, and Mandatory Answer.
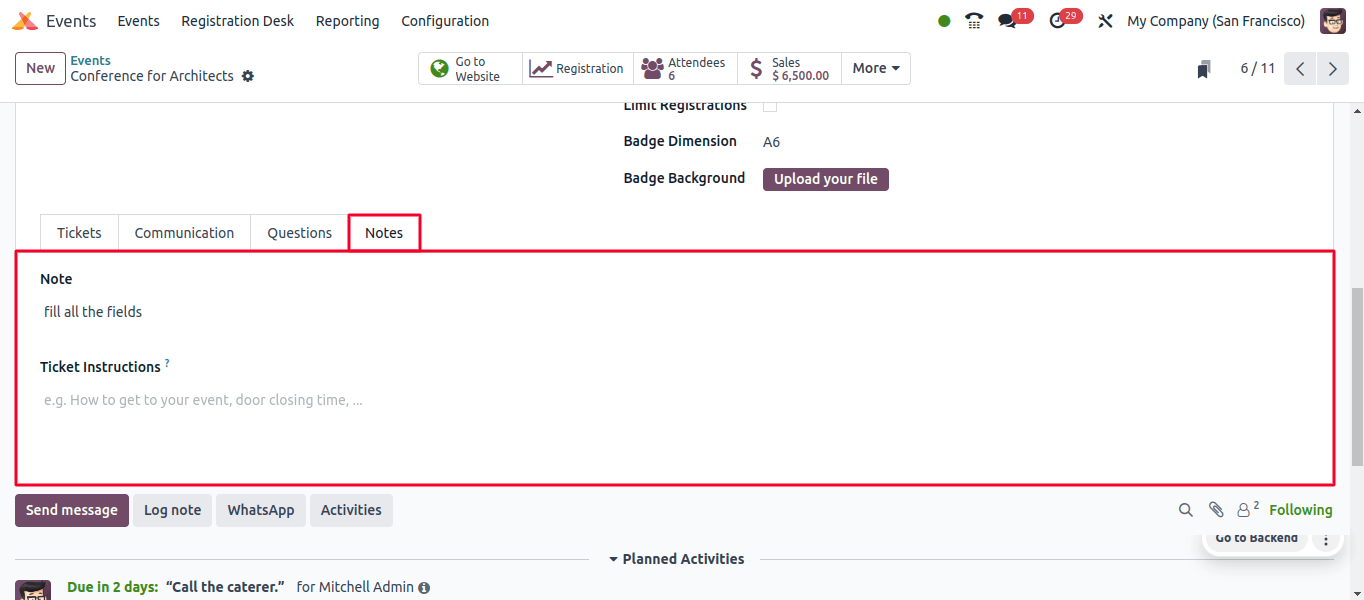
4. Notes Section
Add any additional notes or instructions about the event or the registration process.
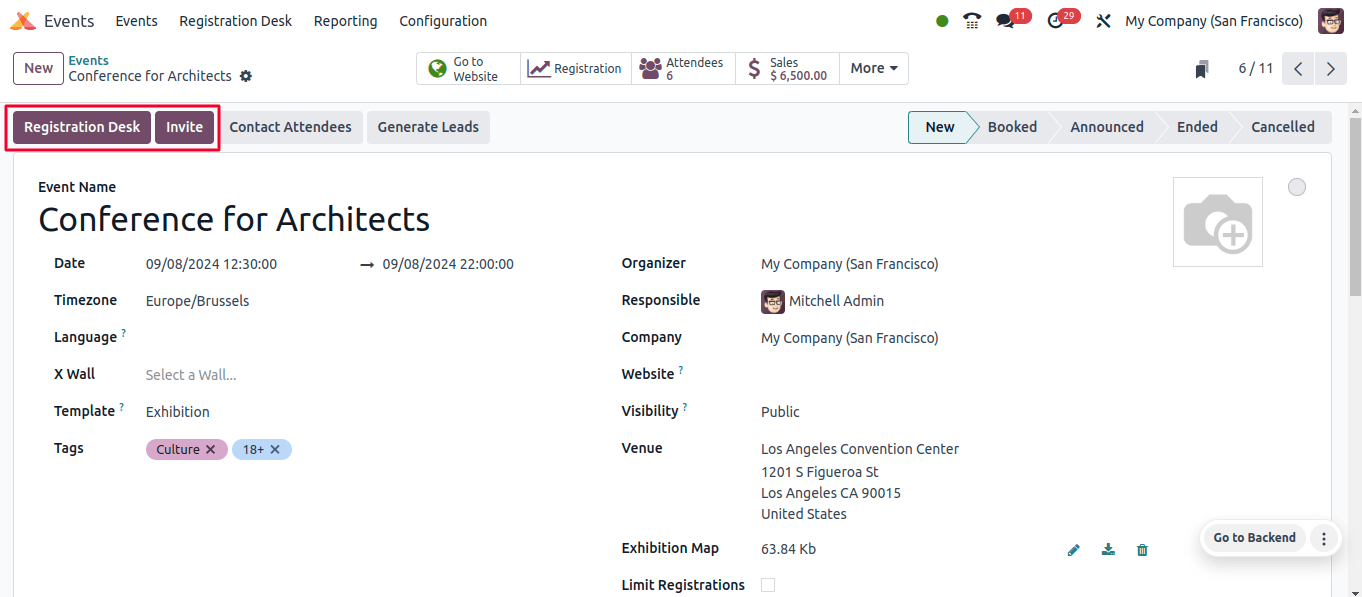
Save the Event: Once all of the details have been input, save the event. It will now be displayed in the module’s event list. As shown below, there are two buttons: Registration Desk and Invite.
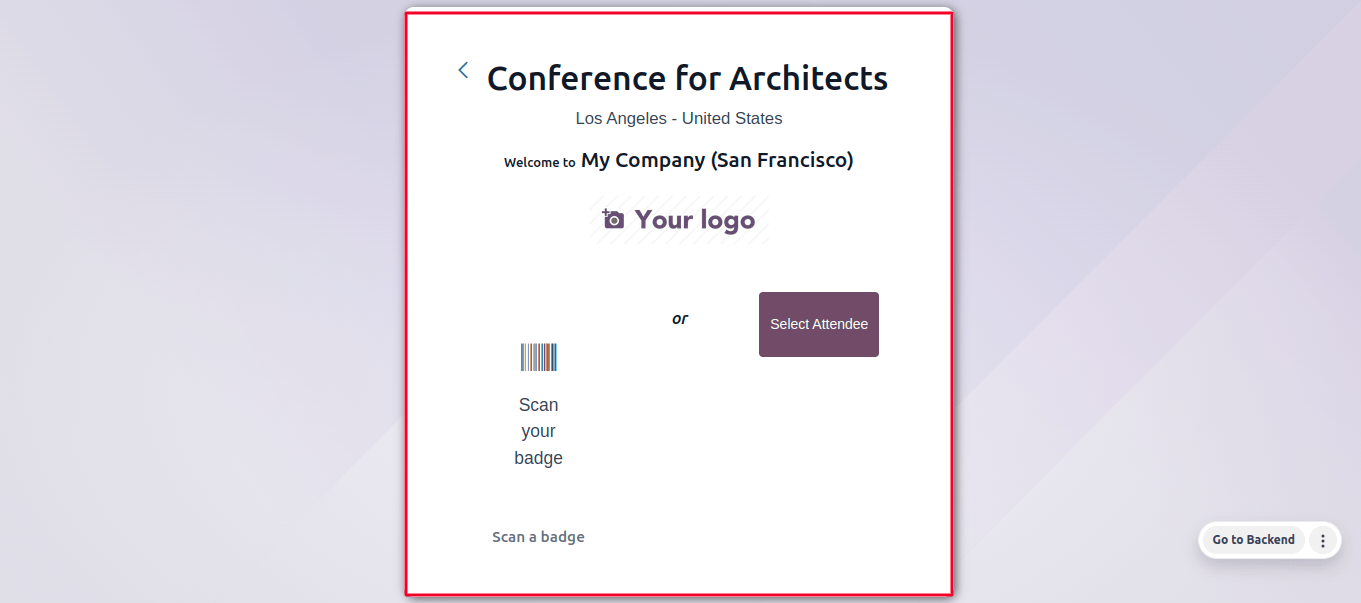
Registration Desk
Clicking the Registration Desk button will open a new pop-up window in which we can enter or register for the conference by scanning a QR-Code badge or manually inputting attendee information by clicking the Select Attendee button, as seen below.
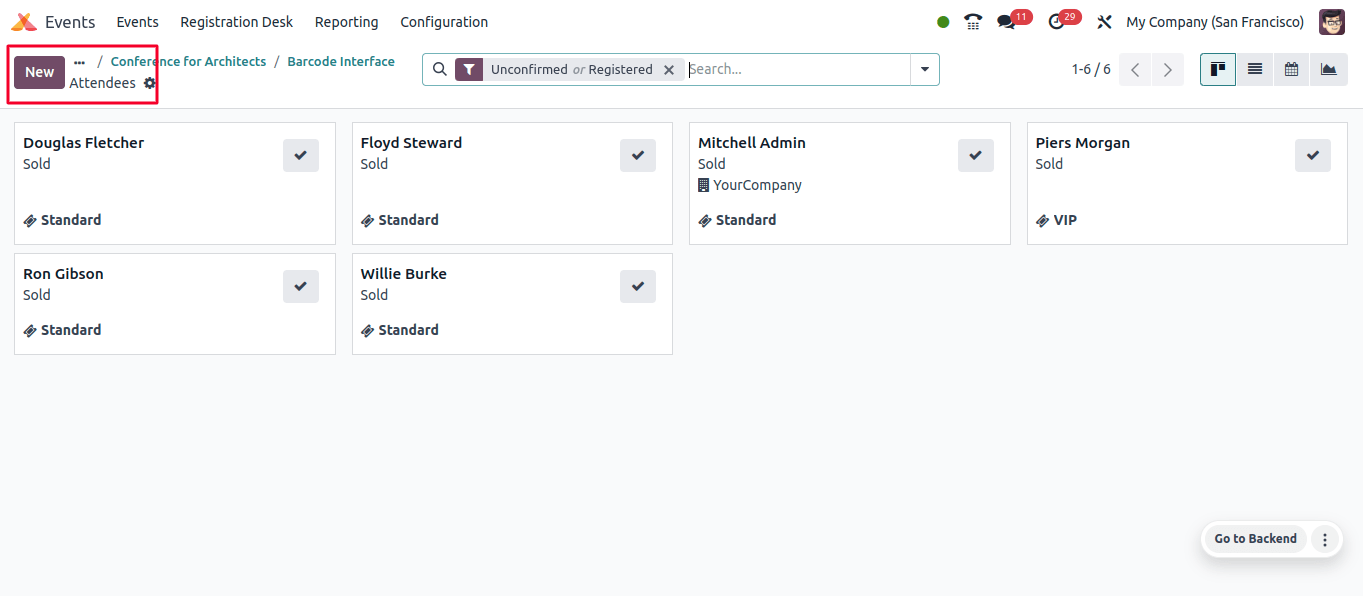
As I manually enter attendance information here, we are directed to an attendee dashboard where we can simply add additional guest information.
In the Attendee configuration form, input the Attendee Name, Email, Phone, Company Name, Event, Event Ticket, and Booked By Information. We can also set mandatory questions in the Questions tab, as seen below.
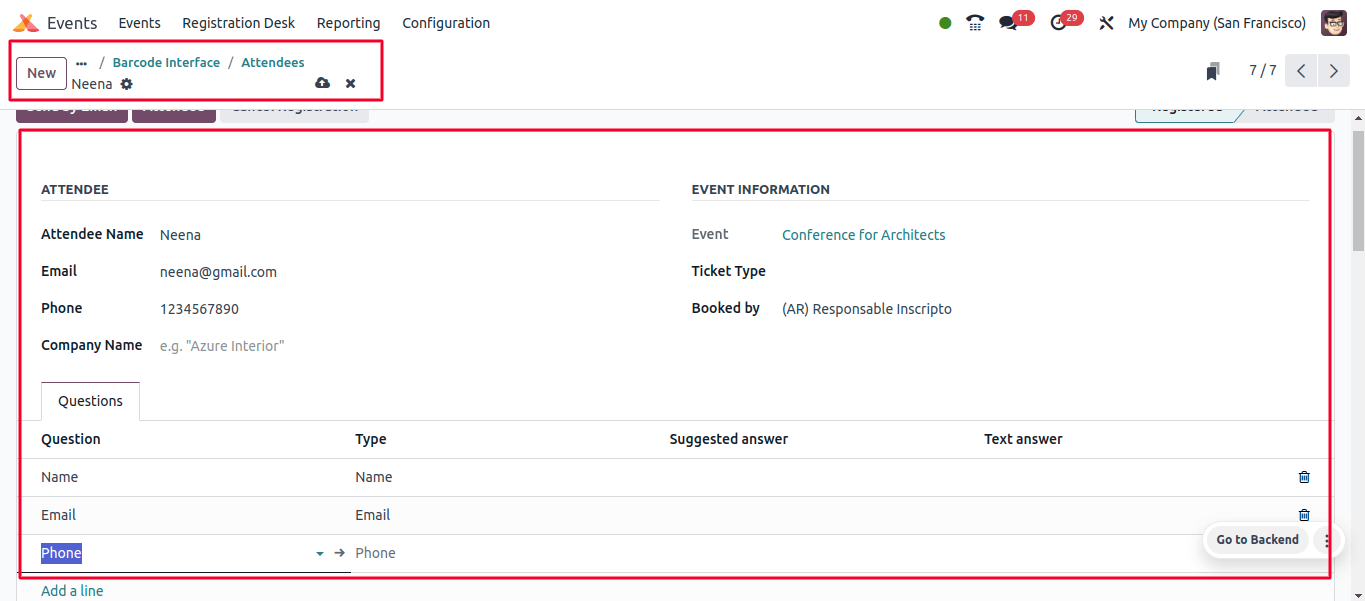
After updating the details, we may mark attendance with the Attended option or send invitations via the Send by Email button.
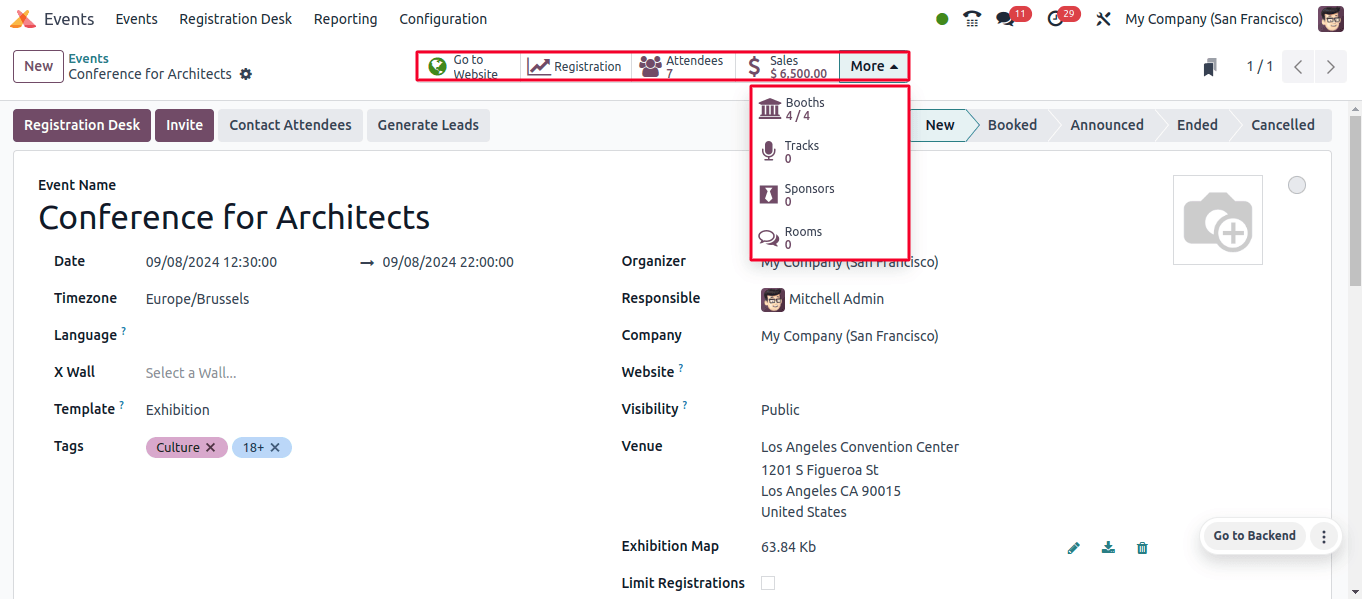
The registration button enables us to view the total number of registrations and data. The number of participants will be displayed within the participant's smart button. The Registration Desk and Booths buttons will then bring up the Registration Desk interface and registration booths respectively.
We can also view the tracks, sponsors, chat rooms, and website previews by clicking the Tracks, Sponsors, Rooms, and Go To Website buttons in the smart button section.
Managing the Created Event
1. View the Event Details: To analyze the details of a newly created event, click on it in the list.
2. Invite Attendees: To send invitations to potential attendees, select the ‘Invite’ option. This opens a mailbox where you can personalize the invitation message and schedule when it will be sent.
3. Track Invitations: Using the smart buttons given within each event setting form, you can track the status of your invitations, including how many were received, opened, clicked, and responded to.
The Odoo 17 Events module is a comprehensive tool for managing events of all sizes. Its complete features, including event design, promotion, and ticketing, ensure that events run smoothly and efficiently. Following the process given above will allow you to simply set up and manage events, ensuring that they are always successful and well-organized.
