Importing purchase and sale orders into Odoo can be quite helpful for companies trying to move data from another system or optimize data entry procedures.
It is inefficient to manually enter every record while attempting to move large amounts of data. When this happens, we can add many entries rapidly and effectively by importing data, which saves time in comparison to manual entry.
Importing Sale Order in Odoo 17
The sale order import template must be downloaded before the sale order can be imported. Following the download, we may alter the template, add the data, and upload it to the Odoo database.
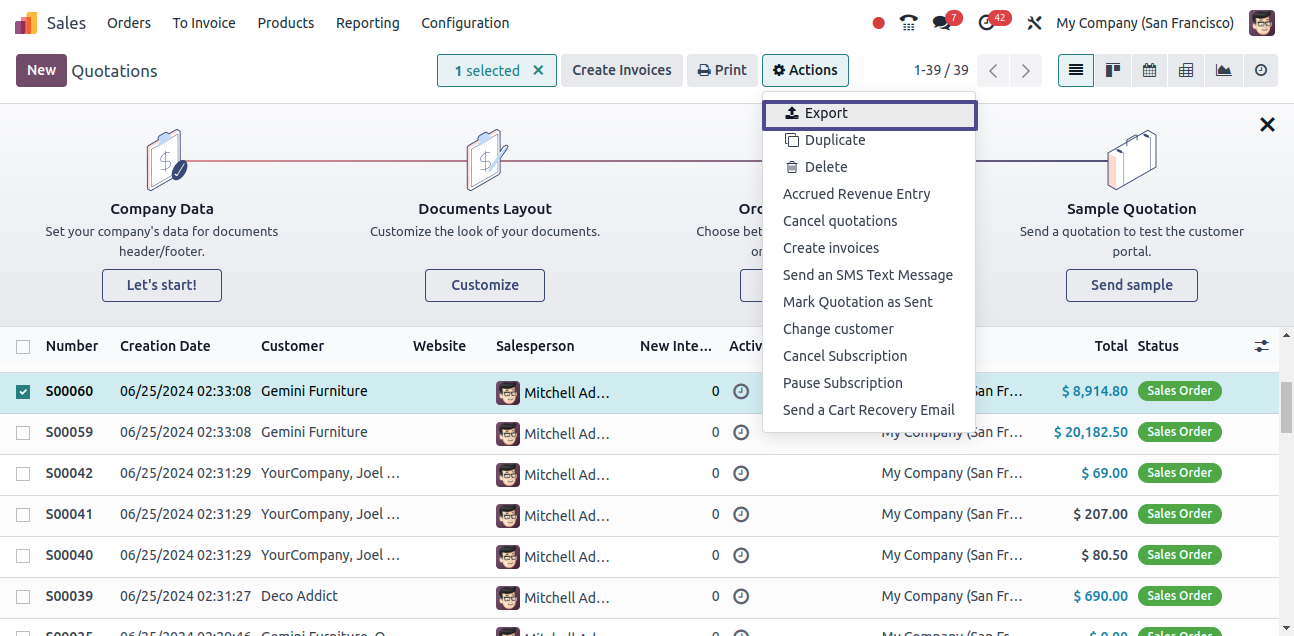
We must go to the Sales app in order to import the sale order into Odoo 17. Purchases? Estimates. First, we may make a template. To begin with, choose a record to export, then click the actions button to make the export option visible.
A new window with fields to export on the right and available fields on the left appears when you click on Export. By selecting the plus icon, we can move the desired field from the "available fields" part to the "fields to export" area.
If the template needs to be saved under a certain name, we can use it in the event that we need to export the data more than once.
There is also an option labeled "I want to update data (import-compatible export)". Only the fields that can be imported are displayed when that option is checked.
In order to update a record without repeating data, we can use its external ID, which will allow us to uniquely identify the record. An additional benefit is that the heading in the exported sheet displays in the top row when we export with the external id, making it simple to map to the Odoo fields.
You have a lot more field possibilities when the box is left unchecked since all of the fields are presented, not just the ones that can be imported.
The exporting process offers two export formats:.csv and.xlsx. The items in a.csv file are separated by commas, whereas a.xlsx file contains information on every worksheet in the file, including layout and content.
You can use the search bar to locate specific fields and the > (right arrow) symbol to see more sub-field possibilities for each field. In the exported file, we can also drag the fields to put them in the desired order and remove any fields that are not needed by using the trash icon.
The following fields are being added to the export here:
Order reference: It refers to the unique reference ID of the order.
Customer: Customer to whom the sale order is being created.
Order Date: It refers to the date on which the sale order is created.
Pricelist: It is the predefined list of prices for products and services offered by the company.
Invoice Address: It is the address to which the invoice for the sale will be sent.
Delivery Address: It is the address to which the products or services purchased in the sale order will be delivered to.Payment terms: Clearly states all terms associated with a sales payment to assist clients in making accurate and timely payments.
Order Lines/Product: Product that needs to be added to the sale order.
Order Lines/Description: Description of the product.
Order Lines/Quantity: Quantity of the product
Order Lines/Unit of Measure: UoM of the product.
Order Lines/Unit Price: Unit price of the product.
Order Lines/Taxes: refers to the tax amount that is attached to each order line.
Invoicing Journal/Journal Name: It is the record-keeping entity used to keep the accounting records of the invoice.
Salesperson: refers to a specific individual who is responsible for managing sales-related activities.
Sales Team: this refers to a specific group of individuals who is responsible for managing the sales-related activities.
Fiscal Position: refers to a set of rules or configurations that define how taxes and accounting entries should be managed for specific customers or vendors based on their fiscal or financial situation.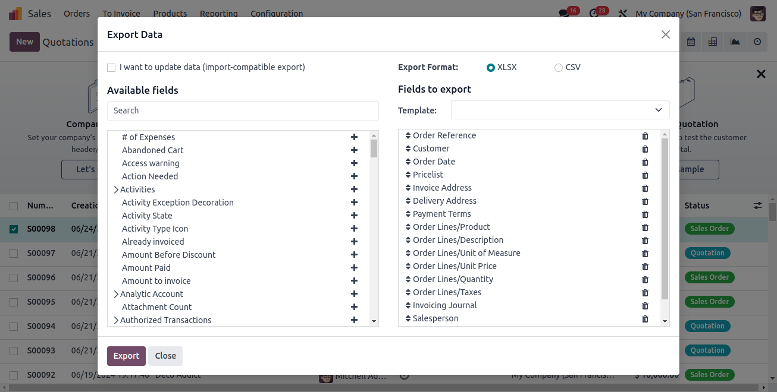
Once every field has been included for export, we can click the Export button to export the template and make any necessary updates.


We may return to the quotes page after making updates to the sale order template spreadsheet, click the gear symbol in the top left corner of the page, and choose Import records.
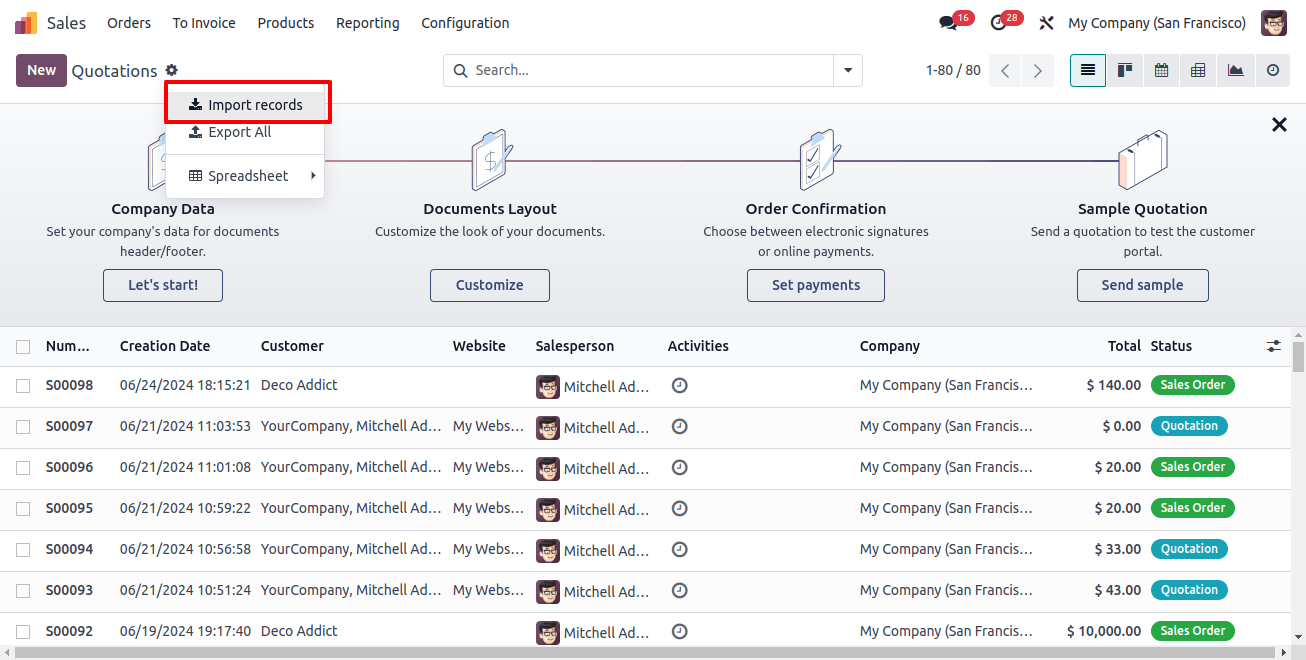
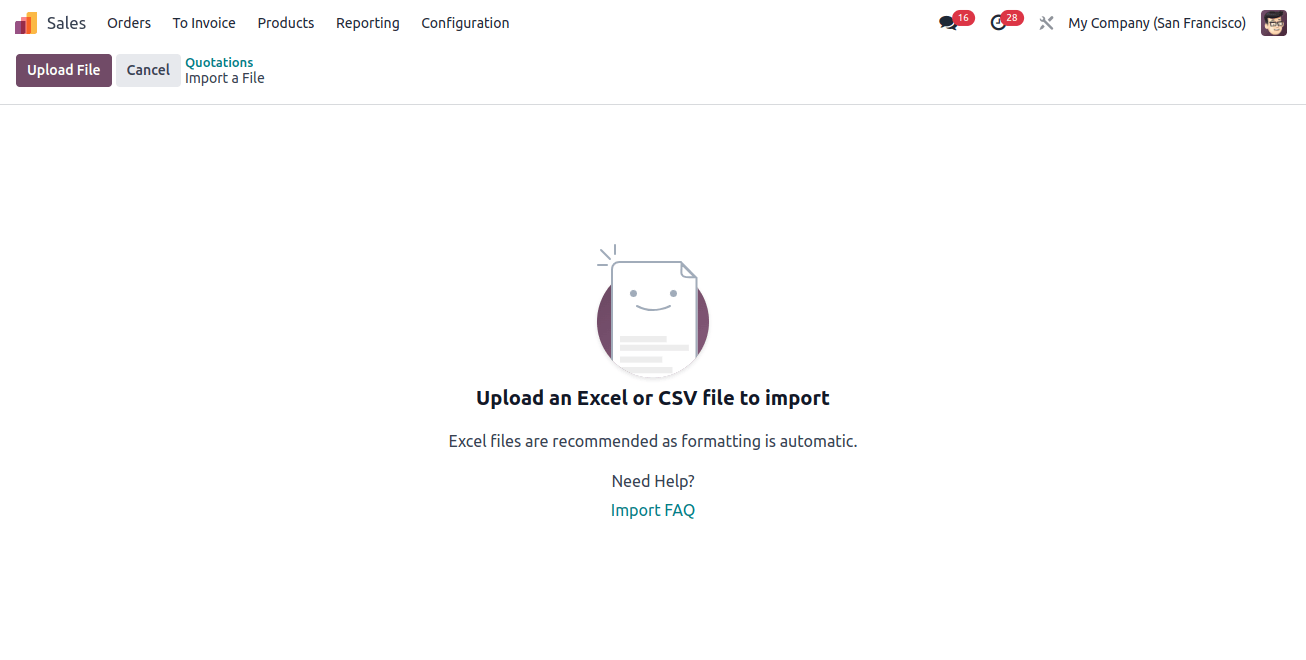
We can upload a file from our system using the option located at the top left.
A page displaying every component of the freshly configured sale order template spreadsheet—divided by File Column, Odoo Field, and Comments—appears upon file upload.
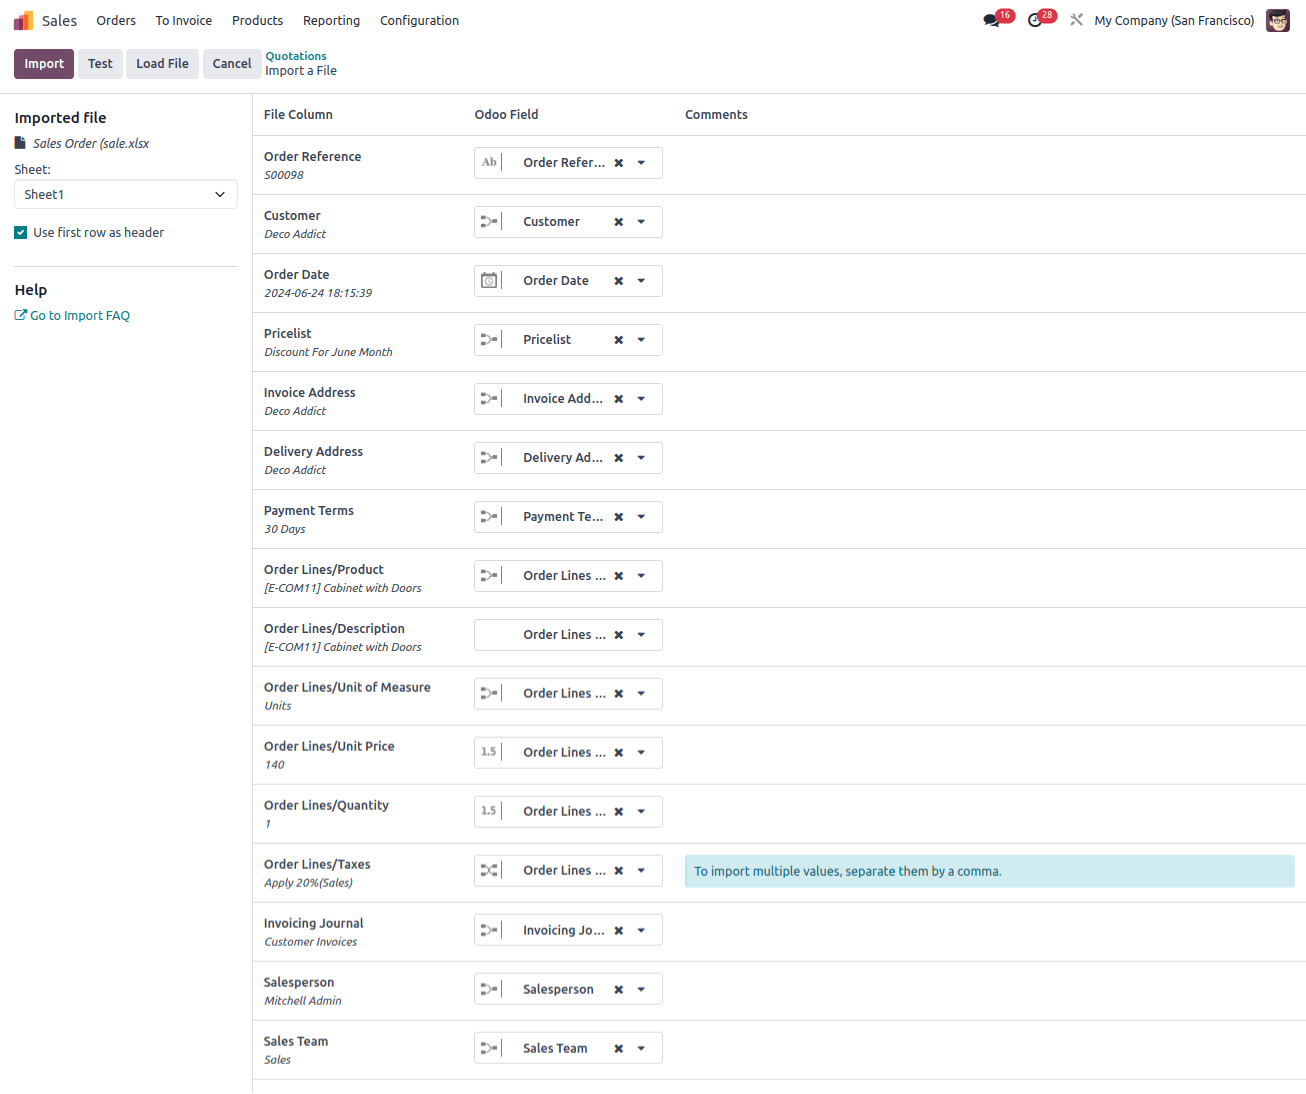
From here, we can manually assign the file column to the Odoo field if needed, and we can click the Test button in the upper-left corner to verify that all of the fields and columns are aligned correctly.
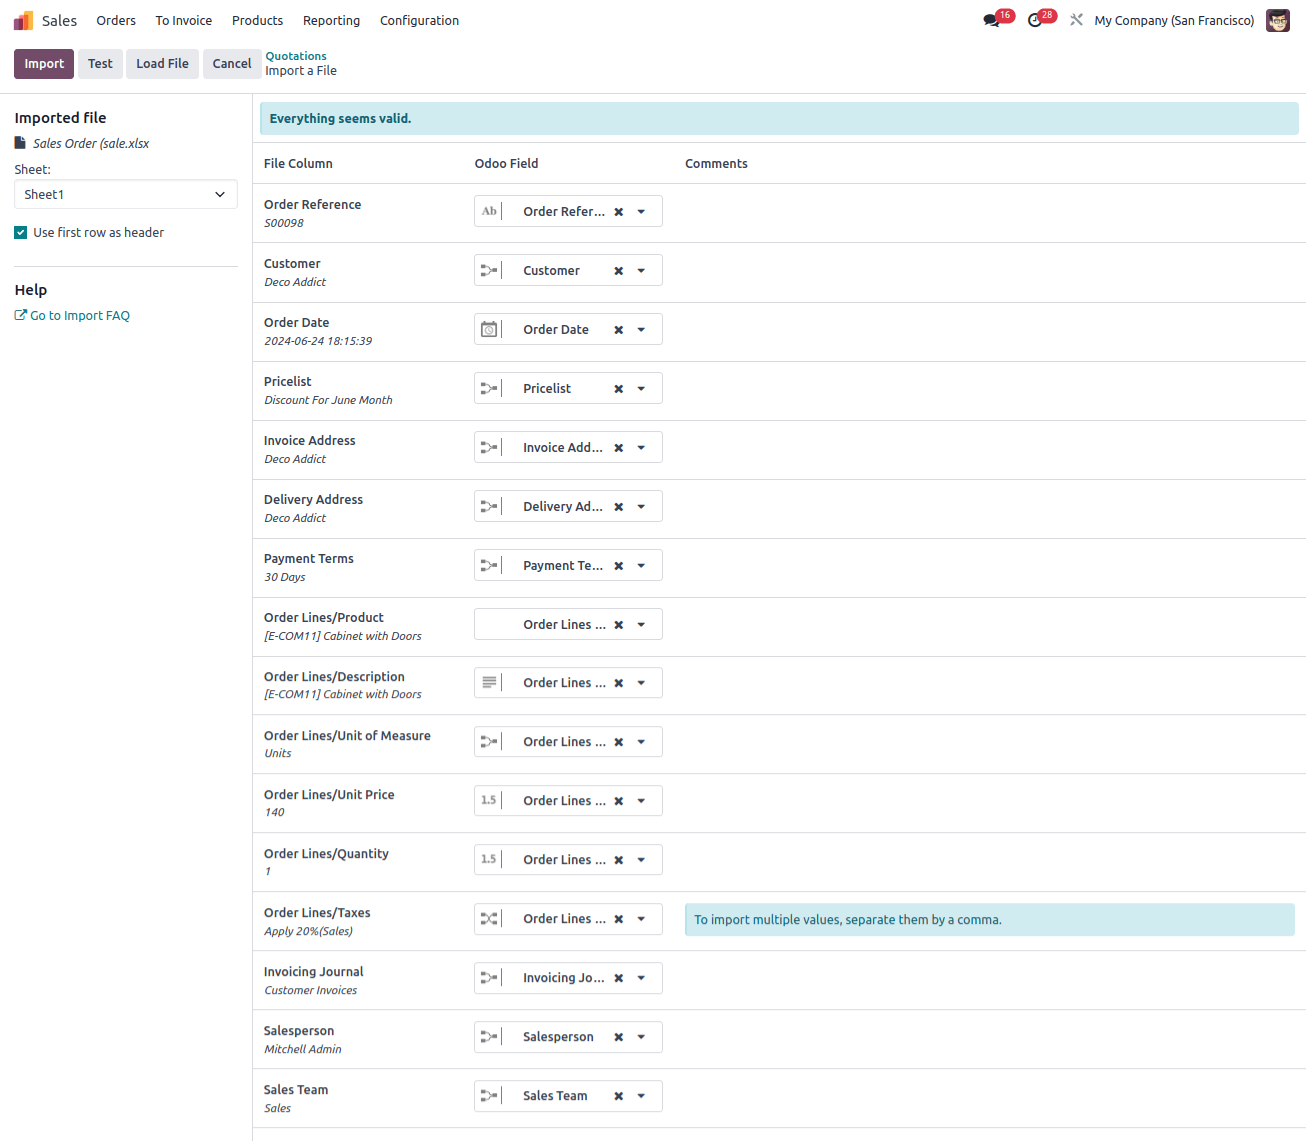
The user is informed that everything appears valid at the top of the page by a blue banner that appears if everything is implemented correctly.
If there are any mistakes, a red banner with information on where to find the individual problems and how to repair them appears at the top of the page.
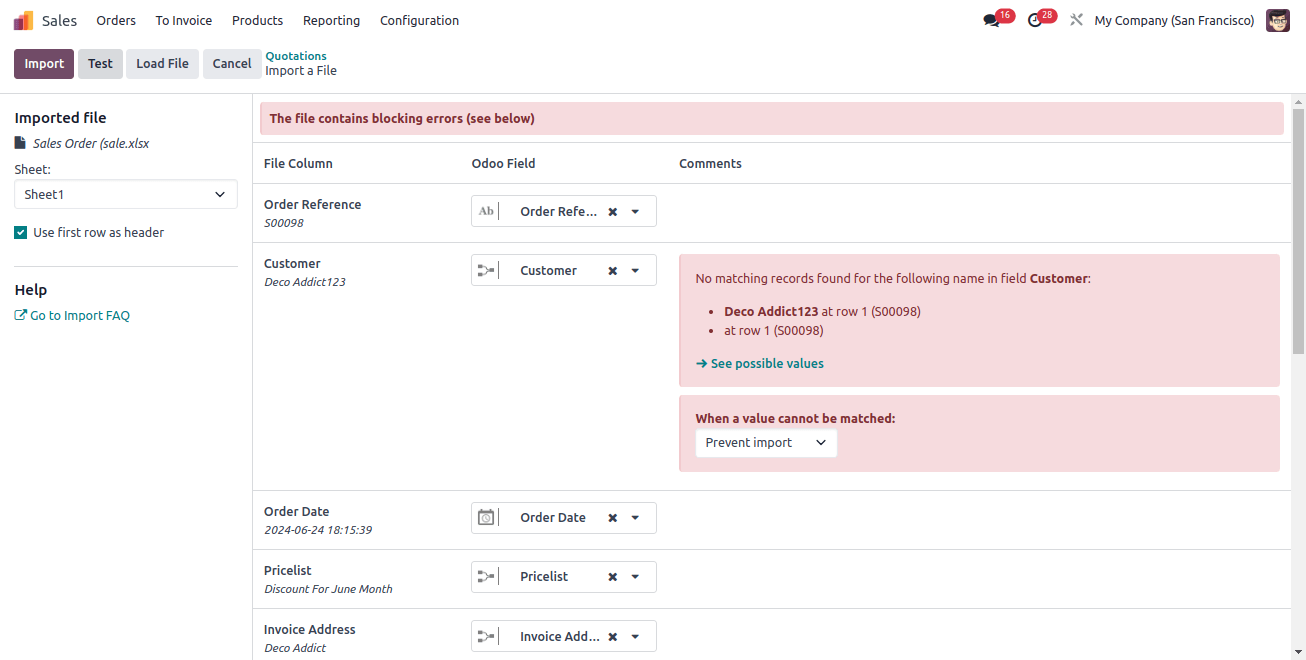
The error "No matching records are found for the following name in the field "customer"" is seen in the screenshot above. From here, we can either choose to stop the import of that field or choose to create new values and carry on.
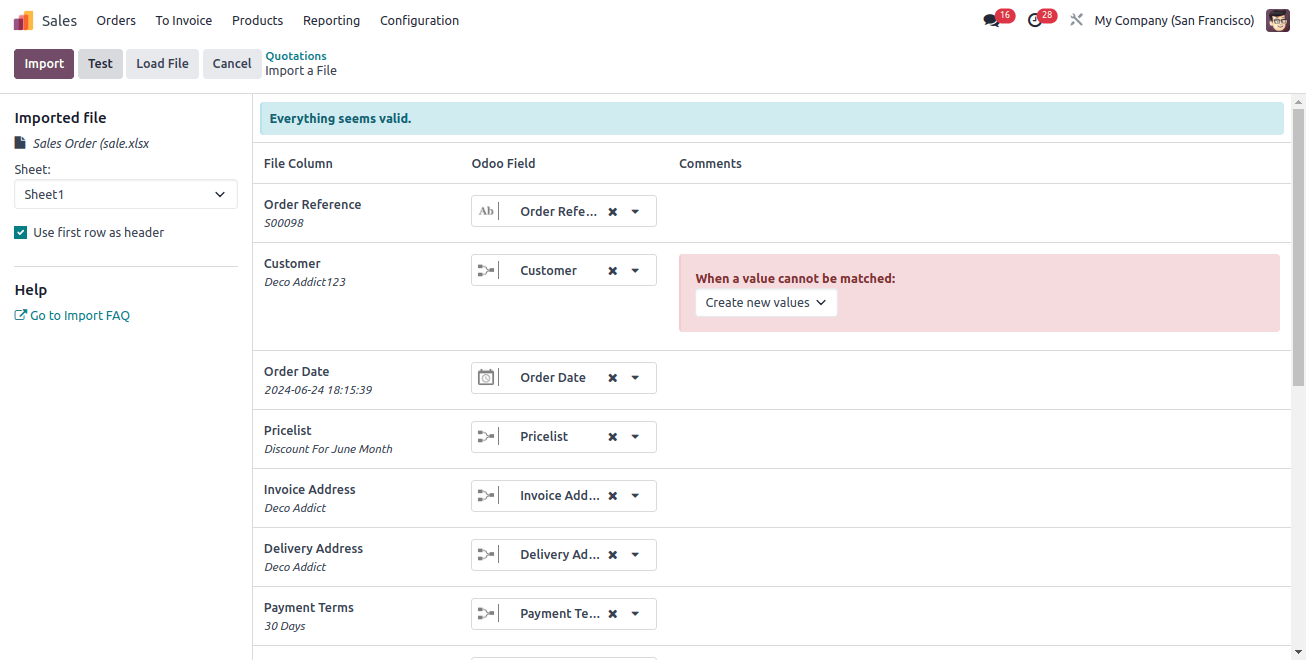
After resolving all the issues, we may import the records by clicking the Import button after testing.
A pop-up notification in the upper-right corner of the screen notifies the user of the number of quotations that were successfully imported when the records are imported.
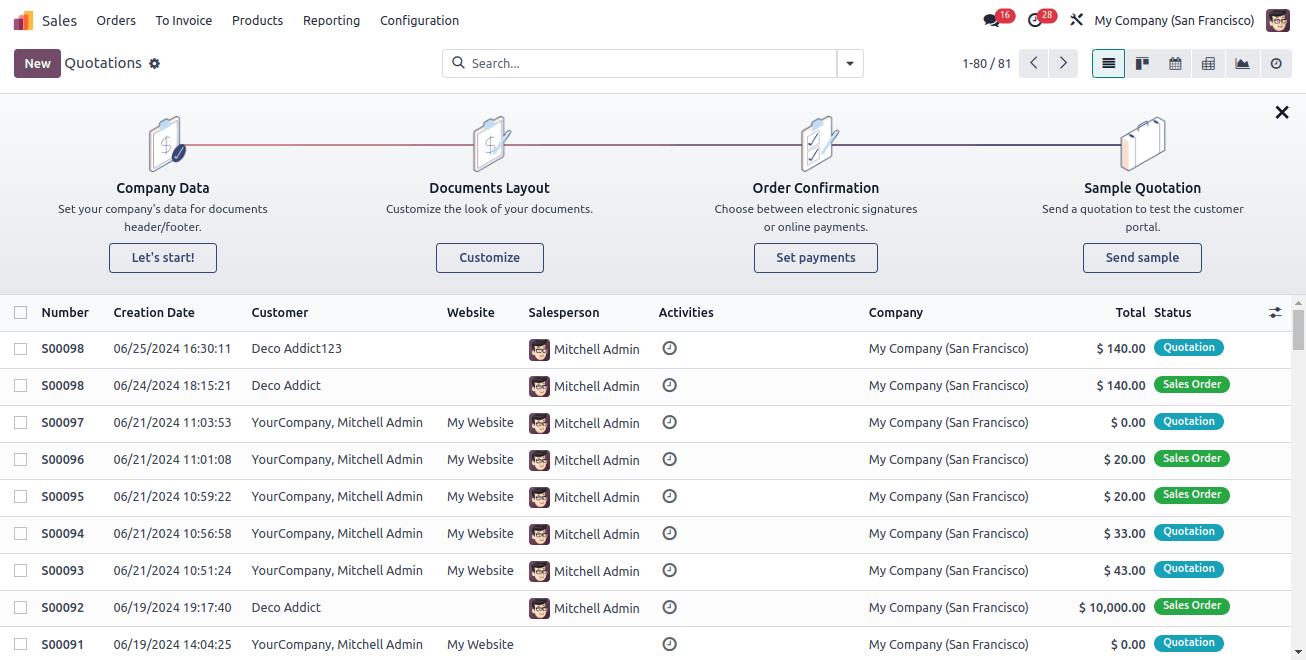
From the quotations tab in the sales app, we can now access and modify the imported quotations in addition to seeing them.
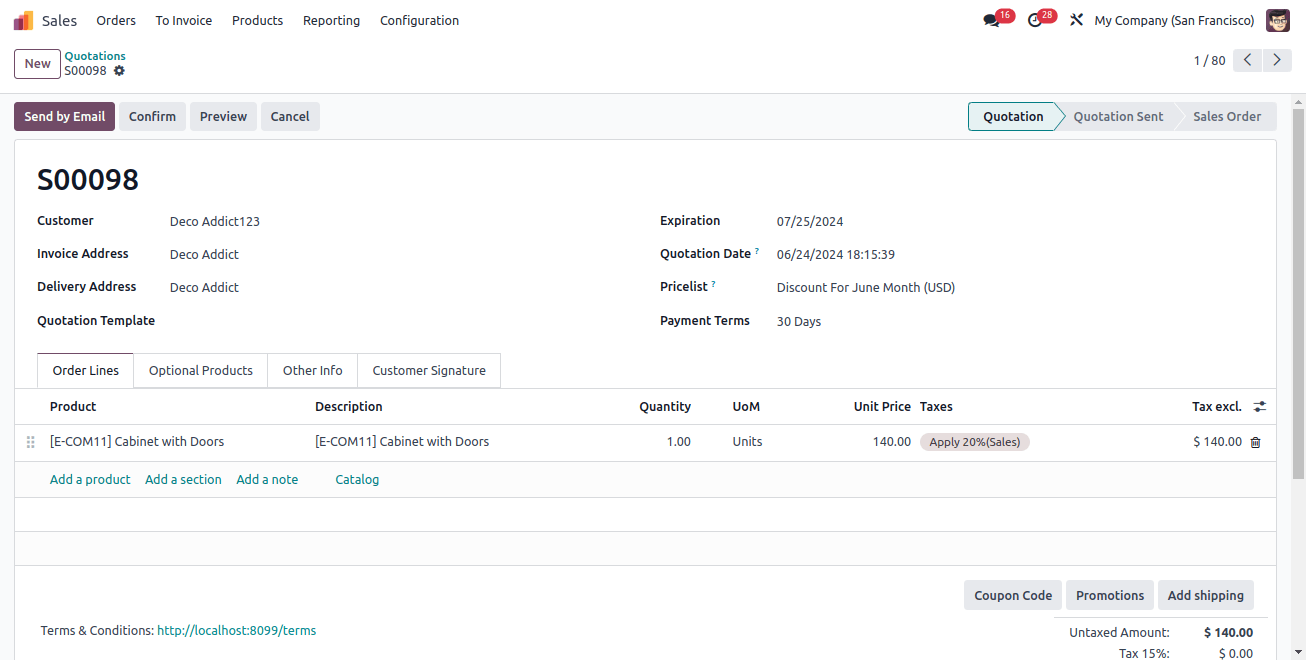
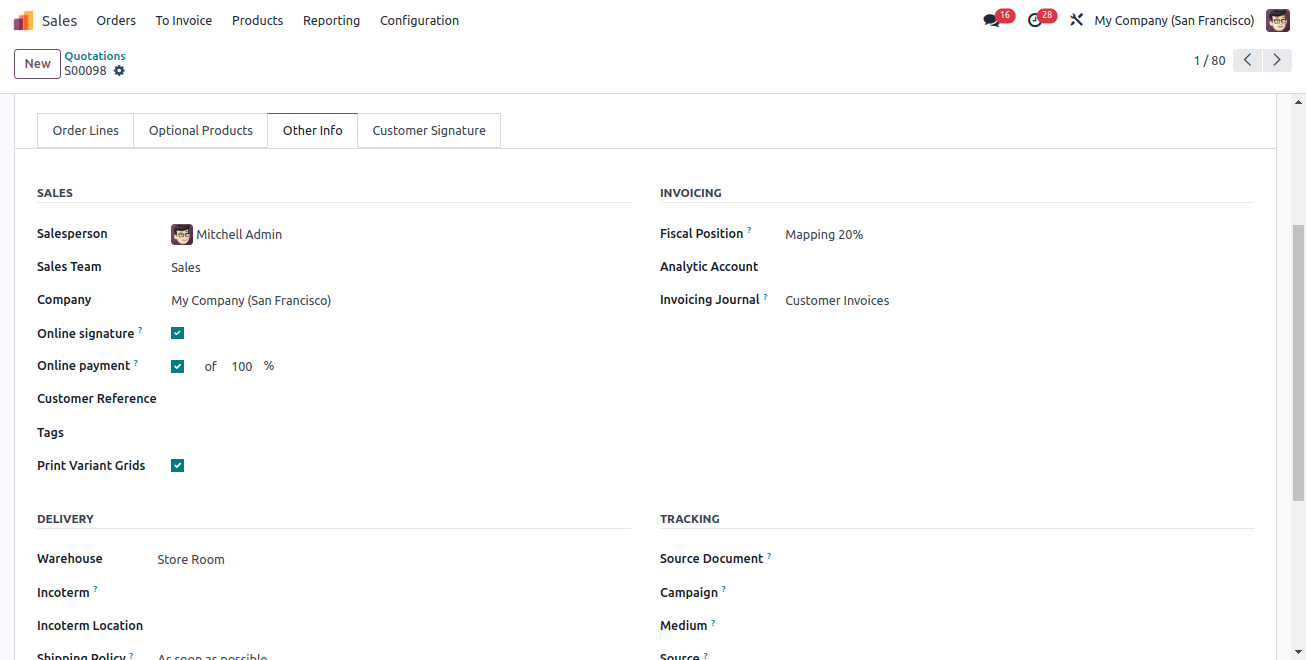
The sales quotation's corresponding fields receive all of the data from the sheet.
Importing Purchase Orders in Odoo 17
The purchase order import template must be downloaded before the purchase orders can be imported into Odoo. We can alter and change the template after downloading it, then upload it to the Odoo database.
To obtain the required import template, go to the Purchase app. Requests? Make a quote request. We can choose a record to export from the request for quotations page, and then click the actions button to make the export option visible.
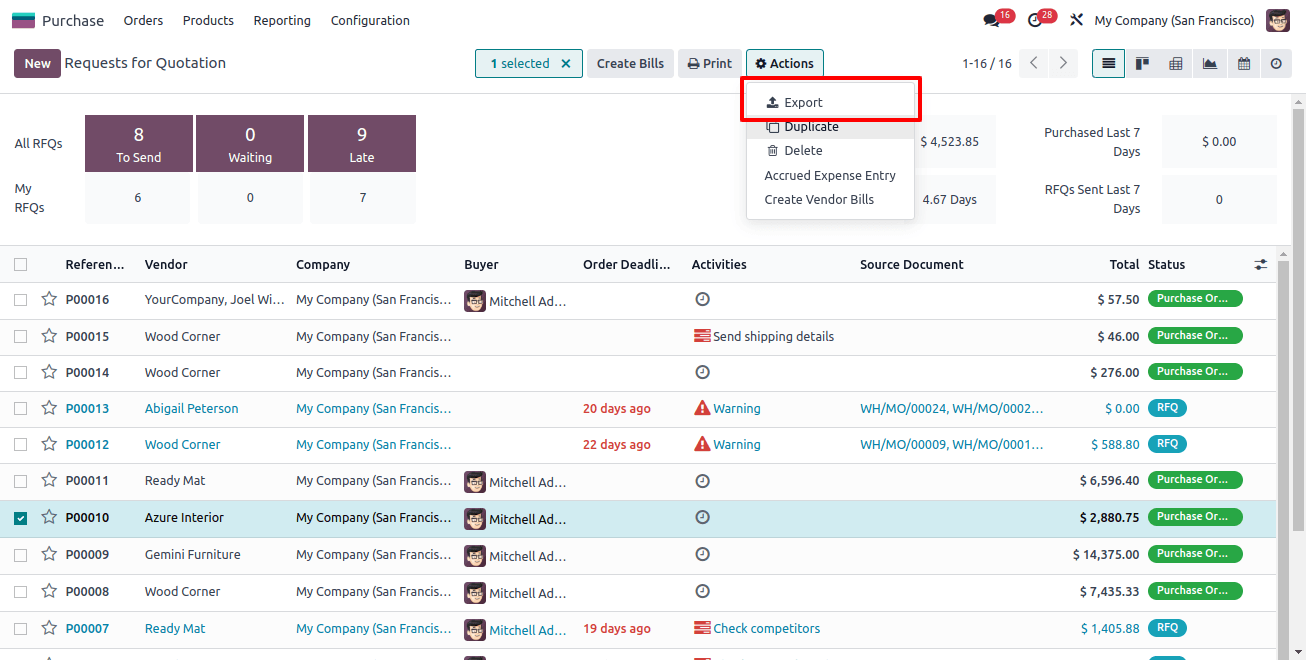
A new window with fields to export on the right and available fields on the left appears when you click on Export.
By selecting the plus icon, we can add the fields that we wish to export from the list of accessible fields to the export area.
If the template needs to be saved under a certain name, we can use it in the event that we need to export the data more than once.
There is also an option labeled "I want to update data (import-compatible export)".
The fields that can be imported are only displayed when the external id is checked. Since the external id aids in identifying a record individually, it will be useful to update an imported record without producing duplicates.
Additionally, the sheet with the first row (header) that we receive when exporting files with an external ID is in a form that can be readily mapped to Odoo fields when importing records.
You have a lot more field possibilities when the box is left unchecked since all of the fields are presented, not just the ones that can be imported.
The exporting process offers two export formats:.csv and.xlsx. The items in a.csv file are separated by commas, whereas a.xlsx file contains information on every worksheet in the file, including layout and content.
You can use the search bar to locate specific fields and the > (right arrow) symbol to see more sub-field possibilities for each field. In the exported file, we can also drag the fields to put them in the desired order and remove any fields that are not needed by using the trash icon.
The following fields are being added at this point:
Order Reference: It refers to the unique reference Id of the order.
Vendor: Vendor for whom the purchase order is being created.
Vendor Reference: It is a reference to the bid or sale order that the seller sent. This reference is put on the delivery order that the seller sends, so it is used to match products when you receive them.
Order Deadline: This refers to the deadline for confirming the request for quotation and converting it into a purchase order.
Expected Arrival: It is the date on which the ordered items are expected to arrive.
Order Lines/Product: Product that needs to be added to the sale order.
Order Lines/Description: Description of the product.
Order Lines/Quantity: Quantity of the product
Order Lines/Unit Price: Unit price of the product.
Order Lines/Unit of Measure: UoM of the product.
Order Lines/ Taxes: refers to the tax amount that is attached to each order line.
Payment Terms: Clearly states all terms associated with a sales payment to assist clients in making accurate and timely payments.
Fiscal Position: Is used to describe a collection of guidelines or configurations that specify how taxes and accounting entries should be handled for particular clients or suppliers in light of their financial or tax circumstances.
Currency: It is the monetary unit in which the transactions take place.
Incoterm: refers to International Commercial Terms, which are conventional trade terms that are predetermined and utilized to split costs and obligations between the buyer and the seller in contracts for international sales.
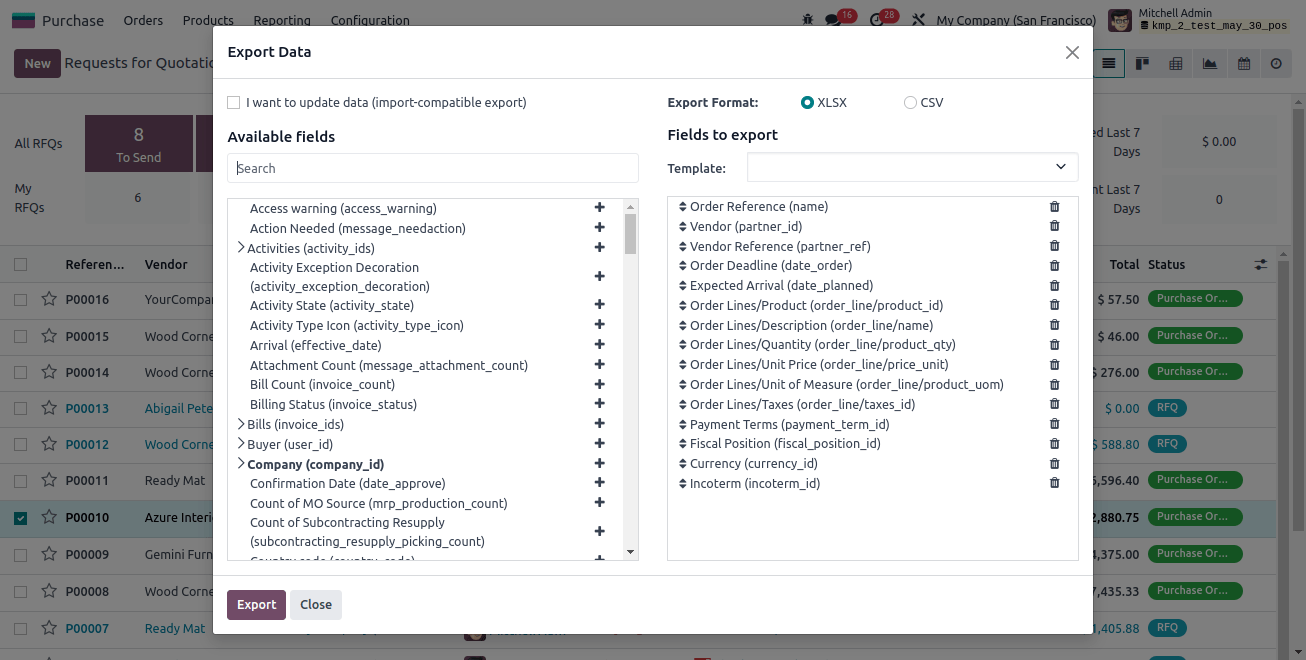
We can export the template by clicking the Export button once all the fields have been added. Then make necessary updates to the template.


We can choose to import records by clicking on the gear icon in the upper left corner of the request for quotations page after making updates to the purchase order template spreadsheet.
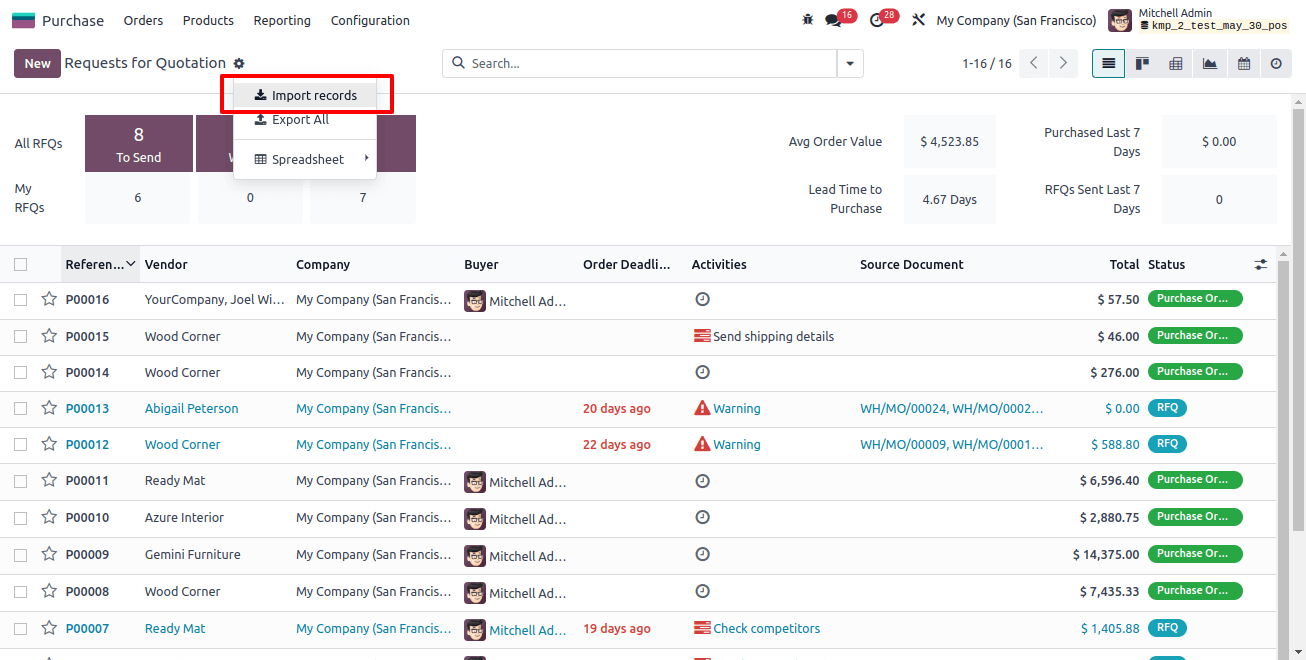
The option to upload the file from our system is located at the upper left corner.
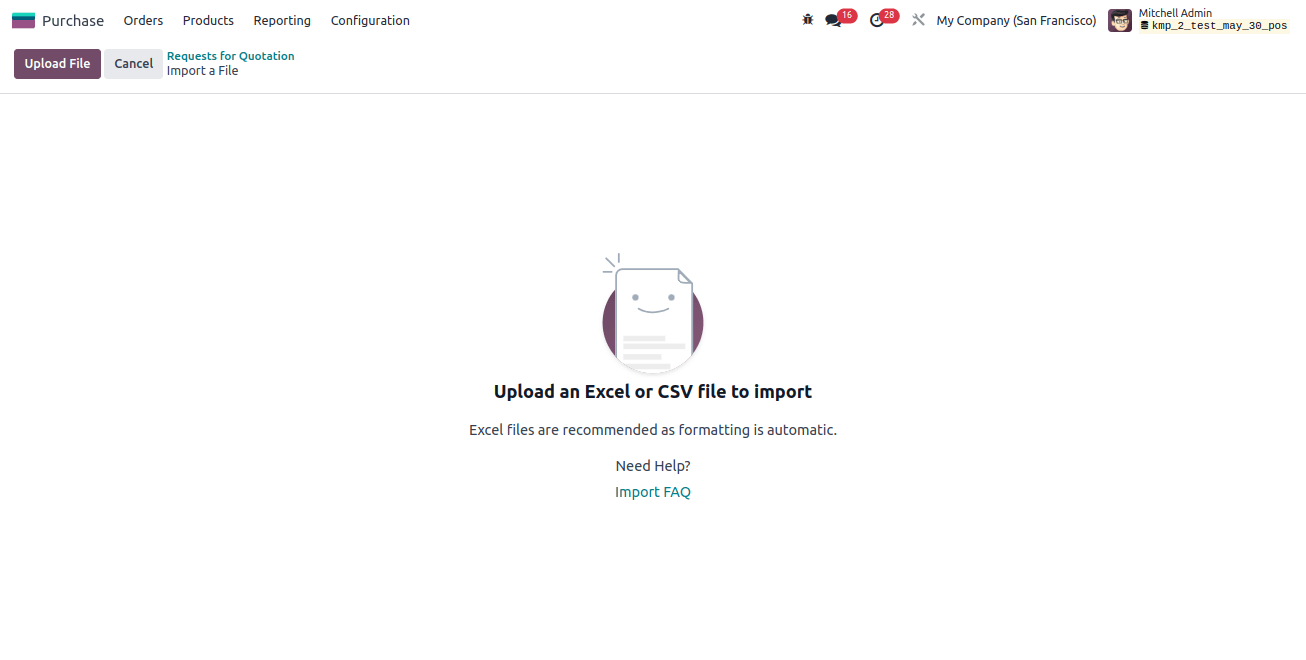
A page displaying every component of the freshly customized purchase order template spreadsheet—divided by File Column, Odoo Field, and Comments—appears upon file upload.
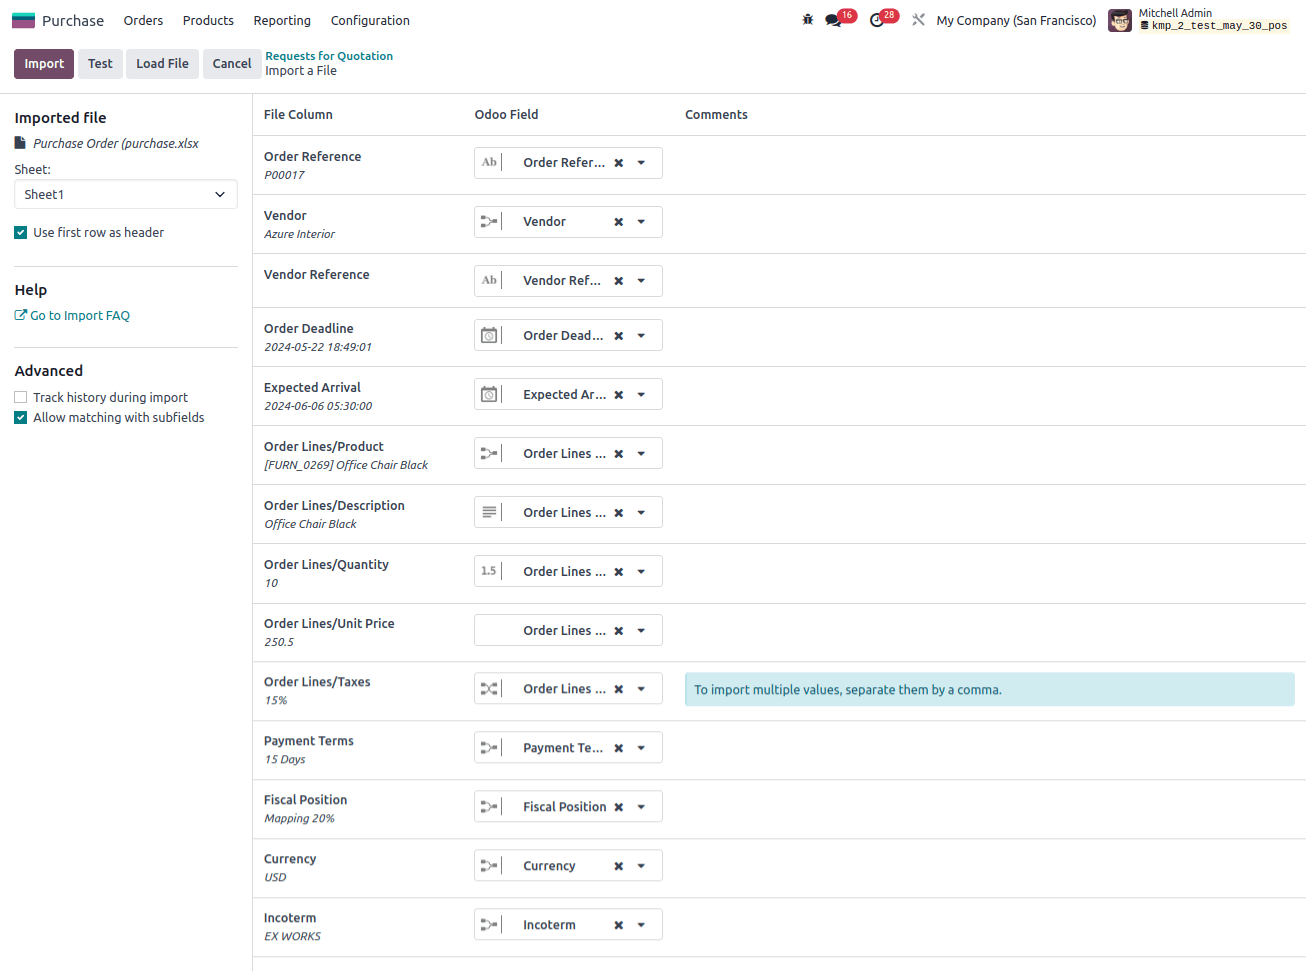
From this point on, if needed, the file column can be manually allocated to the Odoo Field. We can also verify that all columns and fields are aligned correctly by clicking the Test button located in the upper-left corner.
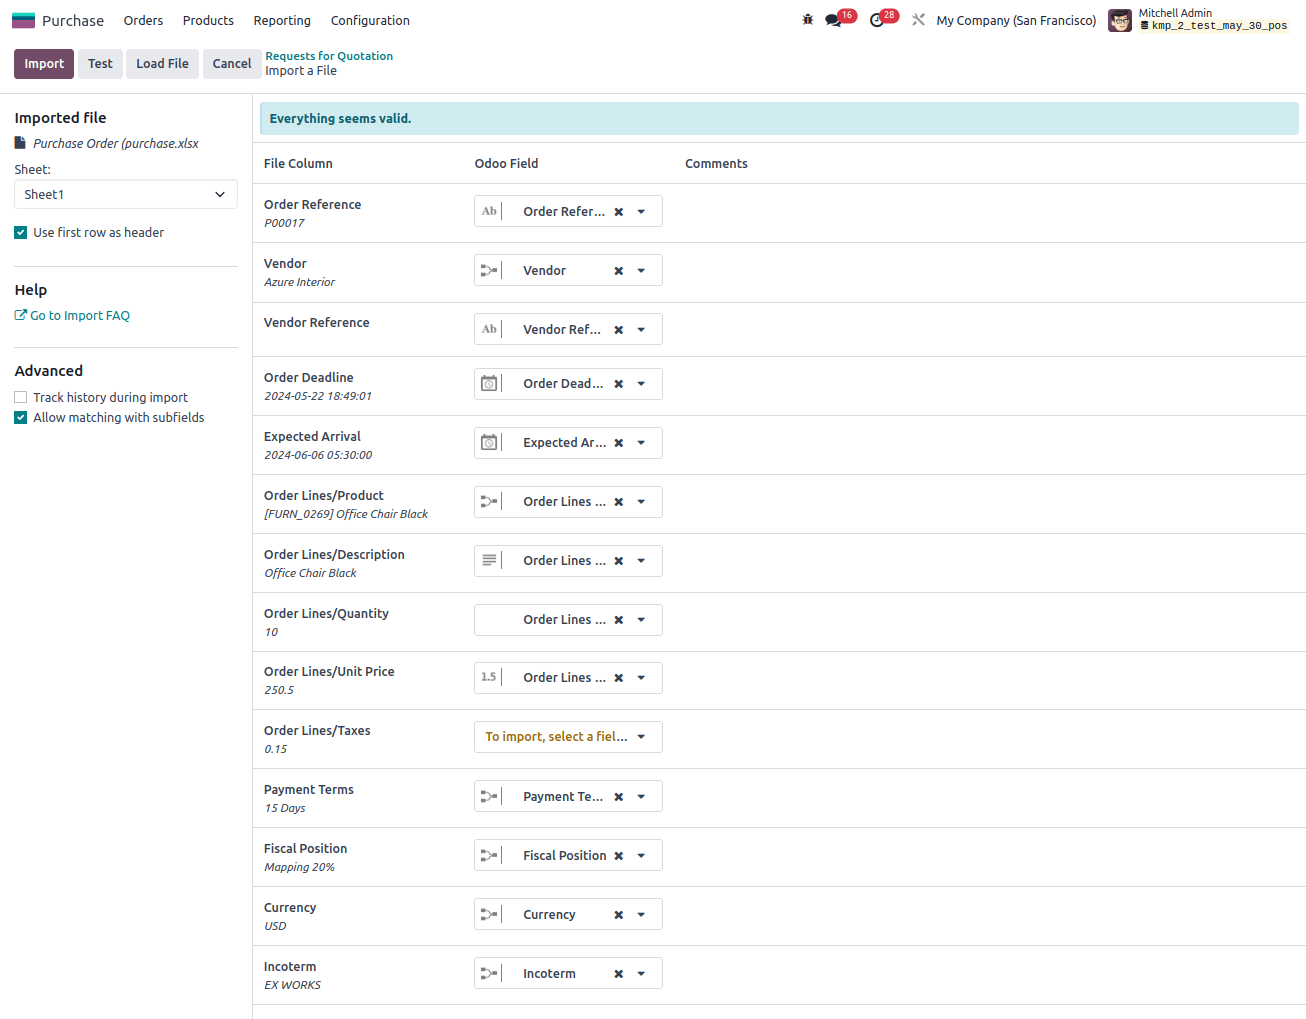
The user is informed that everything appears valid at the top of the page by a blue banner that appears if everything is implemented correctly.
If there are any mistakes, a red banner with information on where to find the individual problems and how to repair them appears at the top of the page.
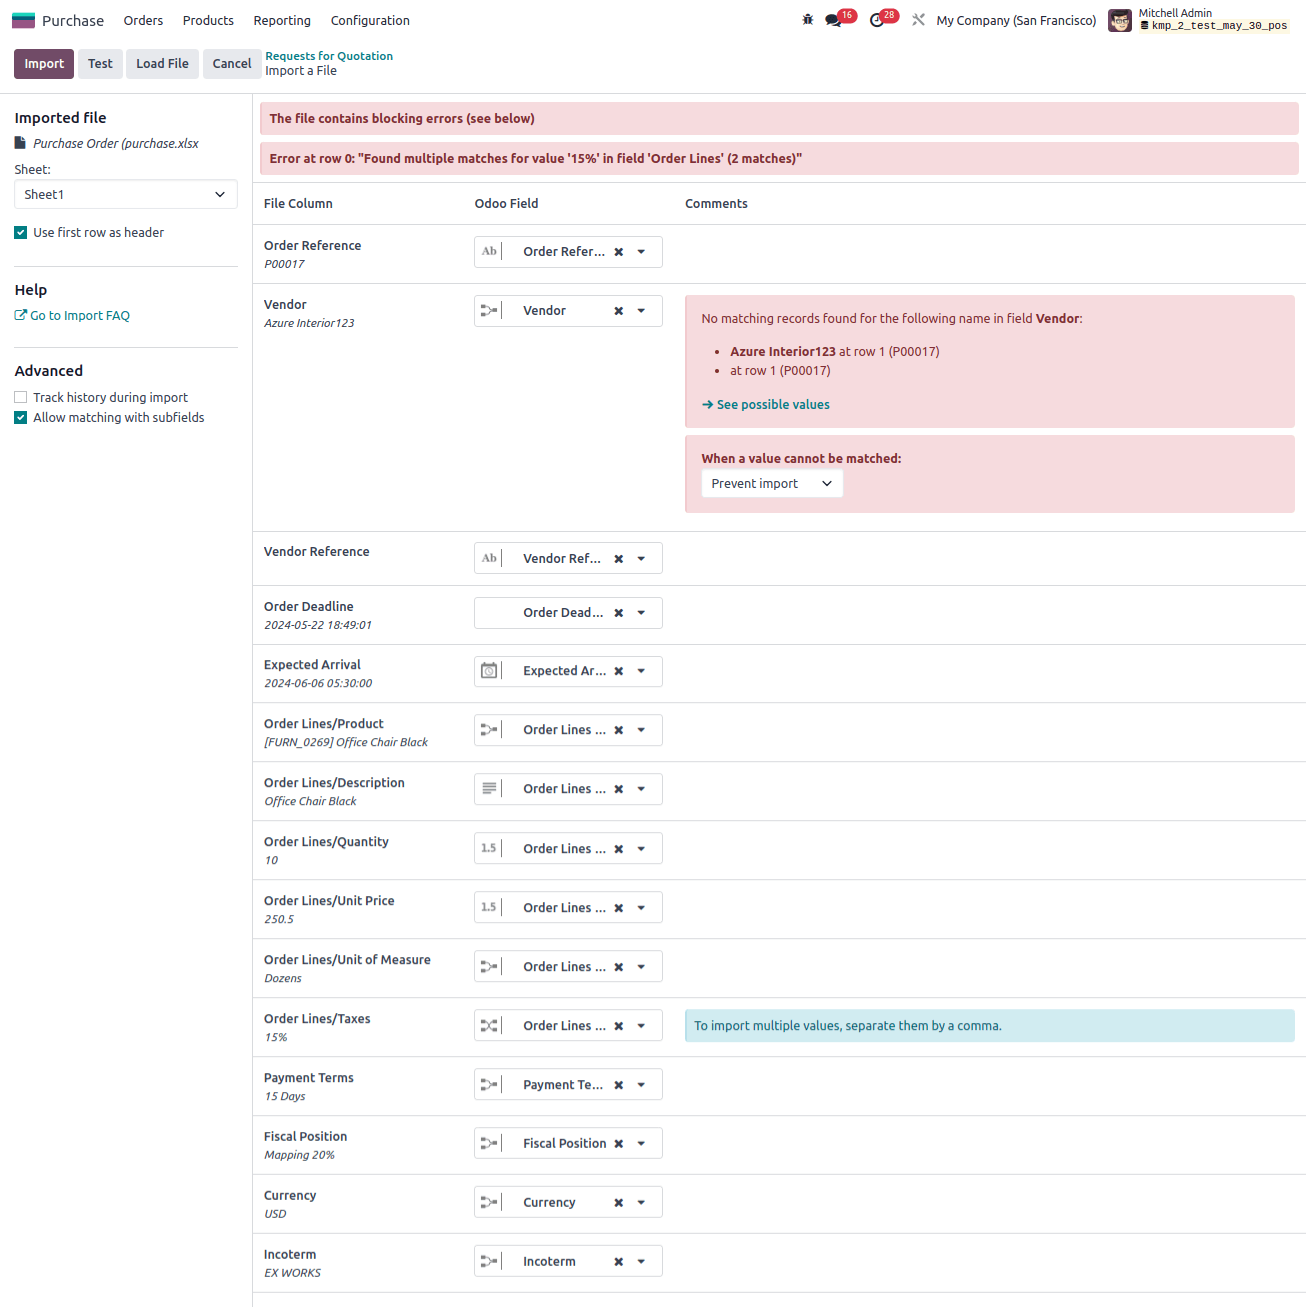
The message "No matching records were found for the following name in the field vendor" is seen in the screenshot above.
From this point on, we have two options: either stop the field from being imported, or choose to construct new values to construct the value and carry on with the import.
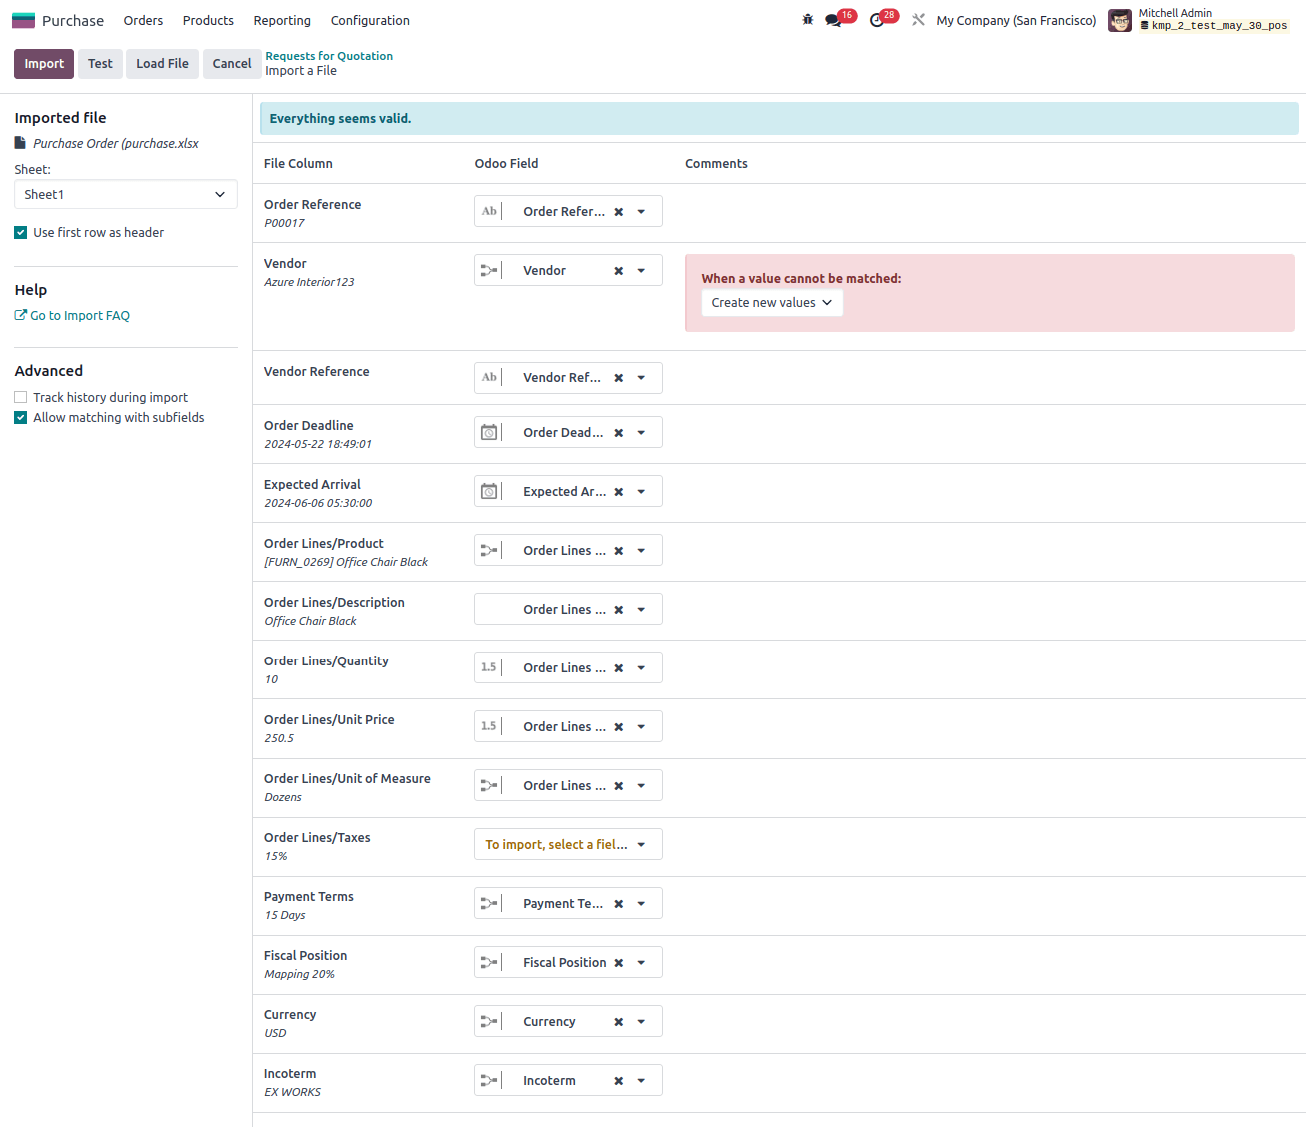
We can import the records by clicking the Import button after all errors have been corrected. A pop-up notice in the upper-right corner of the screen tells the user how many purchase orders were successfully imported when the records are imported.
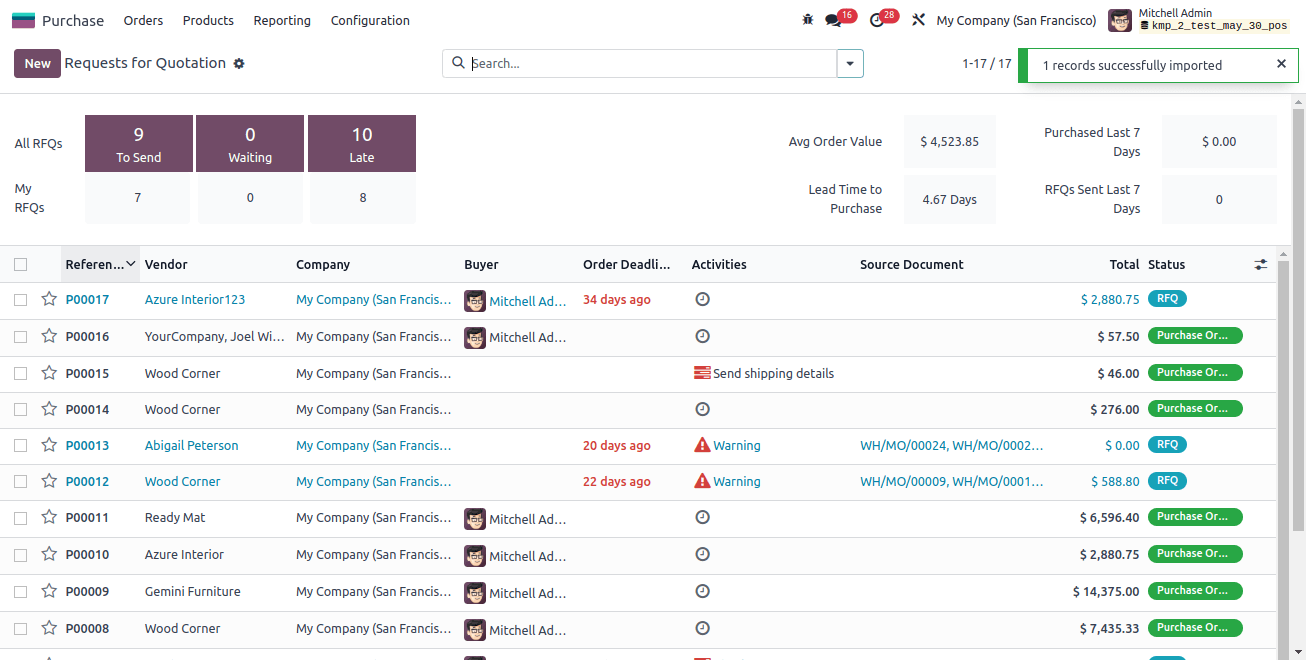
We can now access and update the freshly imported RFQ directly from the RFQ page, where we can also view it.
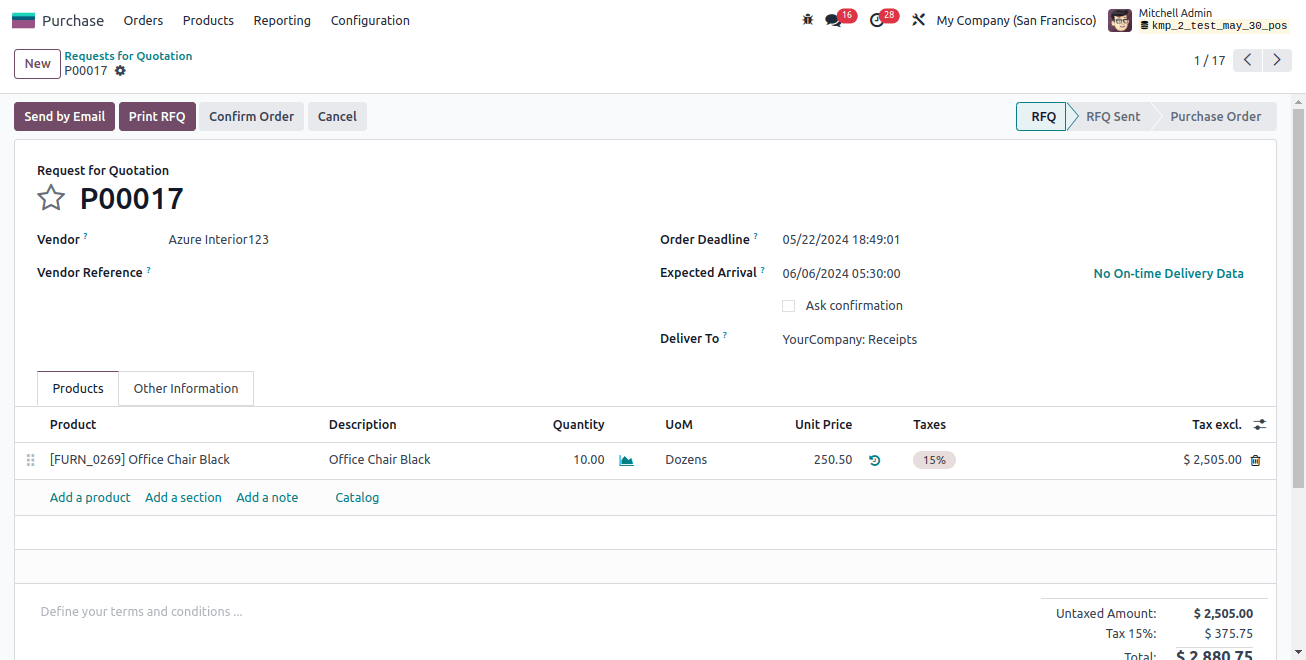
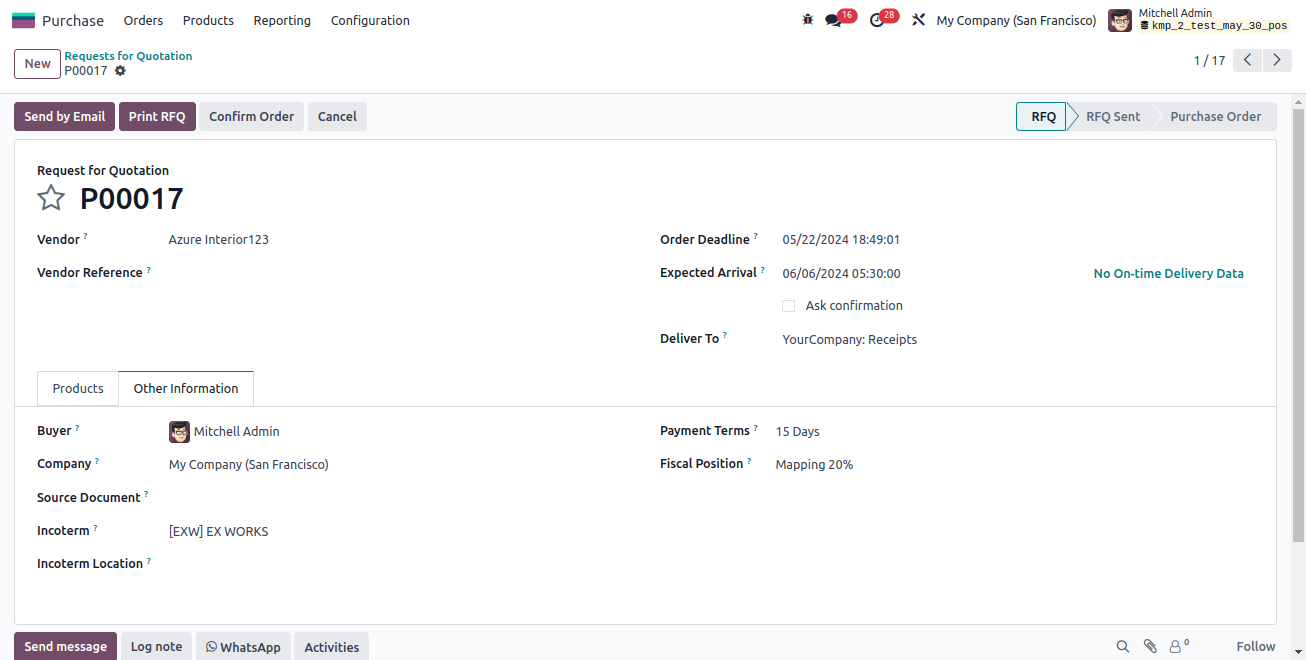
In Odoo 17, every imported field has been accurately matched to the buy quotation fields.
Thus, we have witnessed the importation of purchase and sale orders into Odoo 17. Rather than manually entering the data into the Odoo 17 database one at a time, this is a useful way to add the data in bulk all at once.
Businesses who use the import functionalities of Odoo services can:
- Reduce the amount of data entering that is done by hand, saving time and reducing errors.
- Streamline order processing to increase productivity.
- Increase data precision to facilitate improved decision-making.
Businesses may improve workflows, gain a competitive edge, and expedite order management with the help of Odoo 17's import capabilities.
