Master production schedule, or MPS, is a long-term planning tool that provides an overview of the company’s productions. It is based on the company’s overall strategy for managing resources and production over a specific period.
Certain inputs are required for efficient production planning using MPS, such as a demand forecast, inventory levels, and customer orders.
MPS determines the quantity required to produce the remaining inventory, as well as the total amount of merchandise that can be promised to customers.
MPS is an important component of the Odoo 17 manufacturing module, which helps businesses organize and schedule their production processes.
We may plan product manufacturing depending on a variety of factors, including demand projections, available resources, lead times, and production capacity.
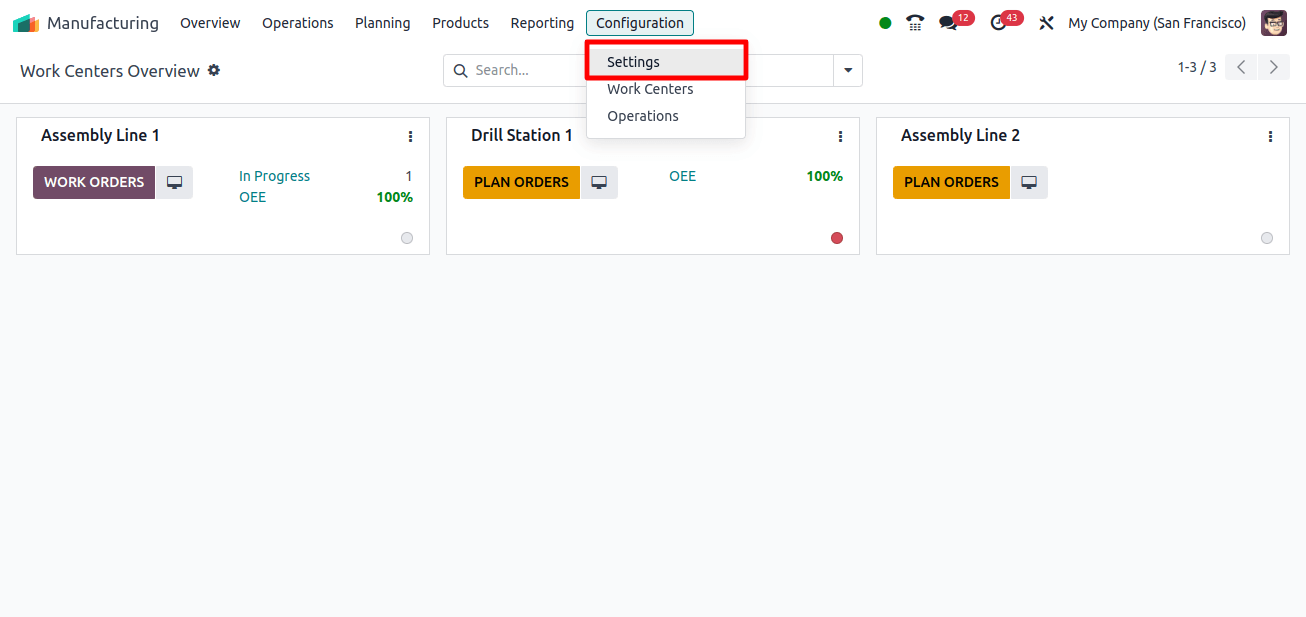
Creating a Master Production Schedule allows businesses to effectively manage their production processes, maximize resource usage, and meet client demands. To enable MPS in Odoo 17, go to Manufacturing → Configuration → Settings.
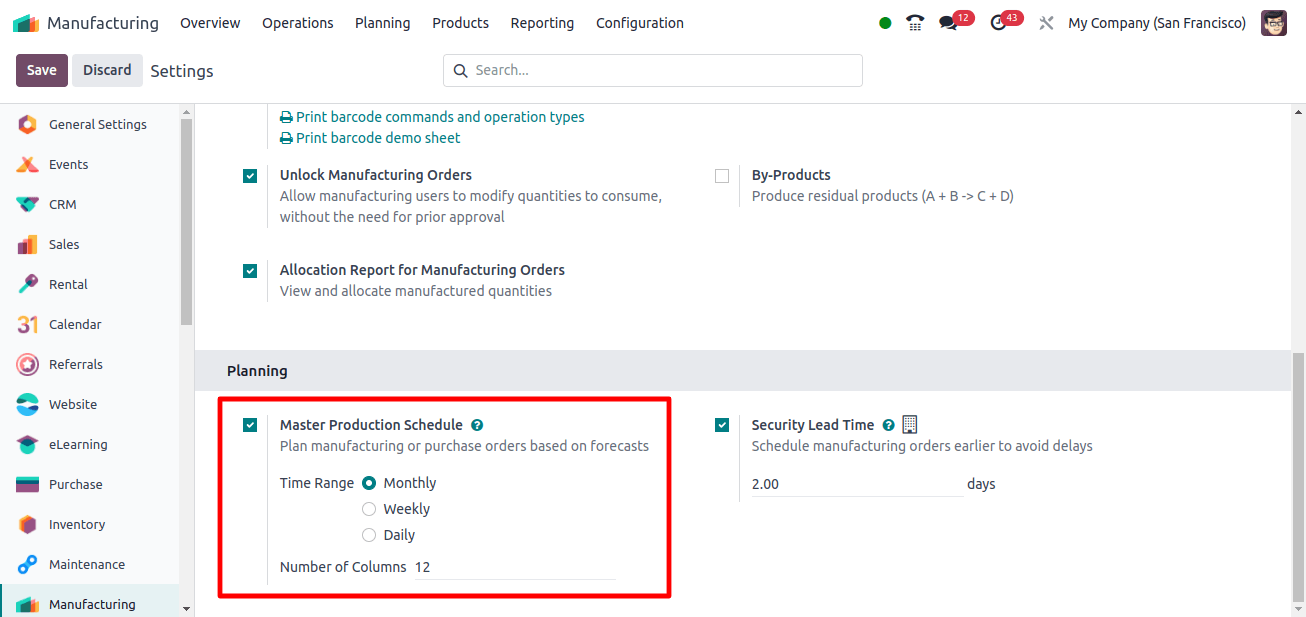
Enable the feature master production schedule. We can also select the time range in which we want to view the master production schedule, such as monthly, weekly, or daily, as well as the number of columns that must be displayed in the Master production schedule. Click the save button to save the changes.
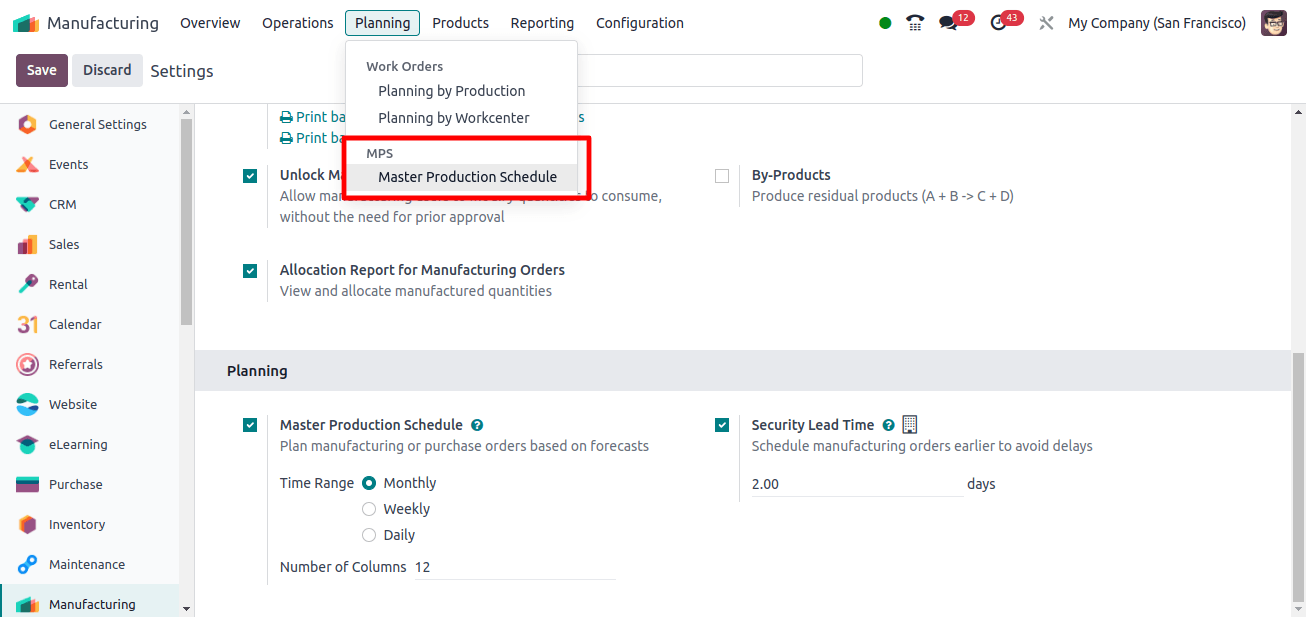
To view the MPS, navigate to Manufacturing → Planning → Master Production Schedule.
We will be brought to a new MPS page where we can see the production schedules for various items.
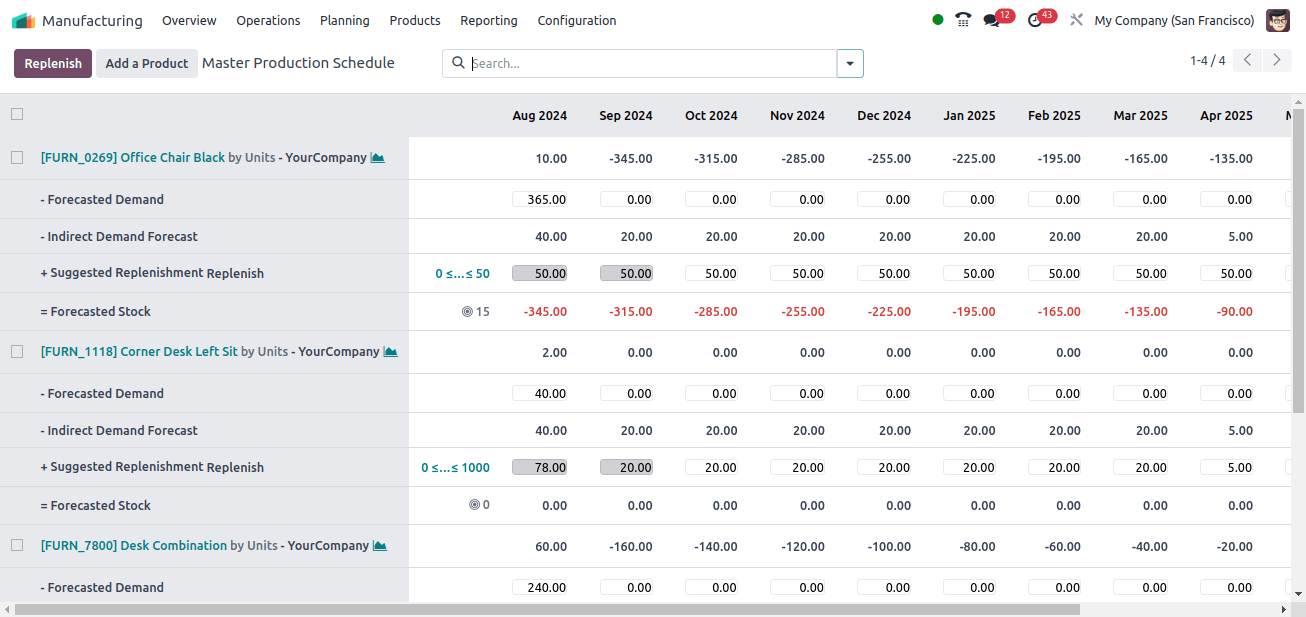
To add a product here, click the Add a Product button in the upper left corner. Before adding a product, we must ensure a bill of materials exists and the route is set to Manufacture. To review the BoM, navigate to Manufacturing → Products → Bill of Materials.
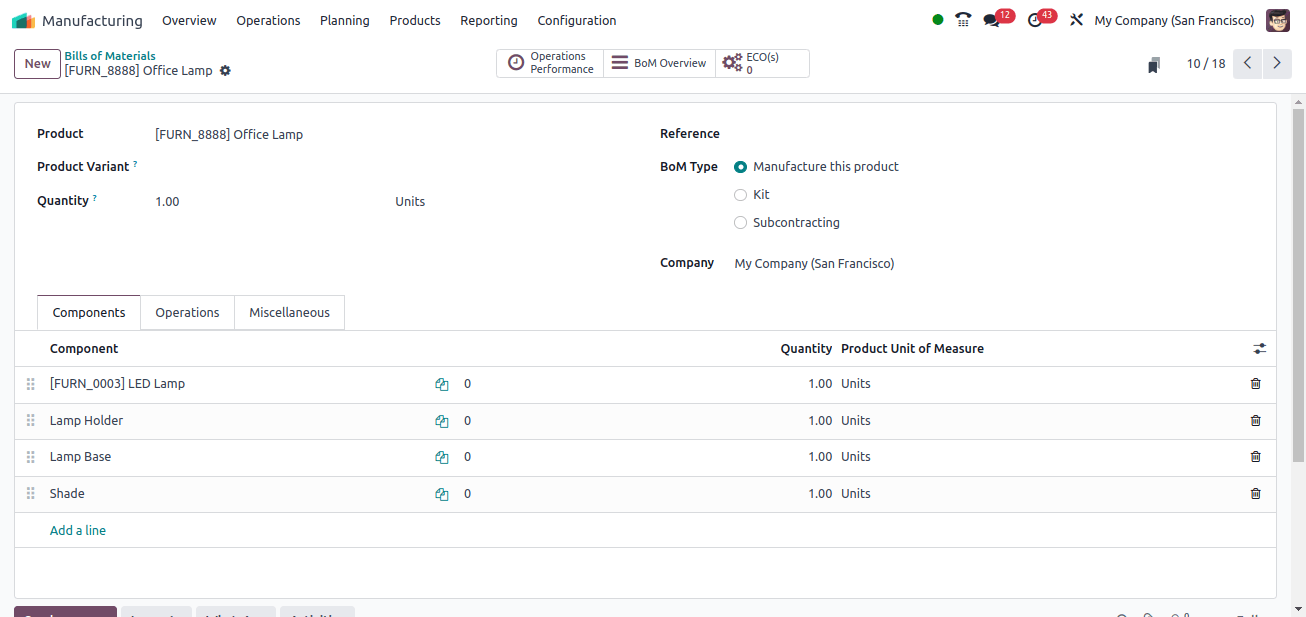
We can now go to the MPS page and click the Add a Product button to add the product we want to schedule manufacturing.
When we click the button, a pop-up window appears, allowing us to enter information such as the product, bill of materials, safety stock target, minimum to replenish, and maximum to replenish.
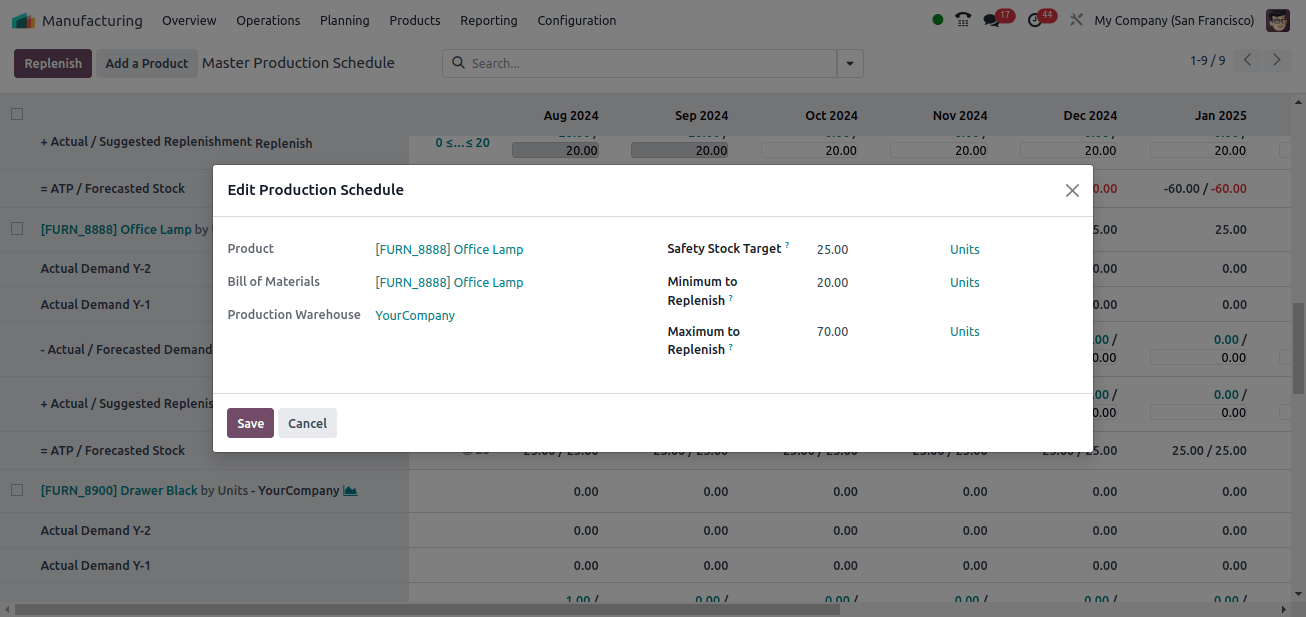
If we have provided a Bill of Materials for the product, the components will be included in the MPS.
The safety target is 25, the minimum number of products that should be available in inventory to prevent the danger of stockout.
The smallest to Replenish is 20, the smallest amount of a product that must be supplied when inventory levels fall below a specific threshold. The Maximum to Replenish is 70, the most amount of a product that must be replenished in a single order.
After supplying all of the information, we can click the save button. The product is listed on the MPS page, along with all of its components.
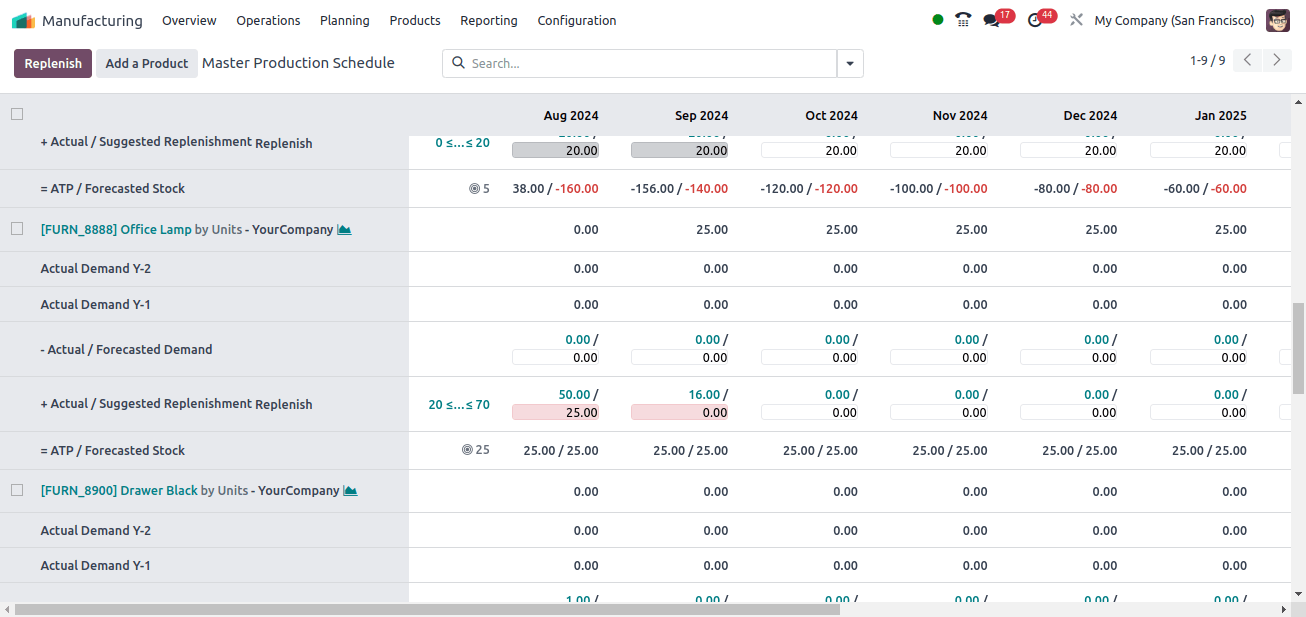
Here we can observe several color codes, which serve as indicators of the status of the product’s replenishment suggestions.
Green: Indicates that the actual replenishment corresponds to the suggested replenishment.
Gray: This indicates that a replenishment order has already been generated, but the quantity may not match the current data. This could be:
If the order has not been amended since its establishment, it will be the same as the suggested replenishment.
Greater than the advised replenishment, indicating that you may have ordered too much.
Less than the suggested replenishment, which could lead to a stockout if not addressed.
Red: This indicates that a replenishment order was generated, but the quantity was too large in comparison to the present data. This could point to overstocking or an error in the initial order quantity.
Orange: Orange usually indicates that a replenishment order was generated, but the quantity was insufficient compared to the present data. If this is not addressed immediately, it may result in a stockout.
By default, we can see fields like forecasted demand, which is the estimated future demand for the product, suggested replenishment, which tells us how much of the product we should order to meet demand, and forecasted stock, which tells us how much inventory we should keep to meet demand.
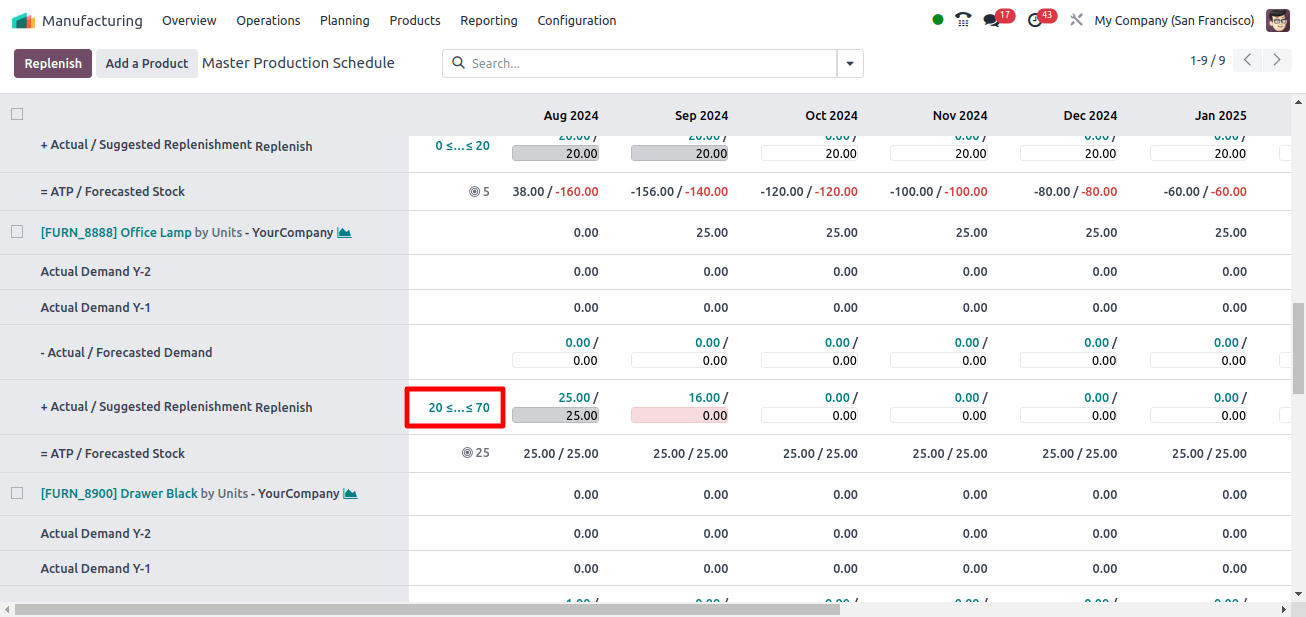
We can alter the safety stock target, as well as the minimum and maximum replenishment amounts for each product, at any time by clicking on the little icon shown in the image below.

We can also see the minimum and maximum to replenish sets, as shown in the image below.
By clicking on the drop-down in the search bar, we can access more rows.
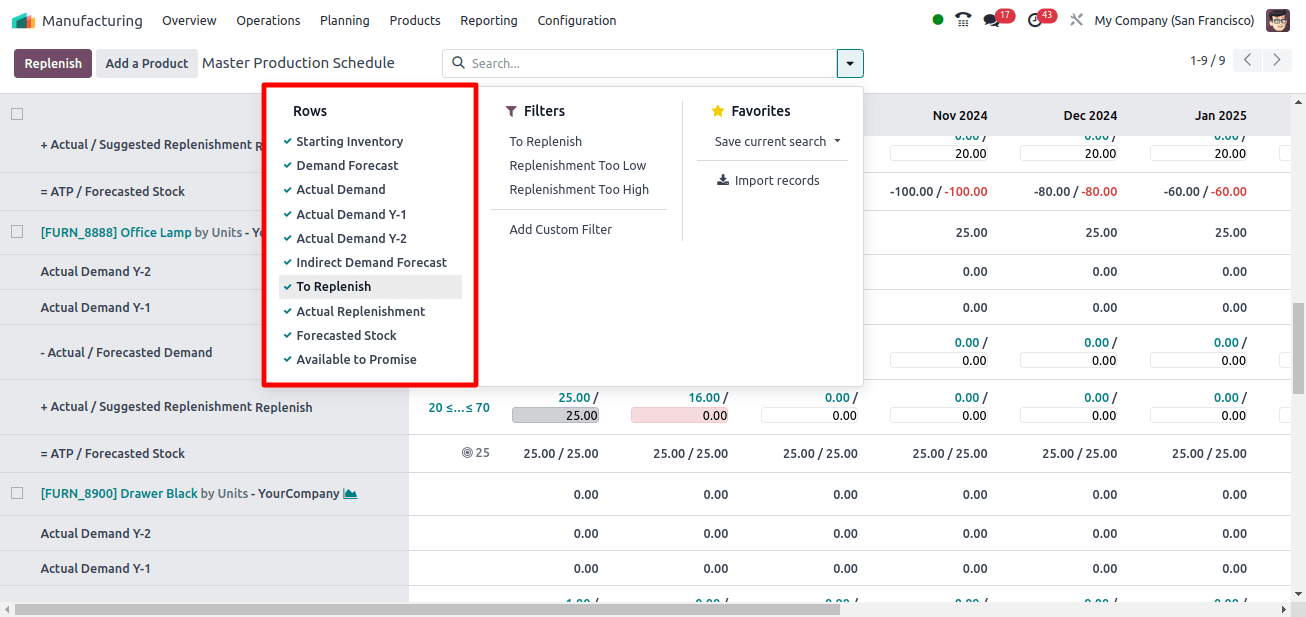
We can enable all of the features and assess the worth of each one.
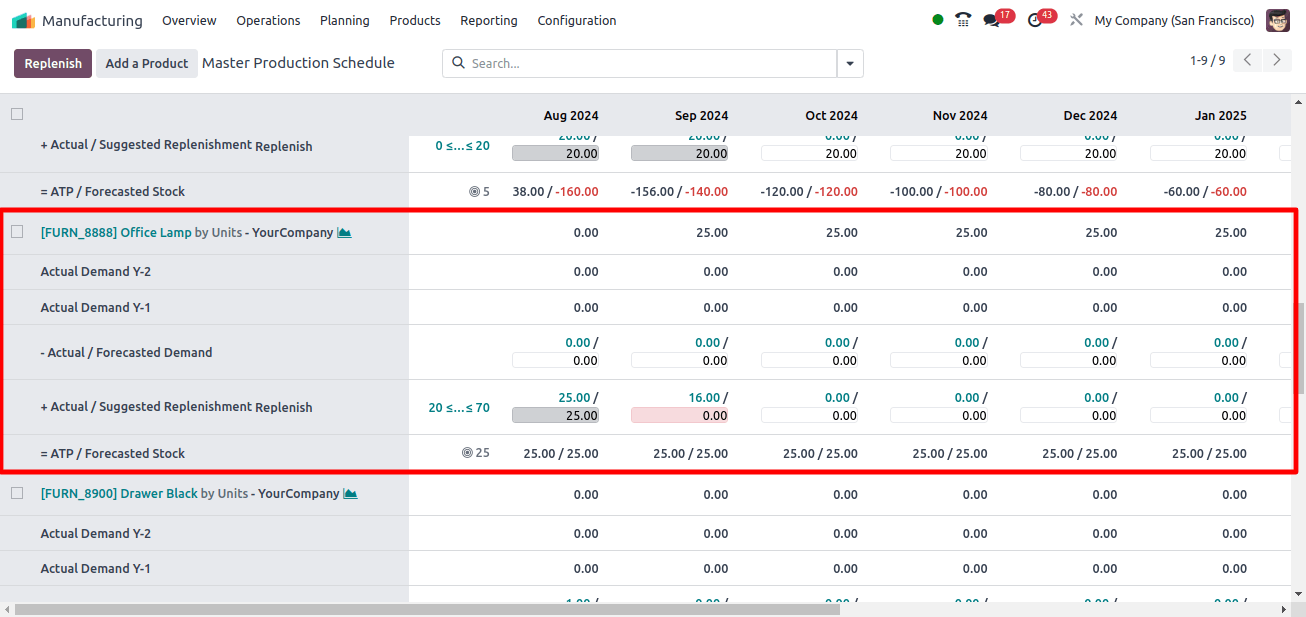
Starting inventory is the quantity of a certain product in stock at the start of the planning period, or MPS. It serves as the starting stock level before accounting for any incoming supplies, production, or sales orders during the planning period. Since we enabled the functionality, we can see the initial quantity of each product in the first row related to the product.
The on-hand quantity of the product is zero, as seen in the first row. For the following period, we can see the starting inventory as 20, which is the amount of merchandise that will be accessible at the end of the preceding period.
We’ve set the safety stock objective to 20, so that amount must be present after the specified period.
The actual replenishment is 25 since the quantity required to meet the safety stock target is 25.
Actual Demand is based on confirmed sales orders. When a sale order is generated for the product, the amount will be represented in Actual Demand. Let us make a sales order for the product in quantity 10.
We can see from the MPS that the real demand is 10.
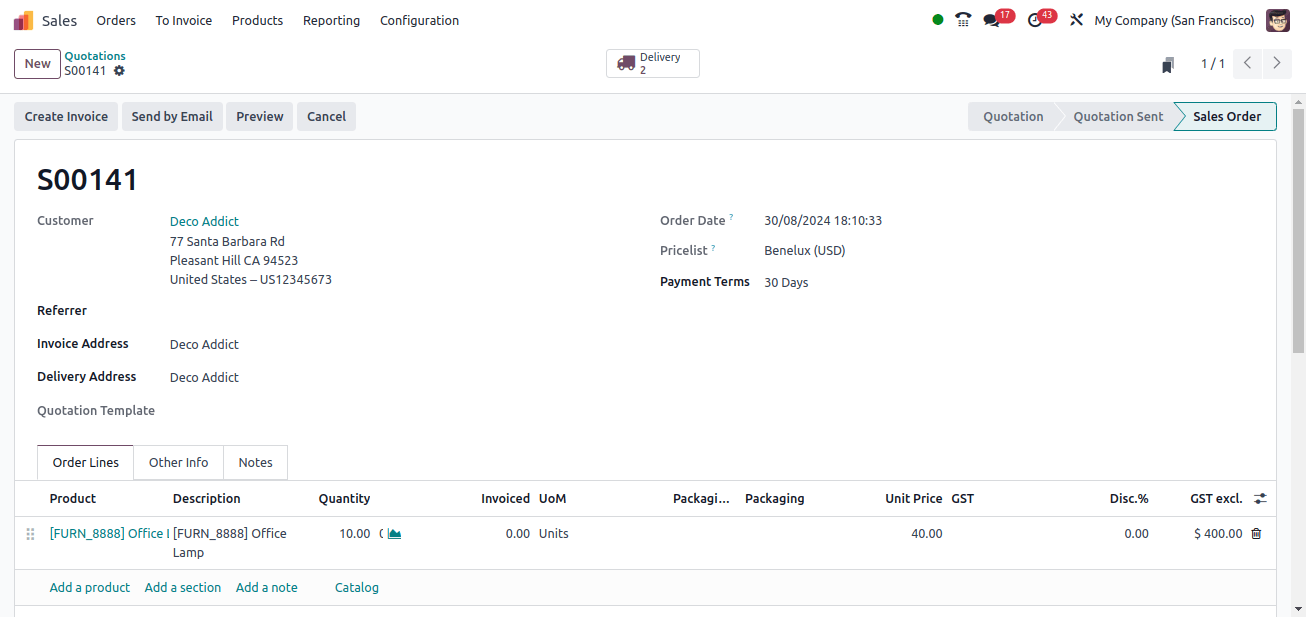
When we click on Actual Demand 10, which is in green here, we will be able to see where this was triggered. When we click on that, we can see the sales order.
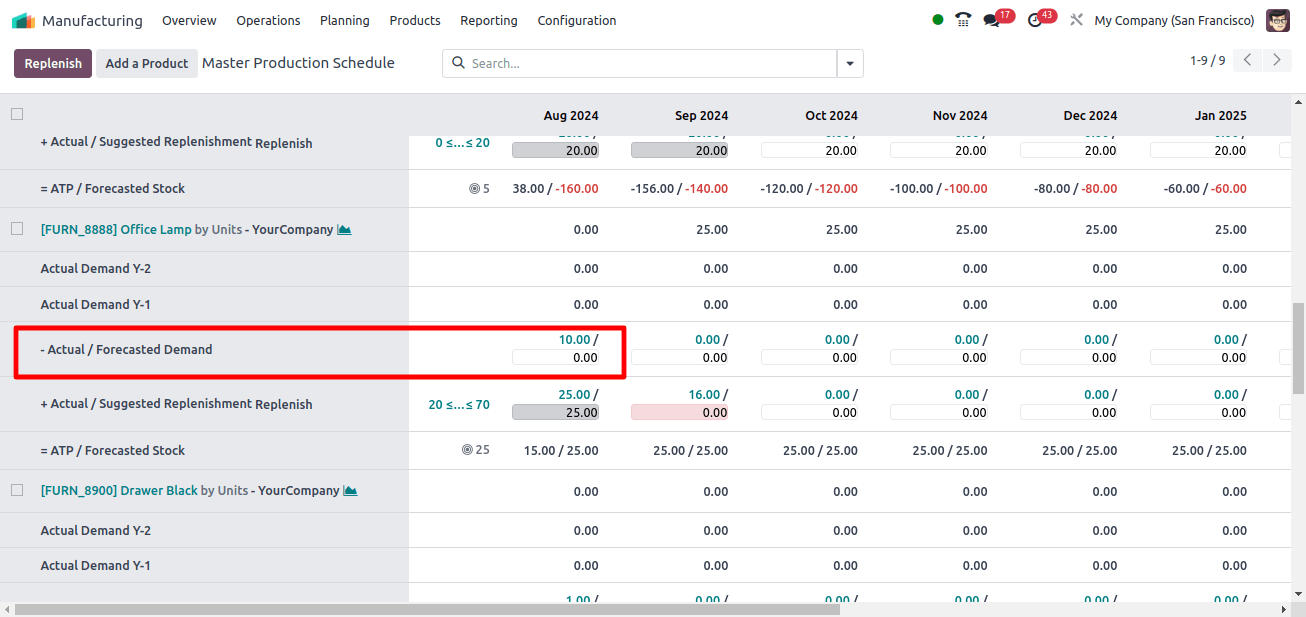
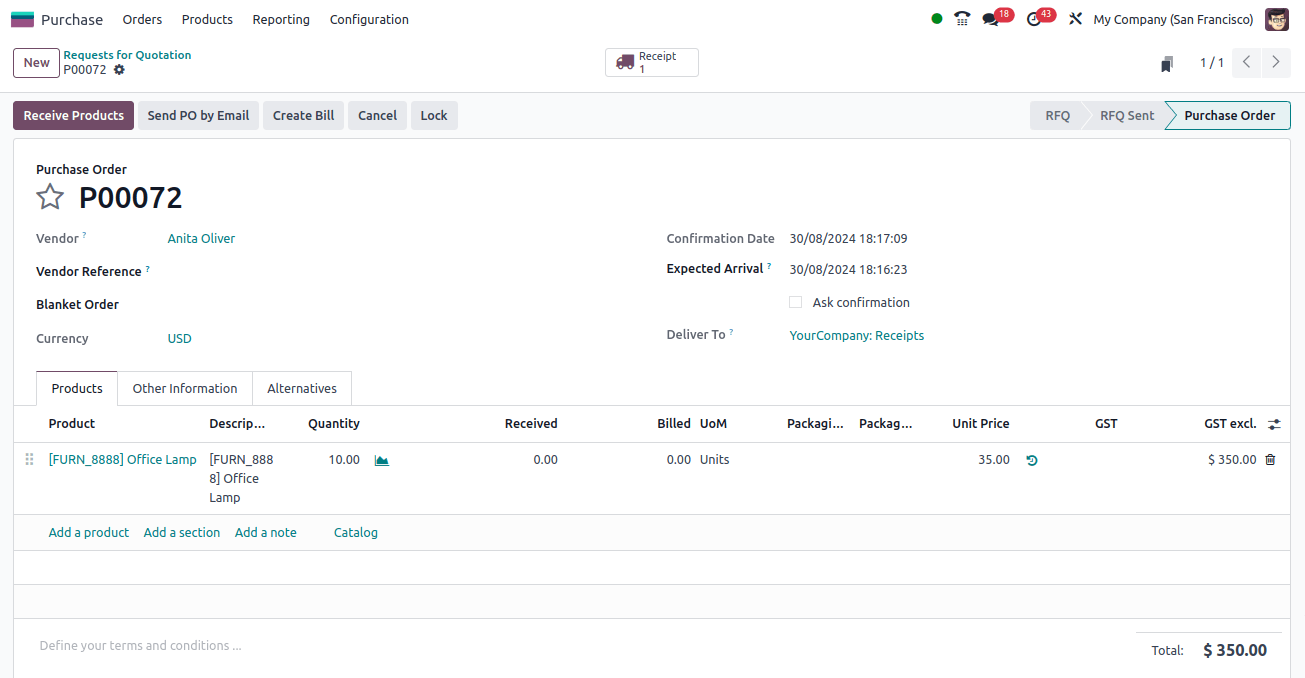
We can also observe that the Actual replenishment has been increased to 25 by adding the actual demand of 10 to 25. Let us now create a purchase order for quantity 10 of the product.

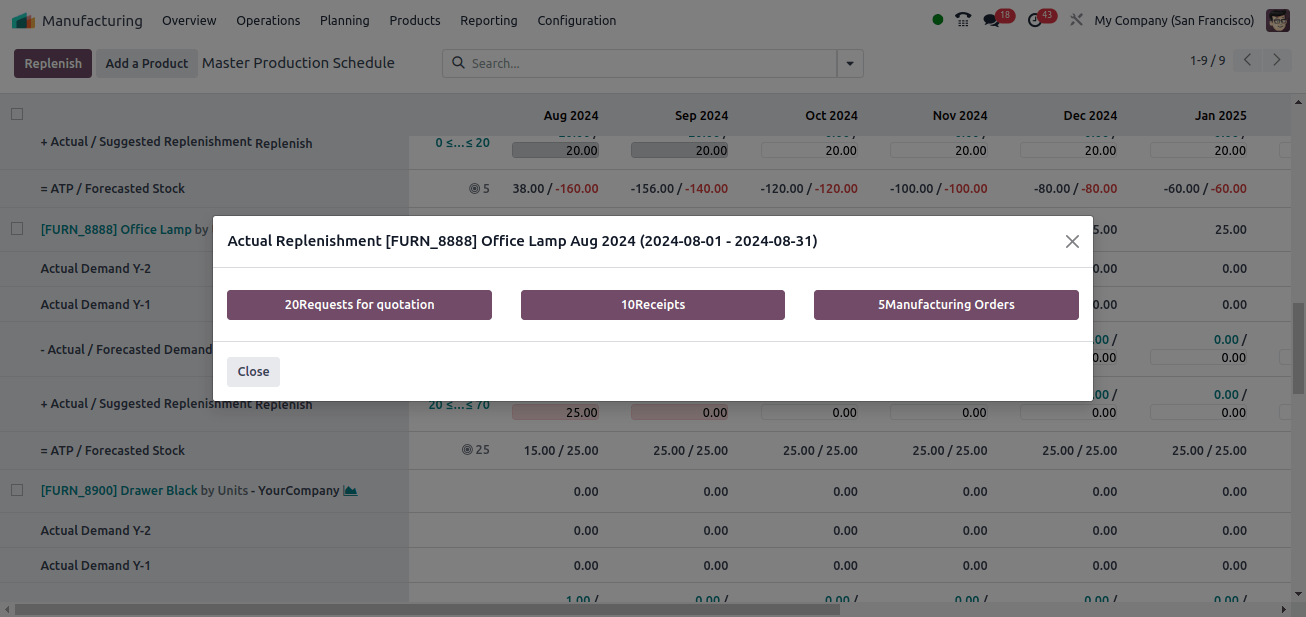
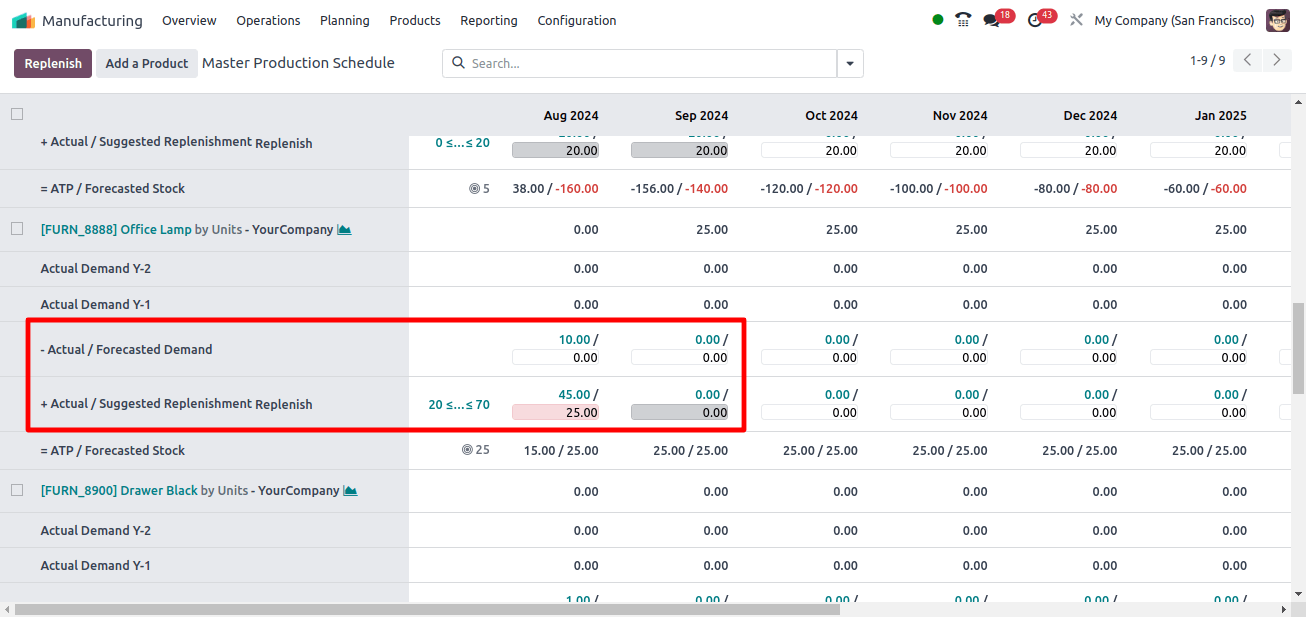
We can see from the MPS that the real replenishment has been increased to 45 by adding the purchase order’s replenishment quantity.
When we click on that, we can view the details of the replenishment path, as shown in the image below.
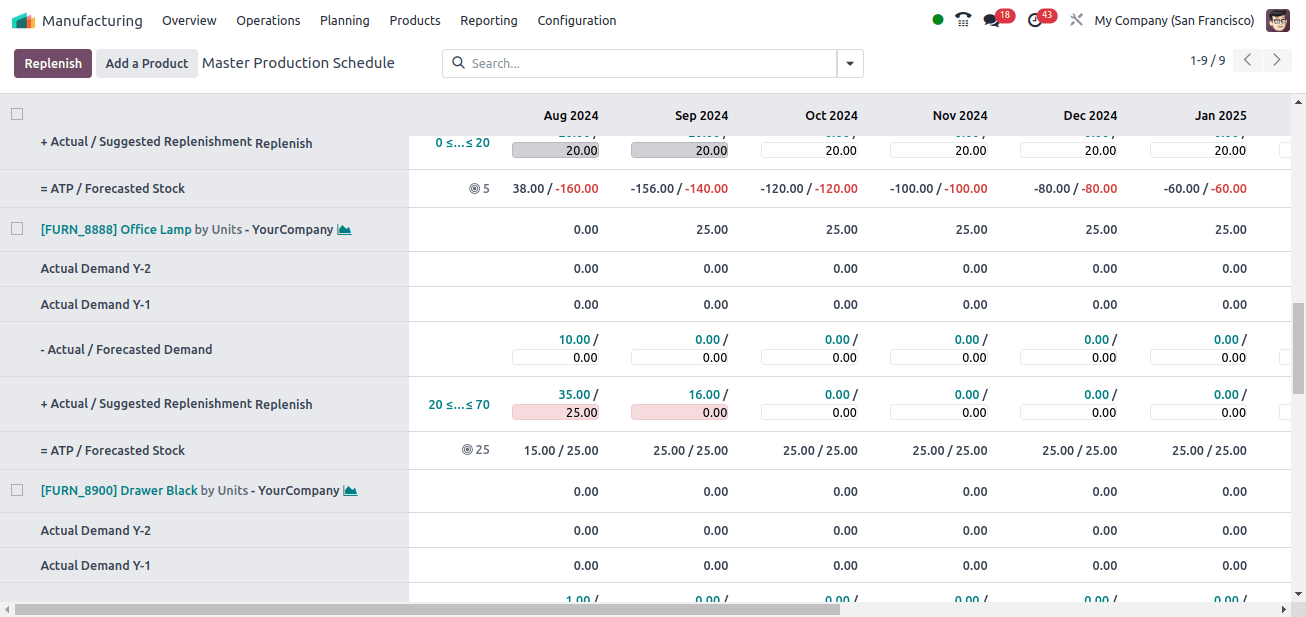
Since we have a safety stock target of 25 and a sale order for 10 quantities of the product, 35 manufacturing orders must be created, as well as a purchase order for 10 quantities of the product.
That is, Actual replenishment offers replenishment values based on confirmed RFQs and Manufacturing Orders.
The next two fields are real Demand Y-1 and Actual Demand Y-2, which indicate the real demand for the last two years.
The forecasted demand for the product can be manually entered for all periods for which we intend to schedule manufacturing, and the suggested replenishment is automatically calculated.
For the first time range, the forecasted demand is set to 15, and the suggested replenishment is 40, equal to the sum of the forecasted demand of 15 and the safety stock target of 25.
Forecasted stock is the quantity that is expected to be in inventory until the end of the period, which is computed as,
Forecasted stock = Starting Inventory - Forecasted Demand + Suggested Replenishment ( 0 - 0 + 25 = 25).
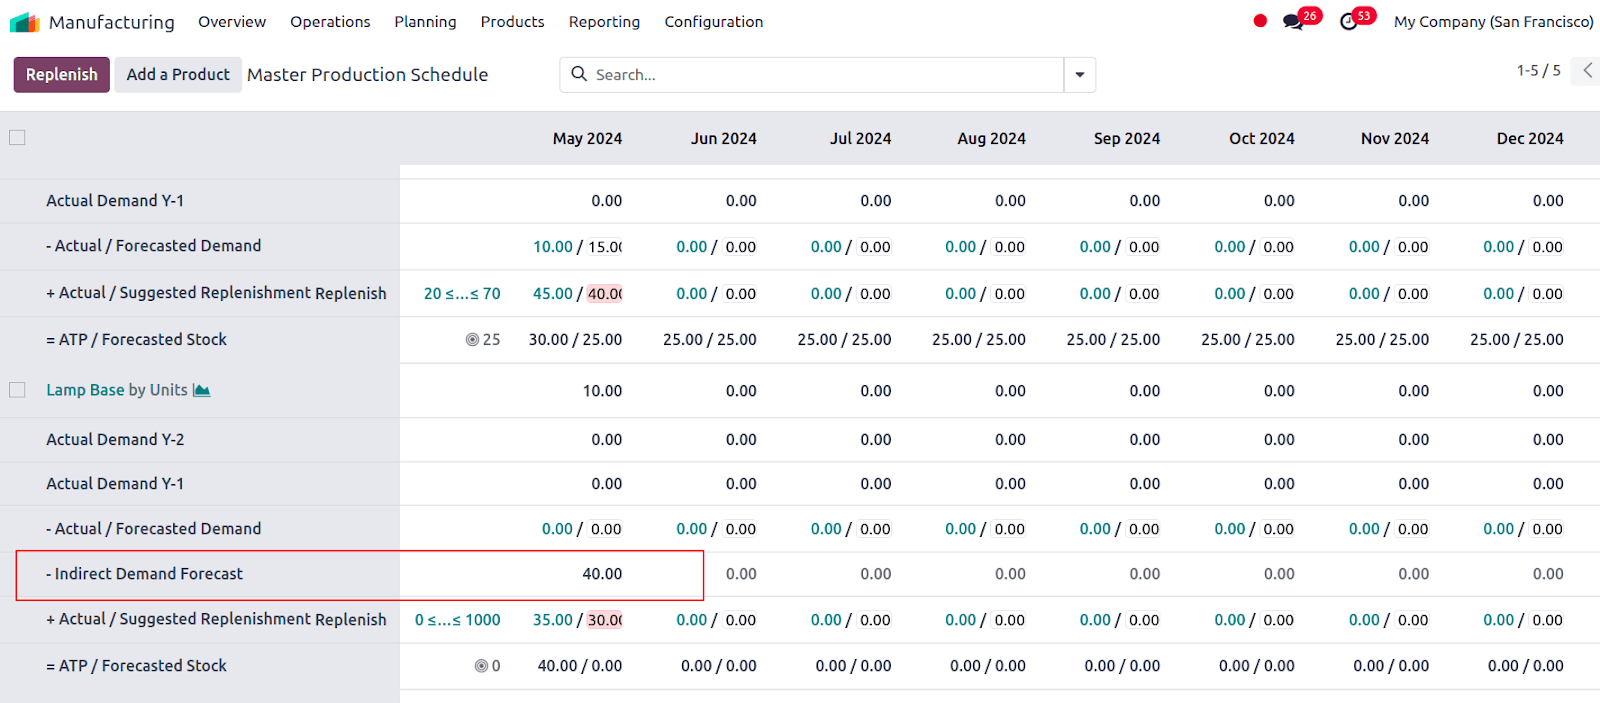
The indirect demand forecast refers to the expected demand for parts required to make the finished products included in the MPS. Here, the indirect demand for one of the components is 40.
Now, we can click the Replenish button in the top left corner, and the product will be set to replenish based on the route we specified in the product form.
So we set the manufacturing route here, which will result in the creation of a manufacturing order. To view the production order, go to Production> Operations > Manufacturing Orders. We can see the manufacturing order that was created, with the source specified as MPS.
In the MPS, we can see that the starting Inventory is 25, which is the stock that was available after the preceding time range, and that the safety stock target is set at 25.
So far, we've seen that using Odoo 17's Master Production Schedule functionality makes product replenishment simple. We can use the Master Production Schedule to schedule production based on demand forecasts.
As a result, the company can simplify its sales and other processes without pauses caused by stockouts, for example. Thus, preserving client pleasure is the ultimate goal of pushing a business to the forefront.
That is, by using the MPS settings in Odoo 17 Manufacturing, businesses may maintain sufficient stock levels to meet demand, optimize their inventory levels, and limit the risk of stockouts or excess inventory.

