Configuring e-Learning course in Odoo 17
The digital revolution has resulted in the creation of personalized learning environments and e-learning platforms, saving time, energy, and resources.
These platforms allow collaborative content development, track training objectives, and provide e-commerce features. Open-source software, such as eLearning, is accessible at all times and from any location, with features such as forums, quizzes, points, and badges to keep students engaged and deliver real-time information.
This blog describes how to configure paid courses, enroll, complete, take analysis, and acquire certifications using the Odoo 17 E-learning platform, which requires installation and activation.
E-learning Dashboard and Creating a New Course
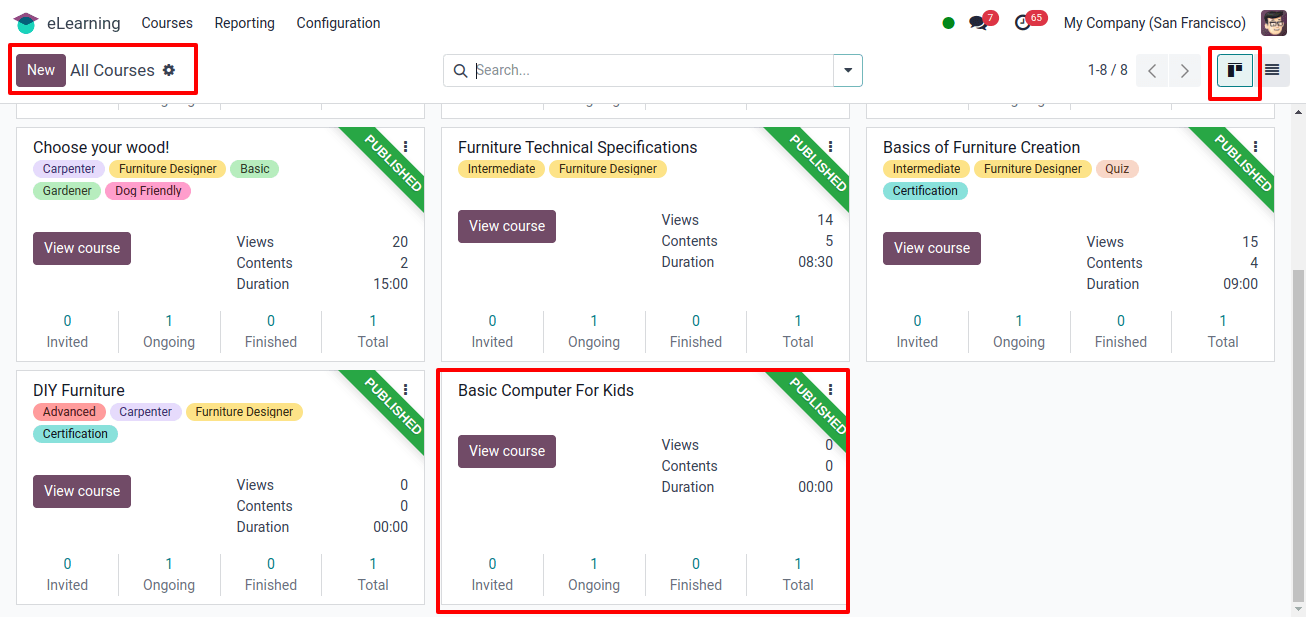
When users go to the module’s home page, they are met with a dashboard that shows all courses developed using the Odoo 17 E-learning Module.
This dashboard shows the overview of all course details, including course name, tags, reviews, views, duration, published content, participants, and completed, and certified participants, allowing for effective data management using sorting and filtering capabilities.
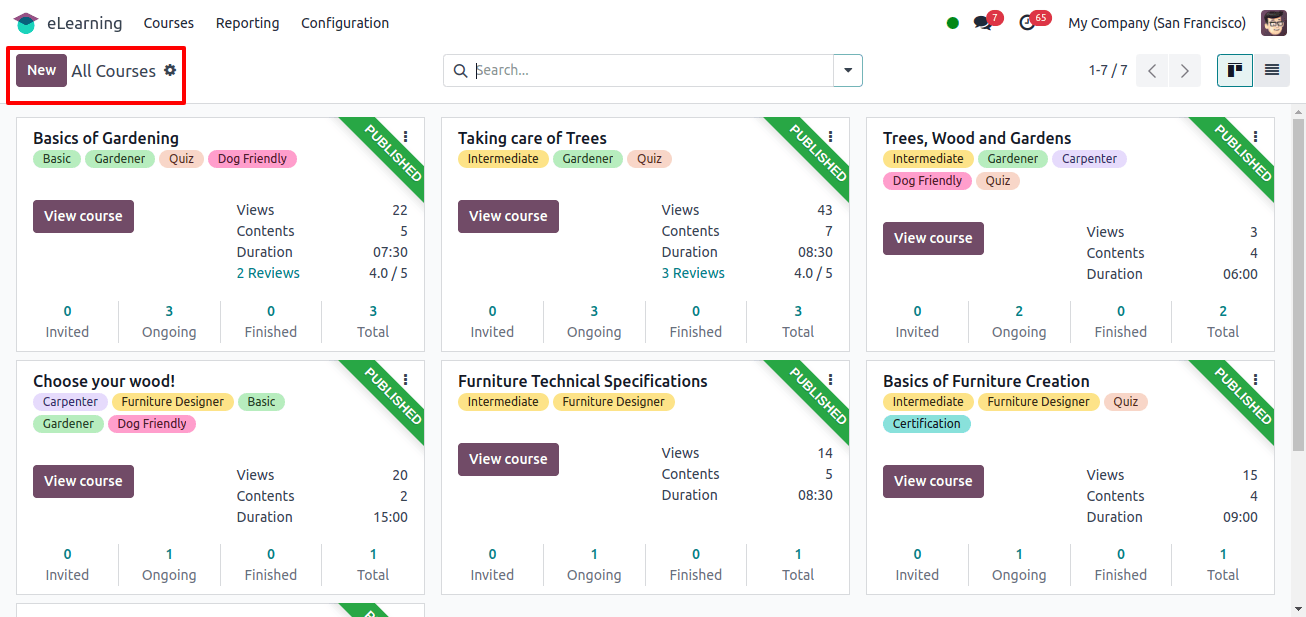
Users can access specific courses on the eLearning Website by selecting the ‘View Course’ button on the Kanban board.
To start a new paid online course, click the ‘New’ button on the homepage and fill out the ‘Content,’ ‘Description,’ ‘Options,’ and ‘Karma’ fields.
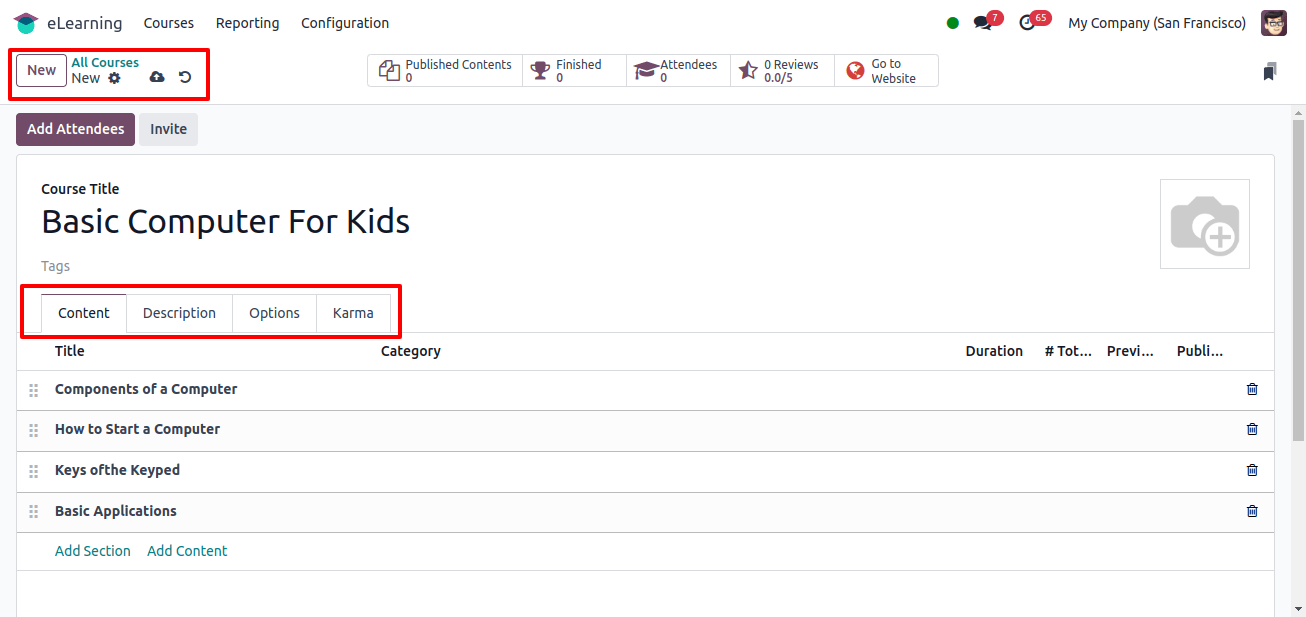
Contents Tab
The Add Section and Add content buttons on the tab field allow you to format content products in a variety of ways, including Title, Category, Certification, and Duration, as well as Total Views, Preview, and Published information.
This feature allows you to build new course sections, chapters, and sub-contents, which may then be used to organize course material or documents, as shown in the image below.
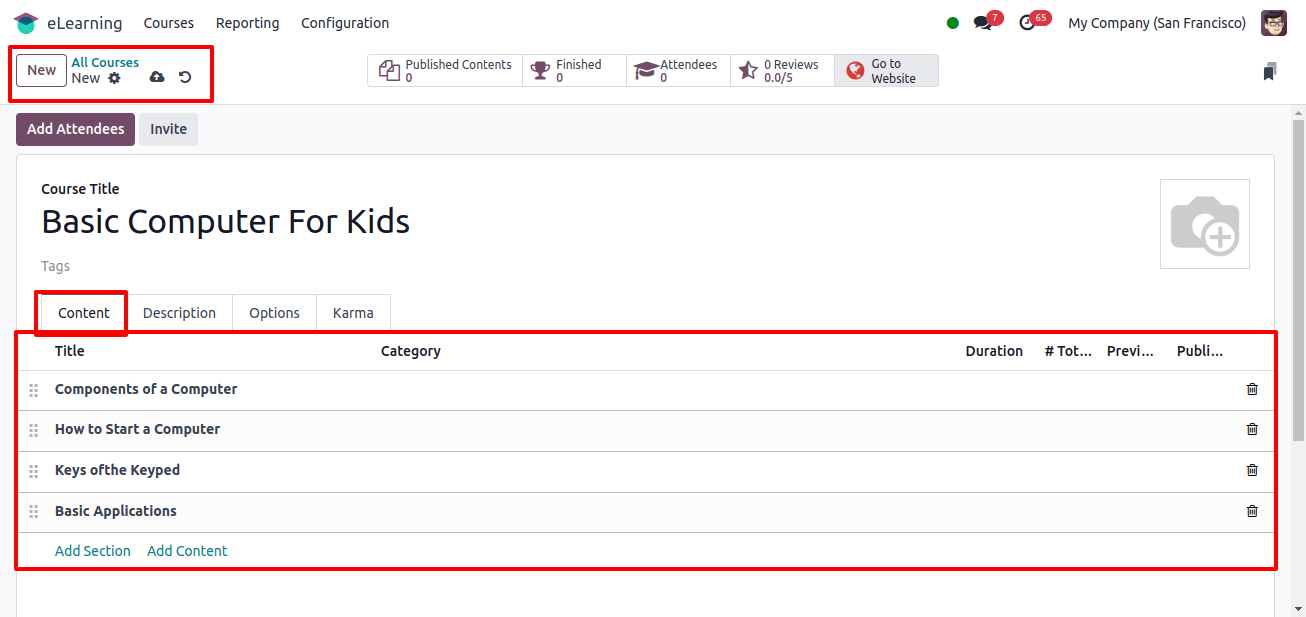
Adding Contents for the Course
Select the ‘Add Contents’ button to amend a course section’s content and connect the right files. This will bring up a new editing window, as shown below.
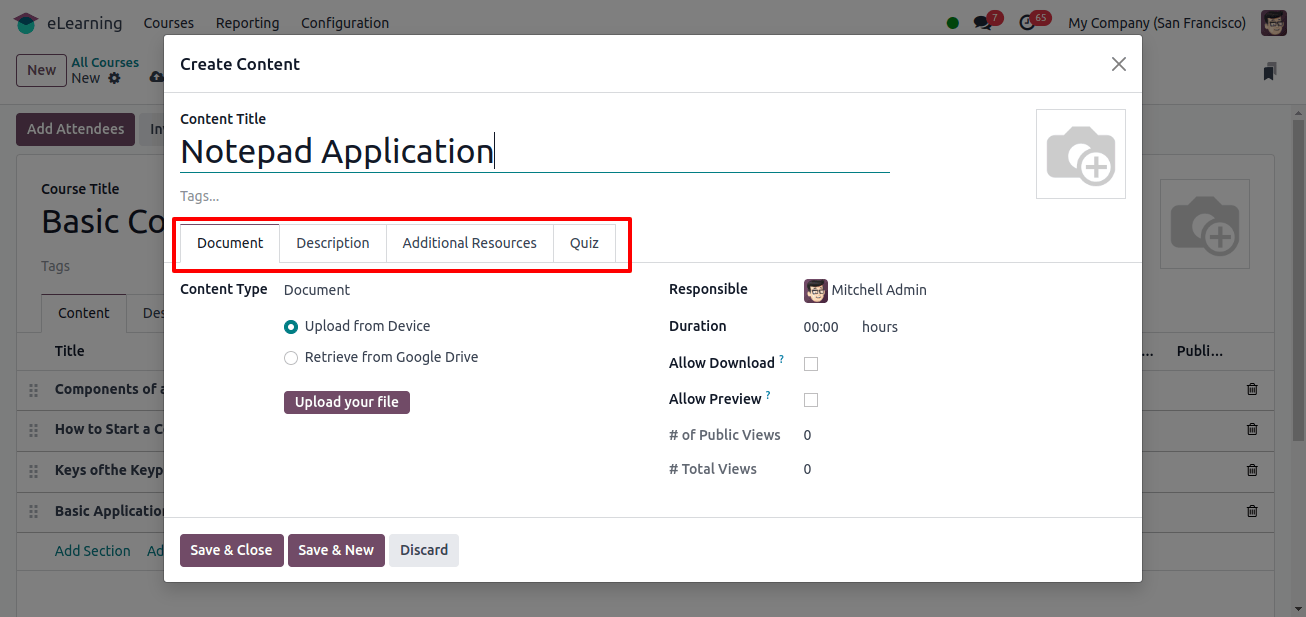
Documents Tab: Within the ‘Documents’ tab, select the relevant option to access Google Drive or download files or documents from your device and fill in the details, including;
* Course: Select which course your content is a part of.
* Content-Type: Select your content type.
* Responsible: Allocate a responsible party for your material.
* Duration: State how long the course will take to finish.
* Allow Download: Permit users to download the slide’s content. This option appears only when the content is a document.
* Allow Preview: This shows the course is open to everyone.
* # of Public Views: Shows how many views come from persons who are not enrolled.
* # Overall Views: Indicates the total number of views (among both enrolled and unenrolled people).
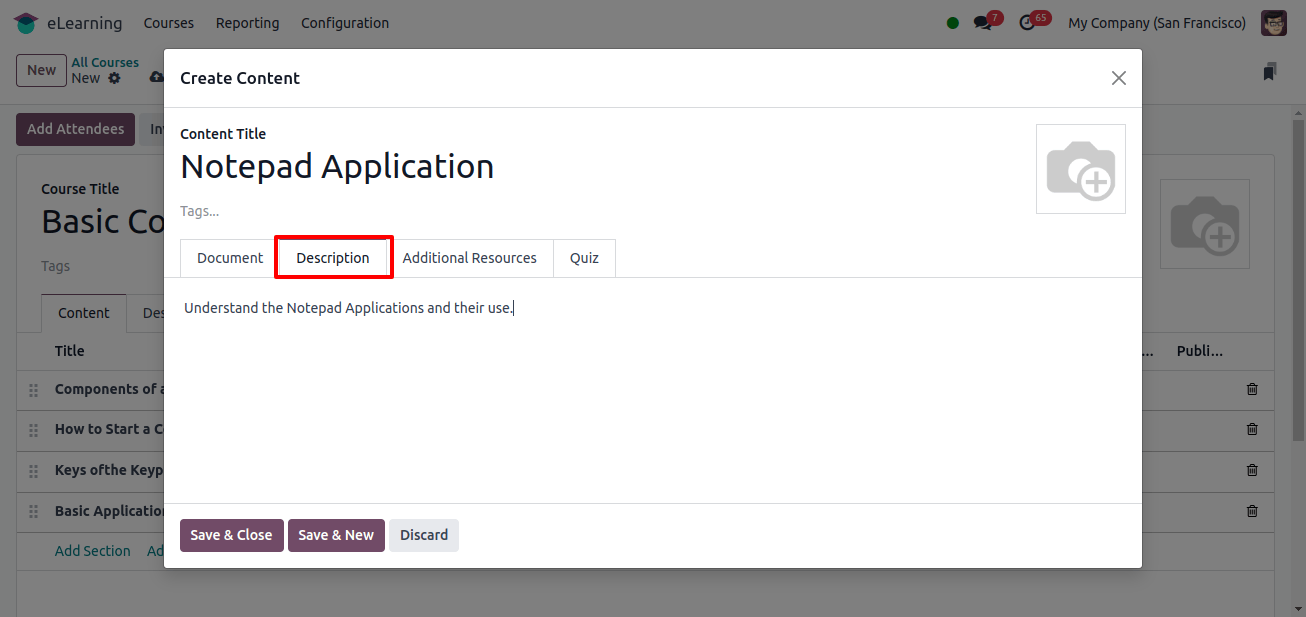
Description Tab: Include a description of your content that will appear on the front end in your course’s About section.
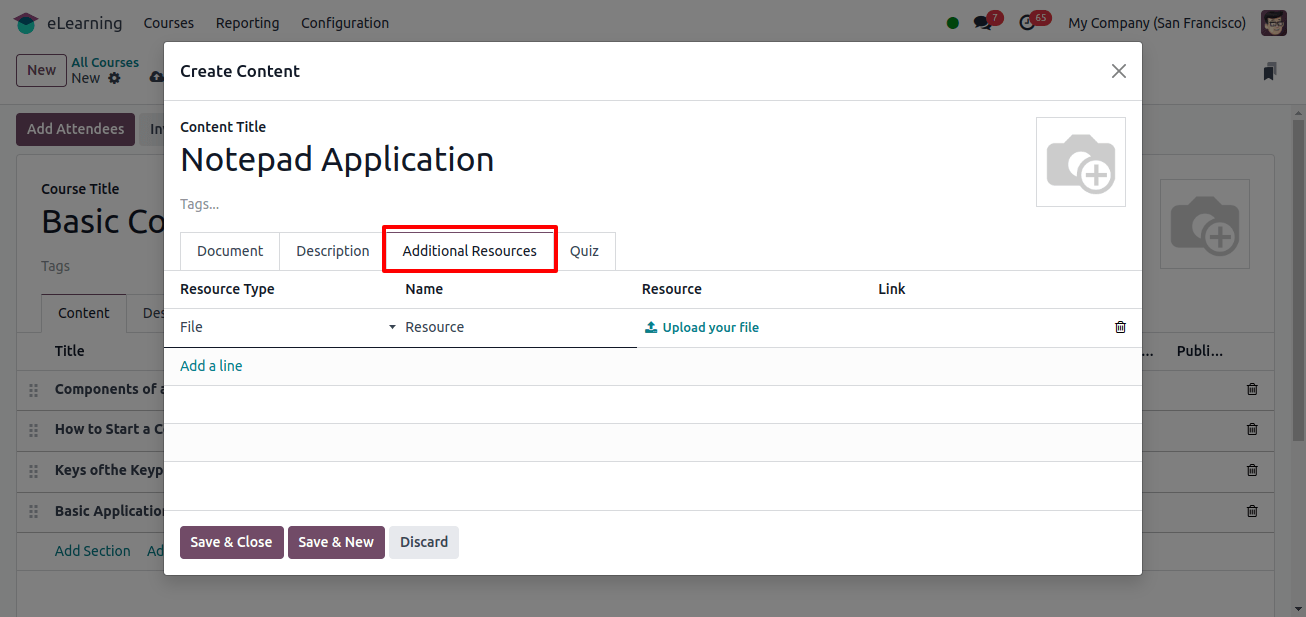
Additional Resources Tab: Click ‘Add a Line’ to include a link of resources that will help your participants learn. It is included in the course content on your website.
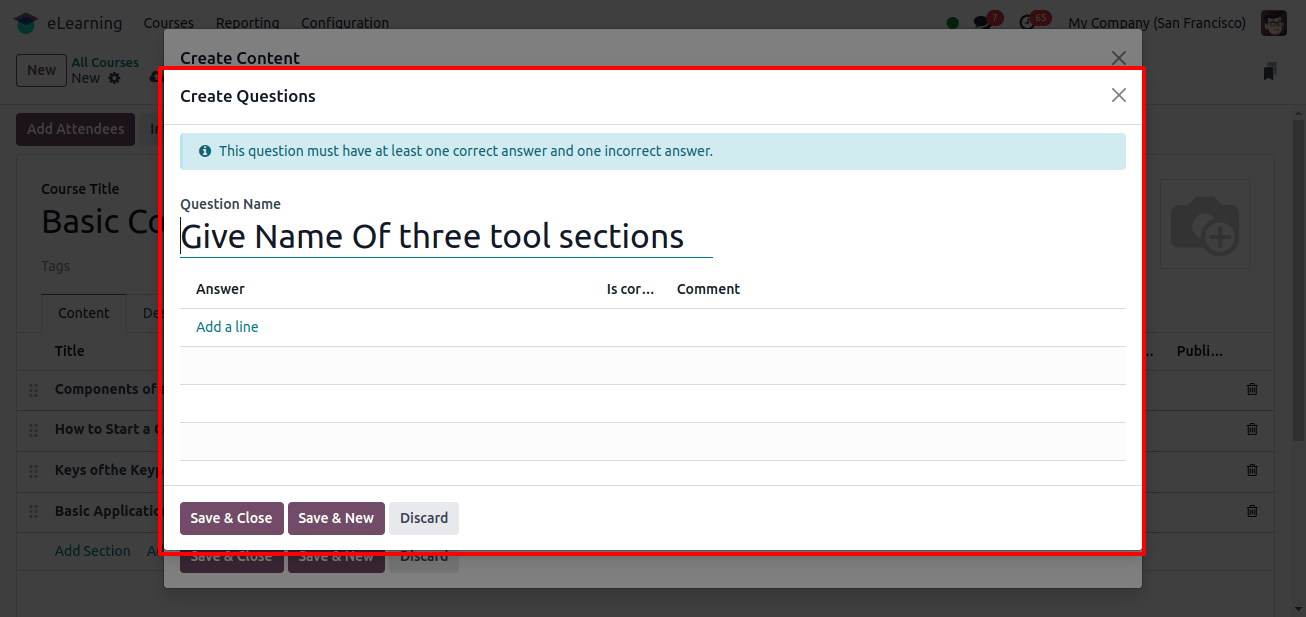
Quiz Tab: The ‘Add a line’ button on this tab allows you to create a quiz to assess your pupils at the end of the course.
A pop-up window will appear, and you can enter as many questions and answers as required, as seen below.
The quiz tab can also be used to assign incentives or points for answering questions after completing the course, as shown in the image below.
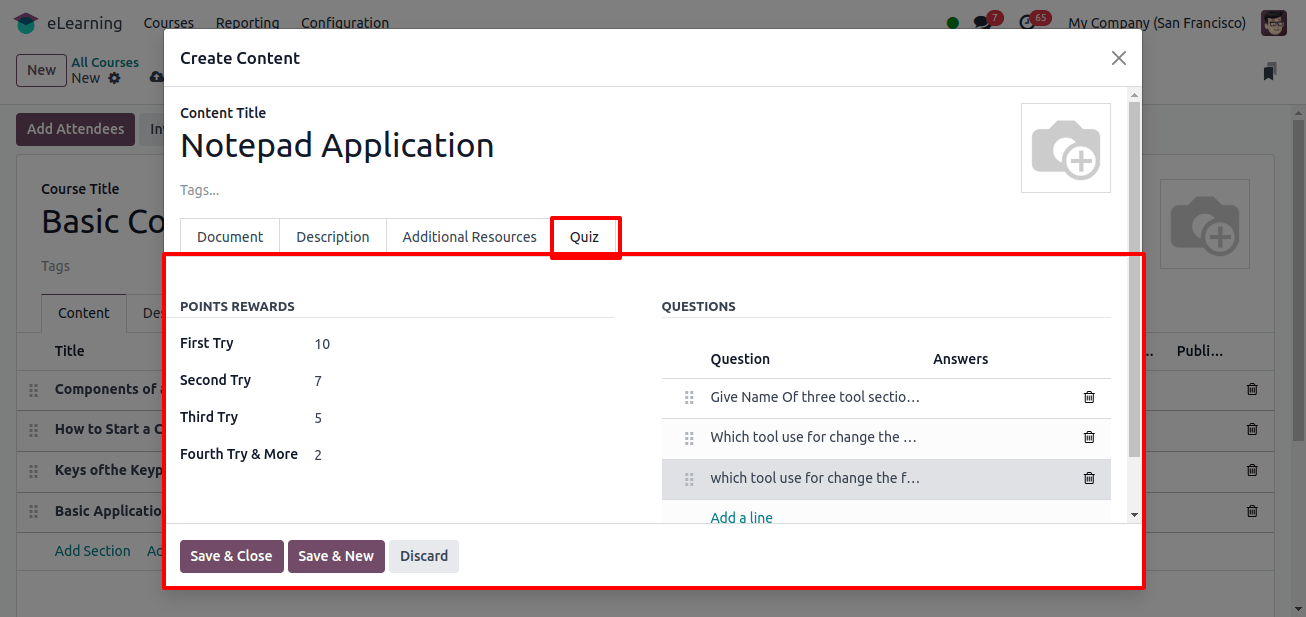
Save the materials and questions by clicking the Save & Close button and returning to the course configuration page.
Description Tab
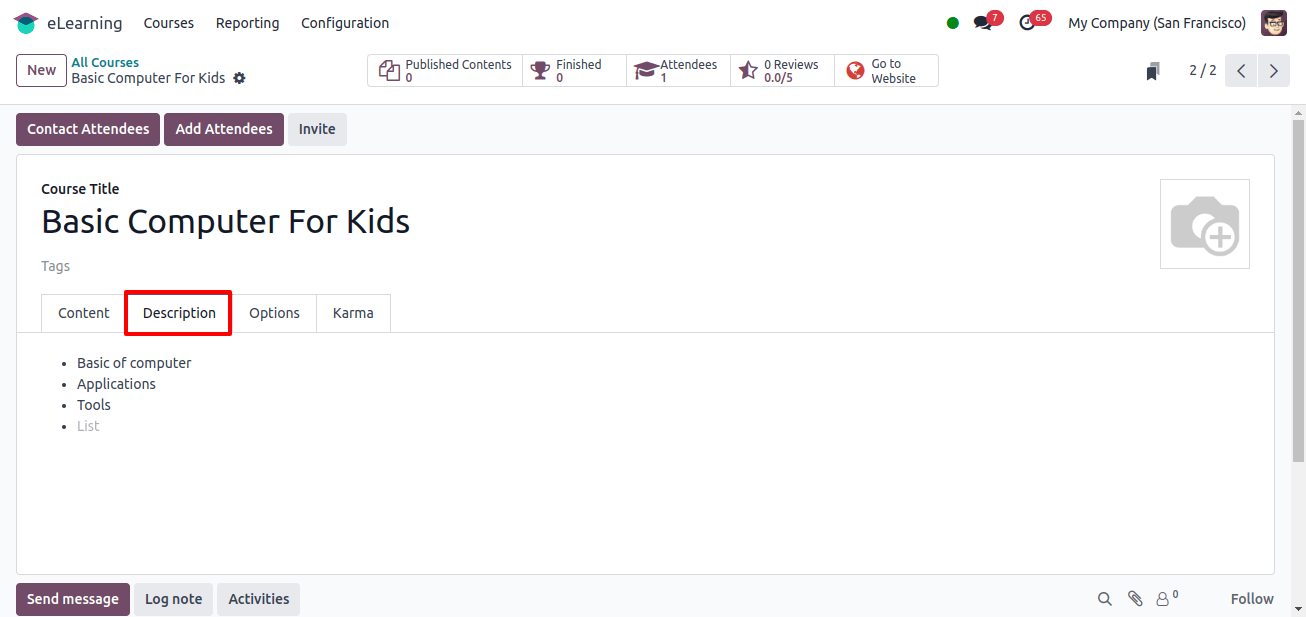
This tab’s editing box allows you to enter any course related descriptions and comments.
As seen in the image below, you can edit your one description or type the ‘/’ sign to select from a range of description formats, such as a bulleted list, numbered list, checklist, table, and so on. These descriptions are located next to the course name on the online interface.
Options Tab
The ‘Options’ tab is a page with several parts, including ‘COURSE,’ ‘ACCESS RIGHTS,’ ‘COMMUNICATION,’ and ‘DISPLAY,’ as shown below.
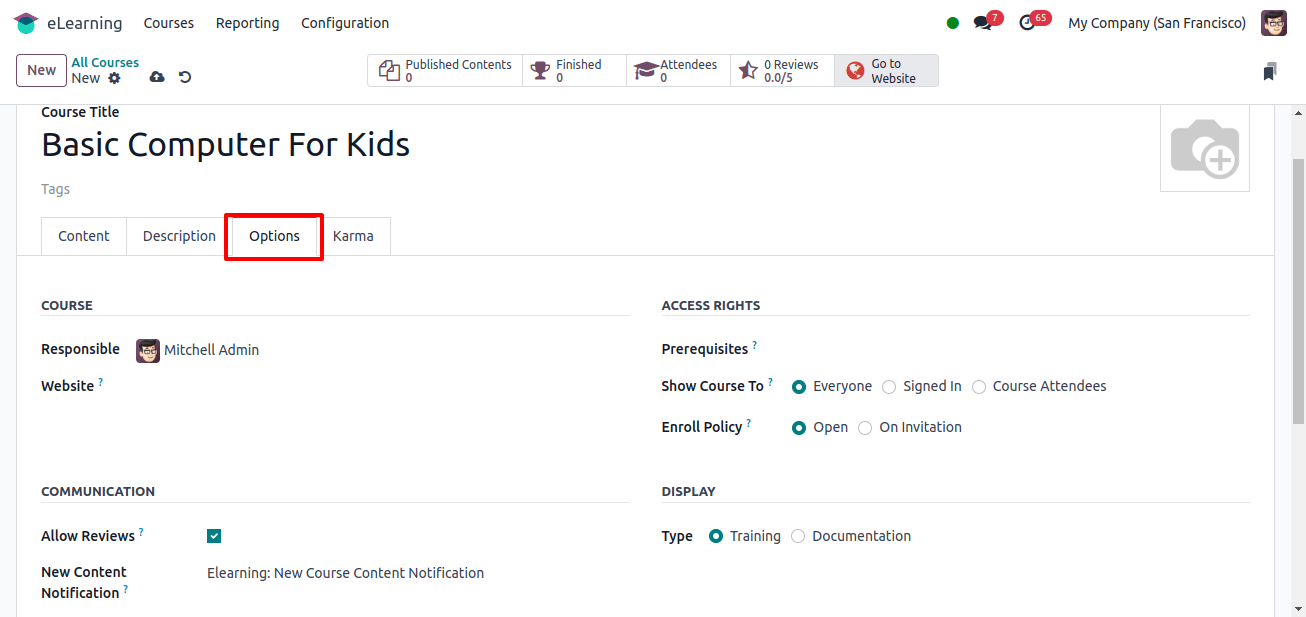
In the ‘COURSE’ field, designate a person to be in charge of posting courses on the website. Within the ‘ACCESS RIGHTS’ section.
Change the setting for ‘Enroll Policy’ as either ‘Public,’ ‘On Invitation,’ as well as ‘On Payment.’The enrollment policy describes the enrollment process.
While invitation-only courses require invitations, public courses can be viewed for free. Online courses may be paid for or offered after payment.
We are going to set a paid course, so we must specify the ‘Product’ as ‘Course Access’ or offer the Course Name.
In the ‘COMMUNICATION’ section, enable the ‘Allow Reviews’ field so that course members can review and rate the course. In the ‘Forum,’ ‘New Content Notification,’ and ‘Completion Notification’ settings, create a forum for course-related conversations and queries.
Odoo will notify attendees when new content is published, as well as course participants who have completed the course and specified a completion email.
The ‘DISPLAY’ field allows you to change the presentation’s setting. ‘Type’ options include ‘training’ and ‘documentation.’ Depending on your choices, you can select the ‘Visibility’ section to specify whether the course should be open to all or just members.
Karma tab
The karma tab in the Odoo eLearning module allows you to set up multiple Karma points or awards for course participants. These points are earned by completing specific tasks including commenting, asking questions, and voting on material.
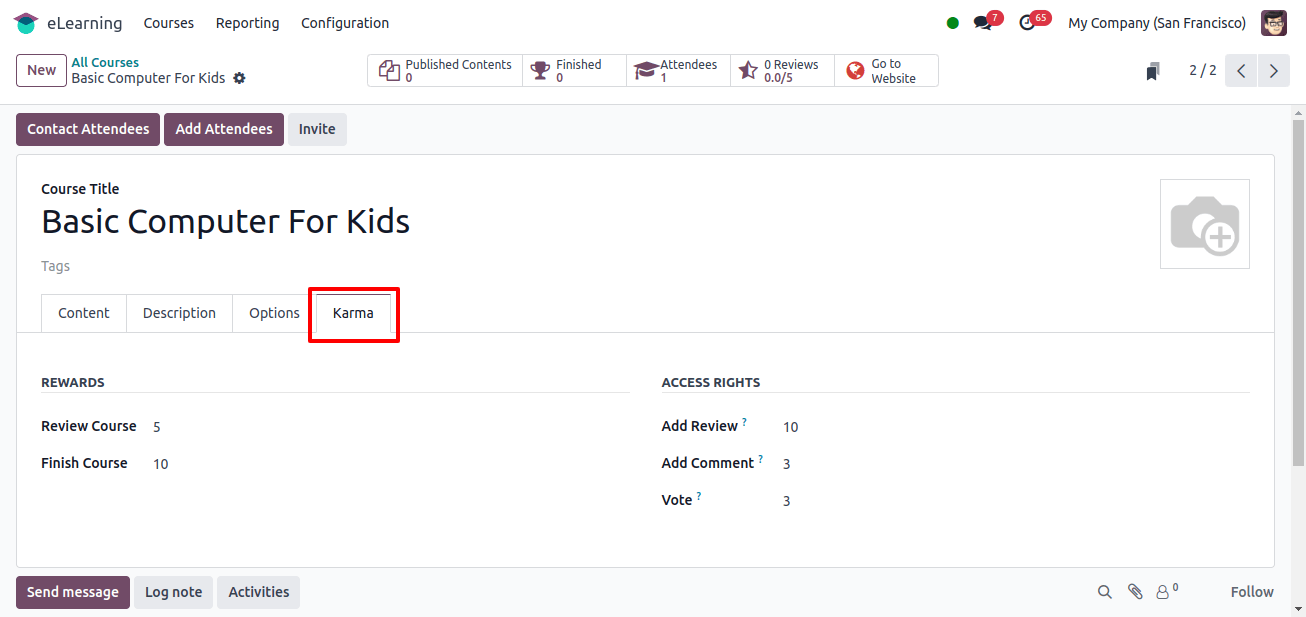
The ‘REWARDs’ field of the Karma tab allows you to set the reward points for ‘Review Course’ and ‘Finish Course.’ The quantity of karma points required to write a review for the course may be found in the Karma ‘ACCESS RIGHTS’ section item ‘Add Review.’
The ‘Add Comment’ option allows users to gain the karma required to comment on a slide, whilst the ‘Vote’ part allows them to express whether they like or detest a presentation.
Only this candidate will be able to perform activities such as reviews, comments, or like if they receive these precise points. This strategy encourages active participation throughout the couse’s many stages.
Inviting Attendees and Sending Invitation Mails
To store the course details, use the store symbol in the top right corner of the page.
After creating the Course, click the ‘Contact Attendees’ button, or use the 'Add Attendees' option in the top right corner of the page, as seen in the image below.
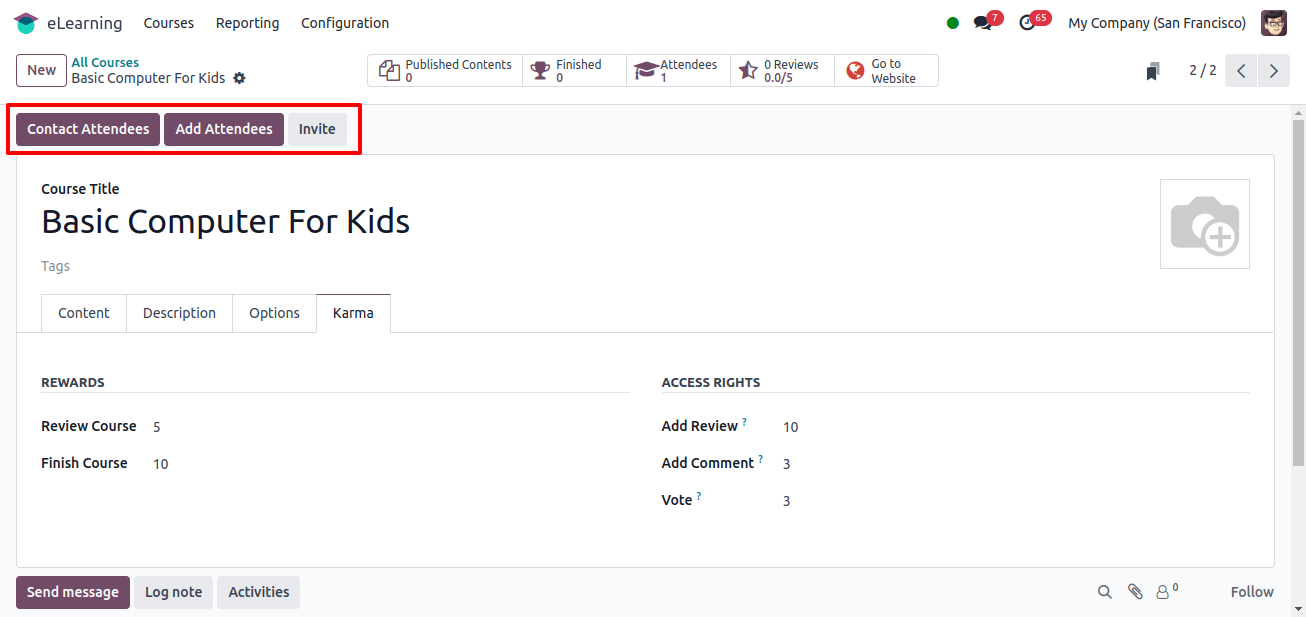
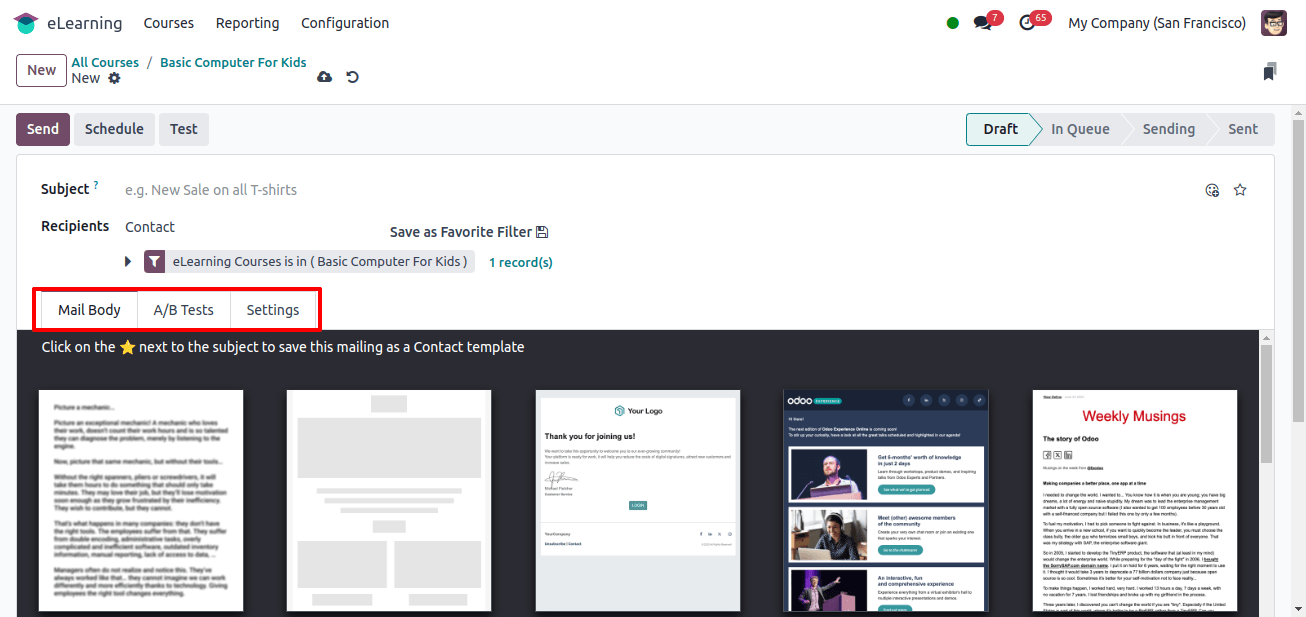
When the button is clicked, a new form may be used to organize bulk mailing for applicants, improving communication.
As seen below, the form contains three tab parts: Mail Body, A/B Tests, and Settings.
Mail Body Tab
Users can access the Mail body template. The template will open in the ‘Mail Body’ tab when the user clicks on it. There, you may use the provided editing tools to change the template’s design and contents, as seen below.
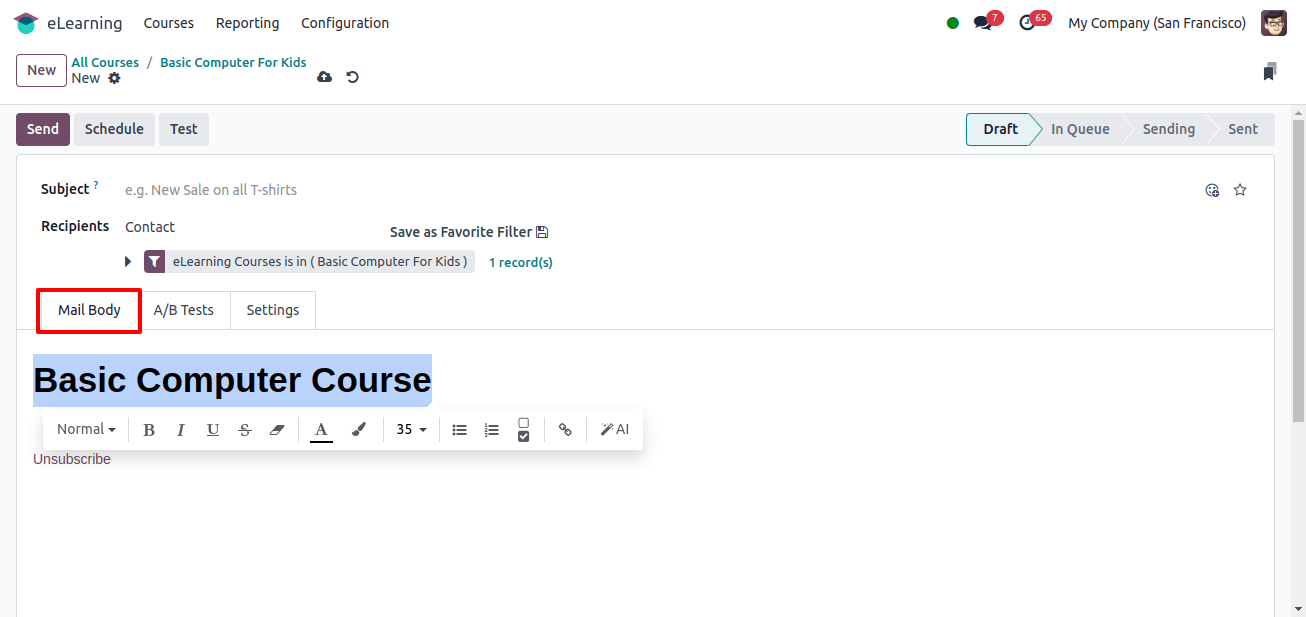
The Email setup form allows you to send invitation emails to participants, edit invitation emails, and customize recipients.
So, enter your main subject in the ‘Subject’ form and customize ‘Recipients’ by picking a receiver type from the dropdown list below the field. The ‘ADD FILTER’ option also allows you to apply unique recipient filters.
A/B Tests Tab
With Odoo ‘Allow A/B Testing,’ you can publish two versions of the same page at the same time and compare how well they perform. The checkbox on this tab, shown below, allows users to enable or disable this feature.
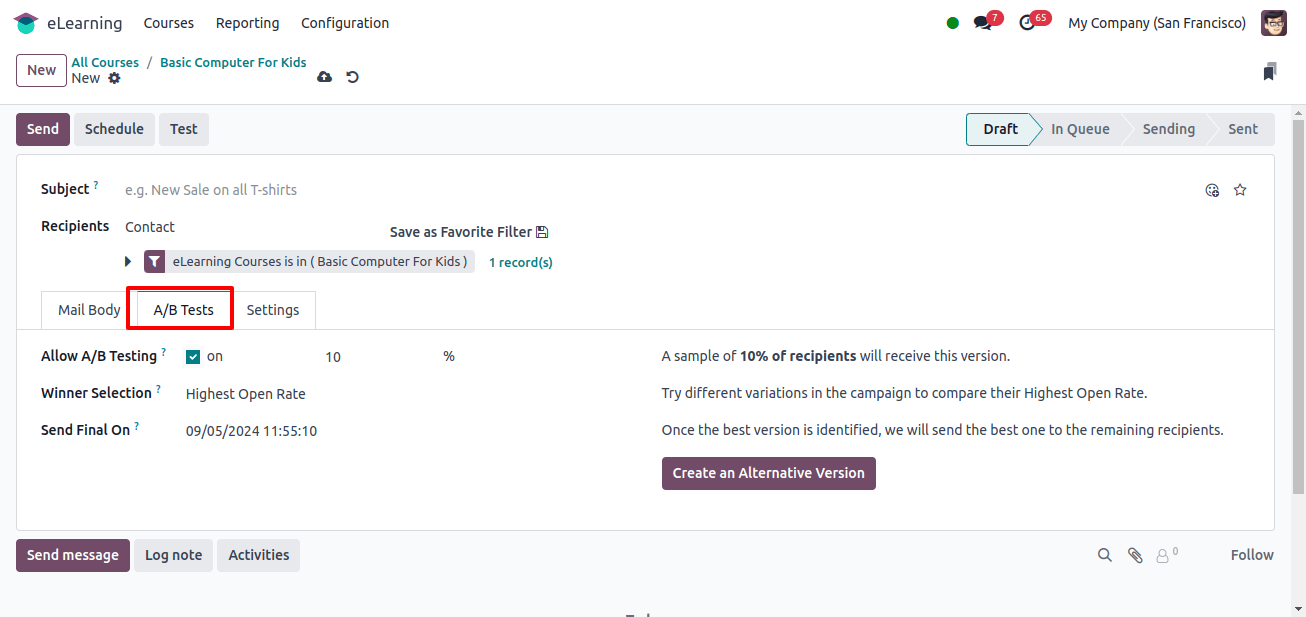
Activating the ‘Winner Selection’ option allows you to specify a final date for recipients to receive the winner announcement message.
By selecting the ‘ Create an Alternative Version' option, a new mail configuration form will appear, allowing you to create a different letter body. Use the options in the form to compare and send a winner message.
Settings Tab
In this tab field, you can choose options such as ‘Preview Text,’ ‘Send Form,’ ‘Reply to,’ and ‘Attach a file,’ which allow you to change the email page’s settings.
You can alter the send and reply email addresses, include text in the message body as a preview, and attach files.
By selecting the ‘Attachments’ option, as seen in the image below.
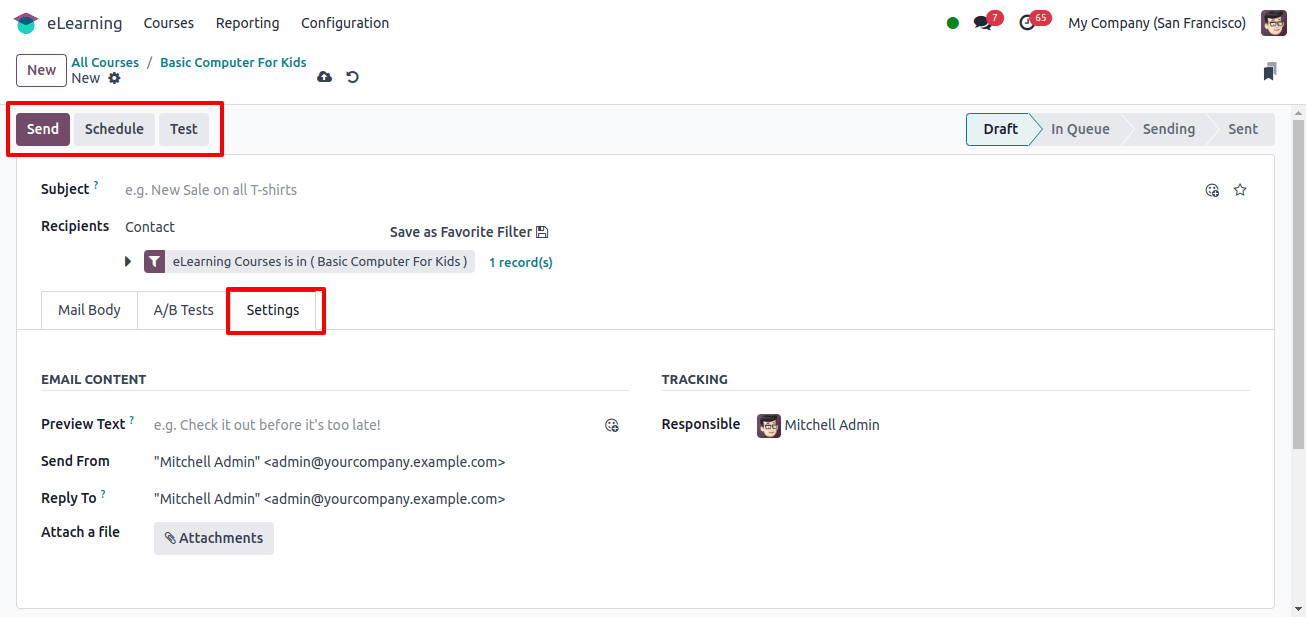
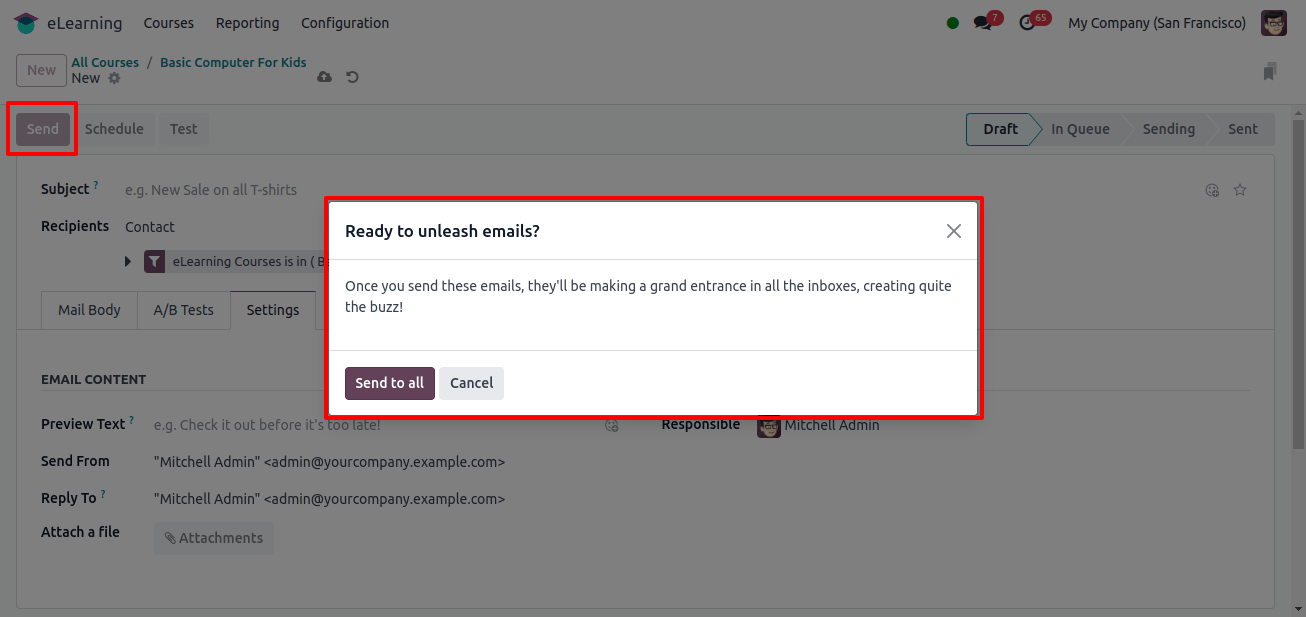
After storing the information, you can send or schedule invitation emails using the ‘Send’ and ‘Schedule’ buttons, or simply test the procedure by clicking the ‘Test’ button.
After seeking confirmation, a confirmation pop-up appears, and we can simply click the ‘Send to all’ button to send the emails.
After sending the emails you will see a course invitation form with several smart buttons, as seen below.
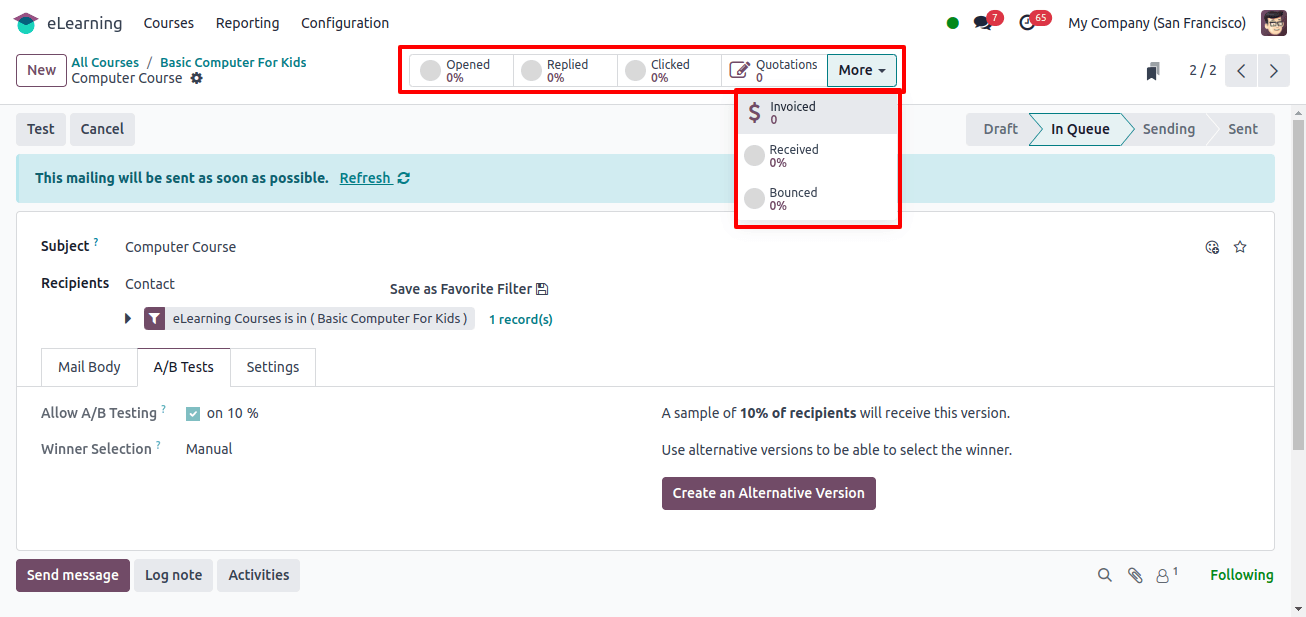
The smart button area allows you to view individual email-related behaviors. We can see the number of opened emails, clicked emails, percentage of replies, lead quotes, invoiced, percentage of received applications, and bounced.
Our new course has been built, and invitation emails have been sent to attendees. As demonstrated below, the ‘Courses’ dashboard allows us to view course details.
Publishing the Course
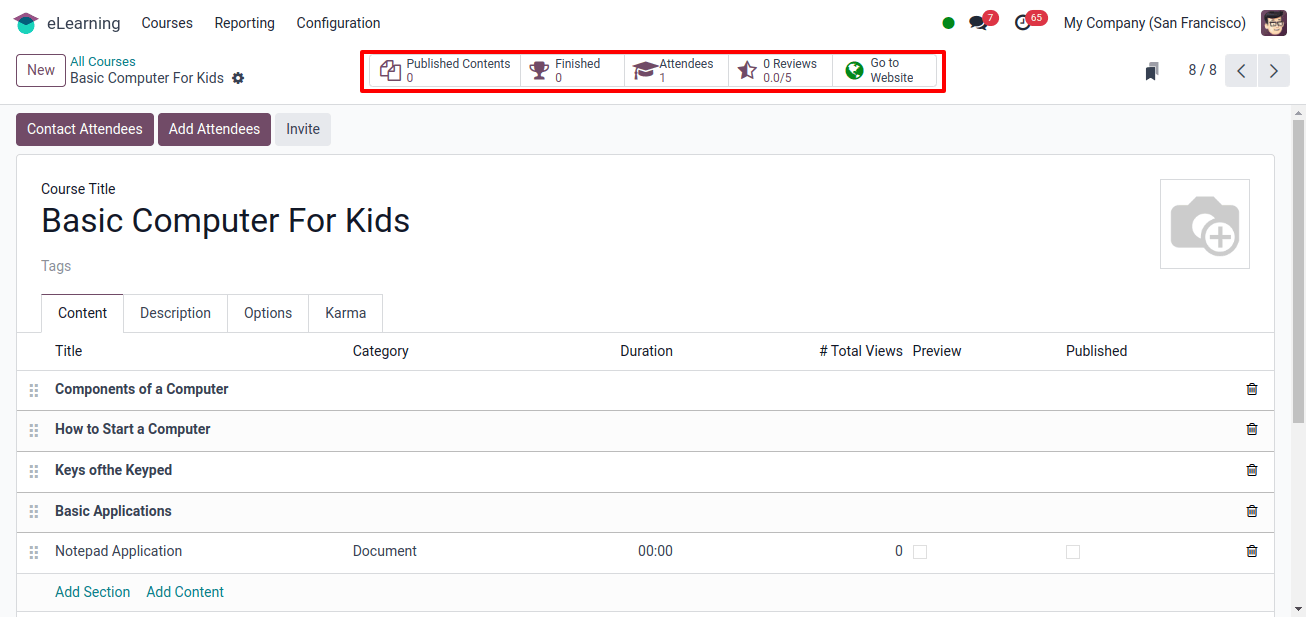
To publish the course, click the Go to Website button located at the top of the main course setting page, as shown below.
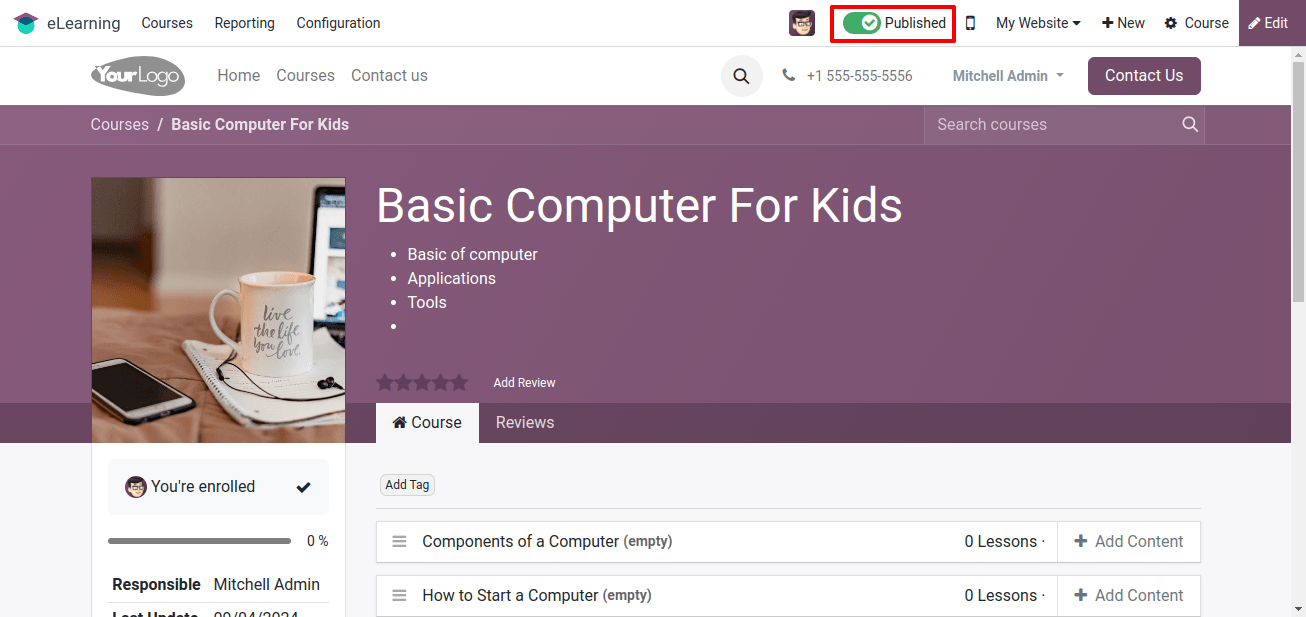
When you reach the course's website interface, simply click the Publish/Unpublish button to publish the course. This will activate the green-colored Published button, as illustrated below.
Setting Payments for a Course
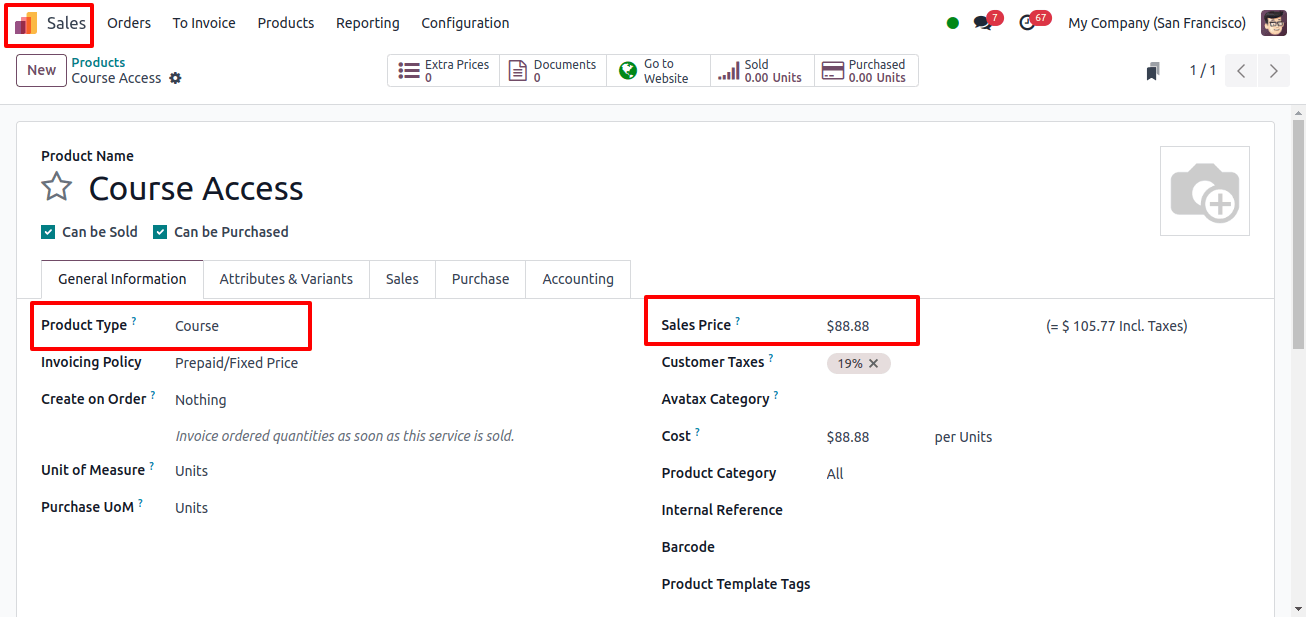
To set up course payments, we must first create the course with the payment amount as a product in the Odoo product catalog, with the ‘Product Type’ set to ‘Course.’ This can be done using the Odoo Sales Module, as shown below.
Next, the ‘Options’ tab area of the e-Learning Module allows users to specify enrollment policies and related products, as well as set payments and enrollment policies for courses.
Users can manage sales-related activities and set prices by configuring product data.
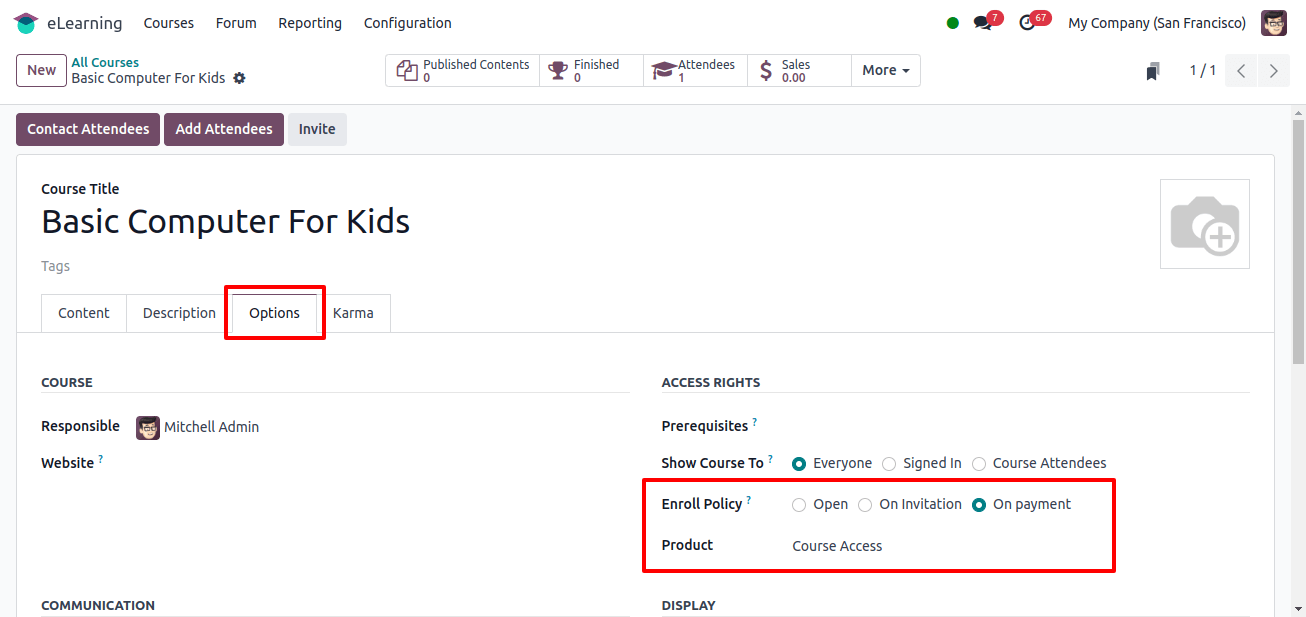
Once configured, participants can enroll in courses by visiting the course webpage, where they can pay the enrollment fee and complete the course enrollment process.
Attendees earn certification after completing courses, which are based on their successful completion of course goals.
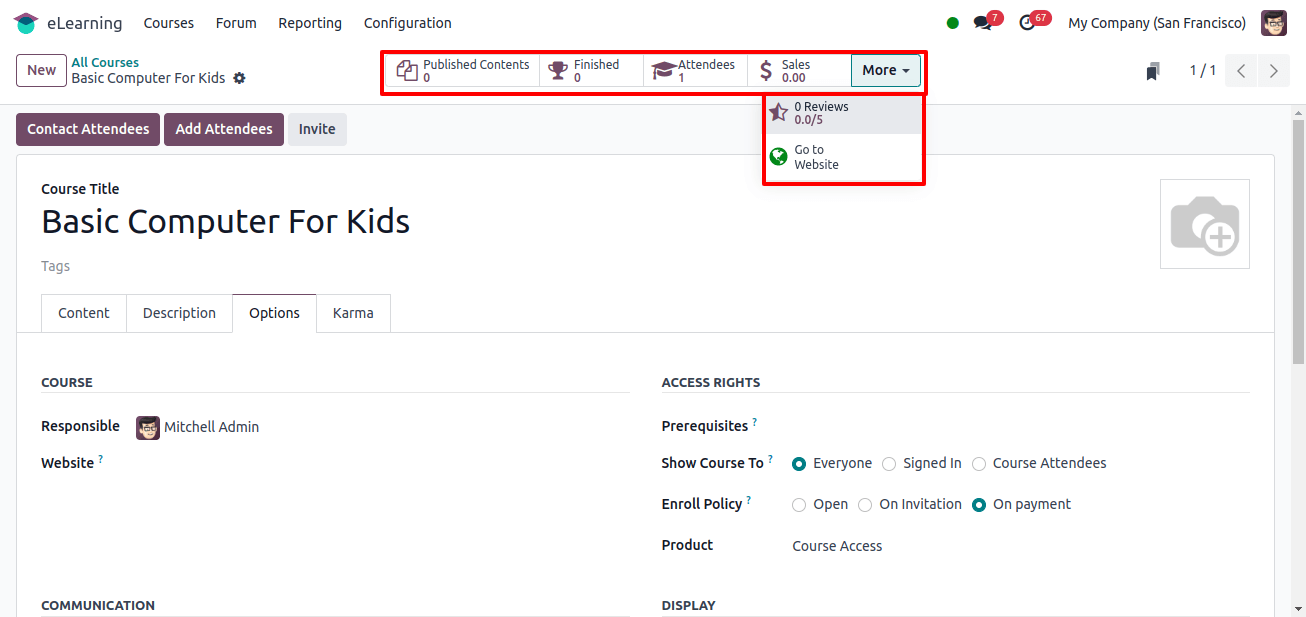
We may use the smart button field to view the amount of published contents, finished, attendees, and reviews, as well as access the course’s online interface using the Go To online button.
Odoo 17 streamlines e-Learning course configuration by including capabilities including course development, content management, and user tracking. Its features, such as quizzes, certificates, and progress tracking, improve learning outcomes.
Odoo 17’s flexibility and user-friendly interface make it an excellent alternative for businesses looking to improve their online training program.
